Tag: Indian recipes

Creamy Chickpea Curry

For decades, my secret weapon for a quick, delicious vegetarian meal has been chickpea curry. It’s perfect when I’m short on time but craving something hearty and flavorful.

Chickpea curry comes together with just a handful of basic spices and a splash of whipping cream for a luxuriously creamy texture, making it absolutely perfect to enjoy with fresh bread. You can either cook the chickpeas yourself or pick up a jar of ready-cooked chickpeas which can be ordered on amazon (known as Kichererbsen in German) or bought from the bigger supermarkets.

I always keep a stash of uncooked chickpeas ready to go. When I’m planning meals for the week, I soak them for a few hours and then use my amazing mini pressure cooker (available on amazon) to have them perfectly cooked in under 10 minutes.

Cooking Chickpeas

How to cook Chickpeas?

  1. Rinse and Soak:
    • In a large bowl, rinse the chickpeas in cold water.
    • Cover them with plenty of water. Ensure the water level is about 2-3 inches above the chickpeas as they will expand.
    • Soak for at least 8 hours or overnight
    • For quick method: bring chickpeas and water to a boil for 1-2 minutes. Remove from heat, and let it sit for 1 hour.
  2. Drain:
    • Drain the soaked chickpeas
  3. Cook:
    • Place the chickpeas in a large pot or a pressure cooker.
    • Add water until it’s 2 inches above the level of chickpeas. Also, add 1 teaspoon of salt.
    • Cover the pressure cooker with the lid and pressure regulator.
    • Cook on high until you hear 3 whistling sounds.
    • Turn off the heat and set aside the pressure cooker until all the pressure has dissipated on its own.
    • If using a pot: Once boiling reduce heat to low, cover the pot and let the chickpeas simmer for about 1 hour, or until tender. Check them periodically and add more water if needed to keep the chickpeas submerged.
  4. Check for Doneness:
    • Taste for tenderness. They should be soft but not mushy. IF they are not done, continue simmering for 10-15 minutes.

Tips:

  • Storage:
    • After cooking, chickpeas can be refrigerated for up to 5 days or frozen for up to 3 months.

For more vegetarian recipes

Paneer Dry with Nando’s Sauce

Beetroot Veg Puffs

Baingan Barta – Eggplant recipe

Tomato Rice – Aromatic Rice

chickpea recipe

Creamy Chickpea Curry

Sherryl Andria
Discover the rich and creamy chickpea curry, infused with whipped cream, tender chickpeas with a touch of spice. A must-try for quick, delicious meals on busy days.
Prep Time 10 minutes
Cook Time 20 minutes
Soaking Time 8 hours
Total Time 30 minutes
Course Dinner, Lunch, Main Course, Side Dish
Cuisine Indian, south-indian
Servings 4
Calories 1063 kcal

Equipment

  • 1 Pressure cooker optional

Ingredients
  

  • 1 cup chickpeas or cooked chickpeas
  • 2 tbsp Olive Oil
  • 1 medium onion thinly diced
  • 3 cloves garlic minced
  • 1 tsp garam masala
  • 1 tsp turmeric powder
  • 1 tsp coriander powder
  • 1 tsp chili powder as required
  • 1 tsp vegetable powder optional
  • 100 ml tomato paste or 2 large fresh tomatoes, chopped
  • 2 tbsp lime
  • salt as per taste
  • 150 ml whipping cream / Schlag sahne (as required)
  • 2 tbsp light soya sauce
  • 1 tsp brown sugar /maple syrup
  • Fresh coriander for garnish

Instructions
 

  • Heat the 2 tbsp olive oil in a large pan over medium hear
  • Add the onions and saute until they are golden brown.
  • Add minced garlic and saute for a minute.

Add Spices

  • Add 1 tsp of garam masala, turmeric, coriander, chili powder and vegetable powder (if available) to the pan.
  • Stir well to combine and cook for 1-2 minutes, allowing the spices to release their flavors.

Add Tomato paste

  • Add the tomato paste and 2 tbsp lime juice for a touch of acidity. Stir and mix together.
  • If using fresh tomatoes, add it to the pan and cook for 5 minutes till they break down.
  • Pour in whipping cream and stir well.

Add Chickpeas

  • Add the cooked chickpeas to the pan and stir in to coat with the spice mixture.
  • Pour in soya sauce. Add sugar or maple syrup and salt to taste.
  • Bring the curry to a gentle simmer and let it cook till it comes to a boil. Stir occasionally.
  • Garnish the chickpea curry with fresh coriander.
  • Serve hot with your favorite flatbread, rice or naan.

Video

Keyword 30-Minute, Healthy, Quick, Vegetarian, Winter Recipe

Read More

Baingan Barta – Eggplant Recipe


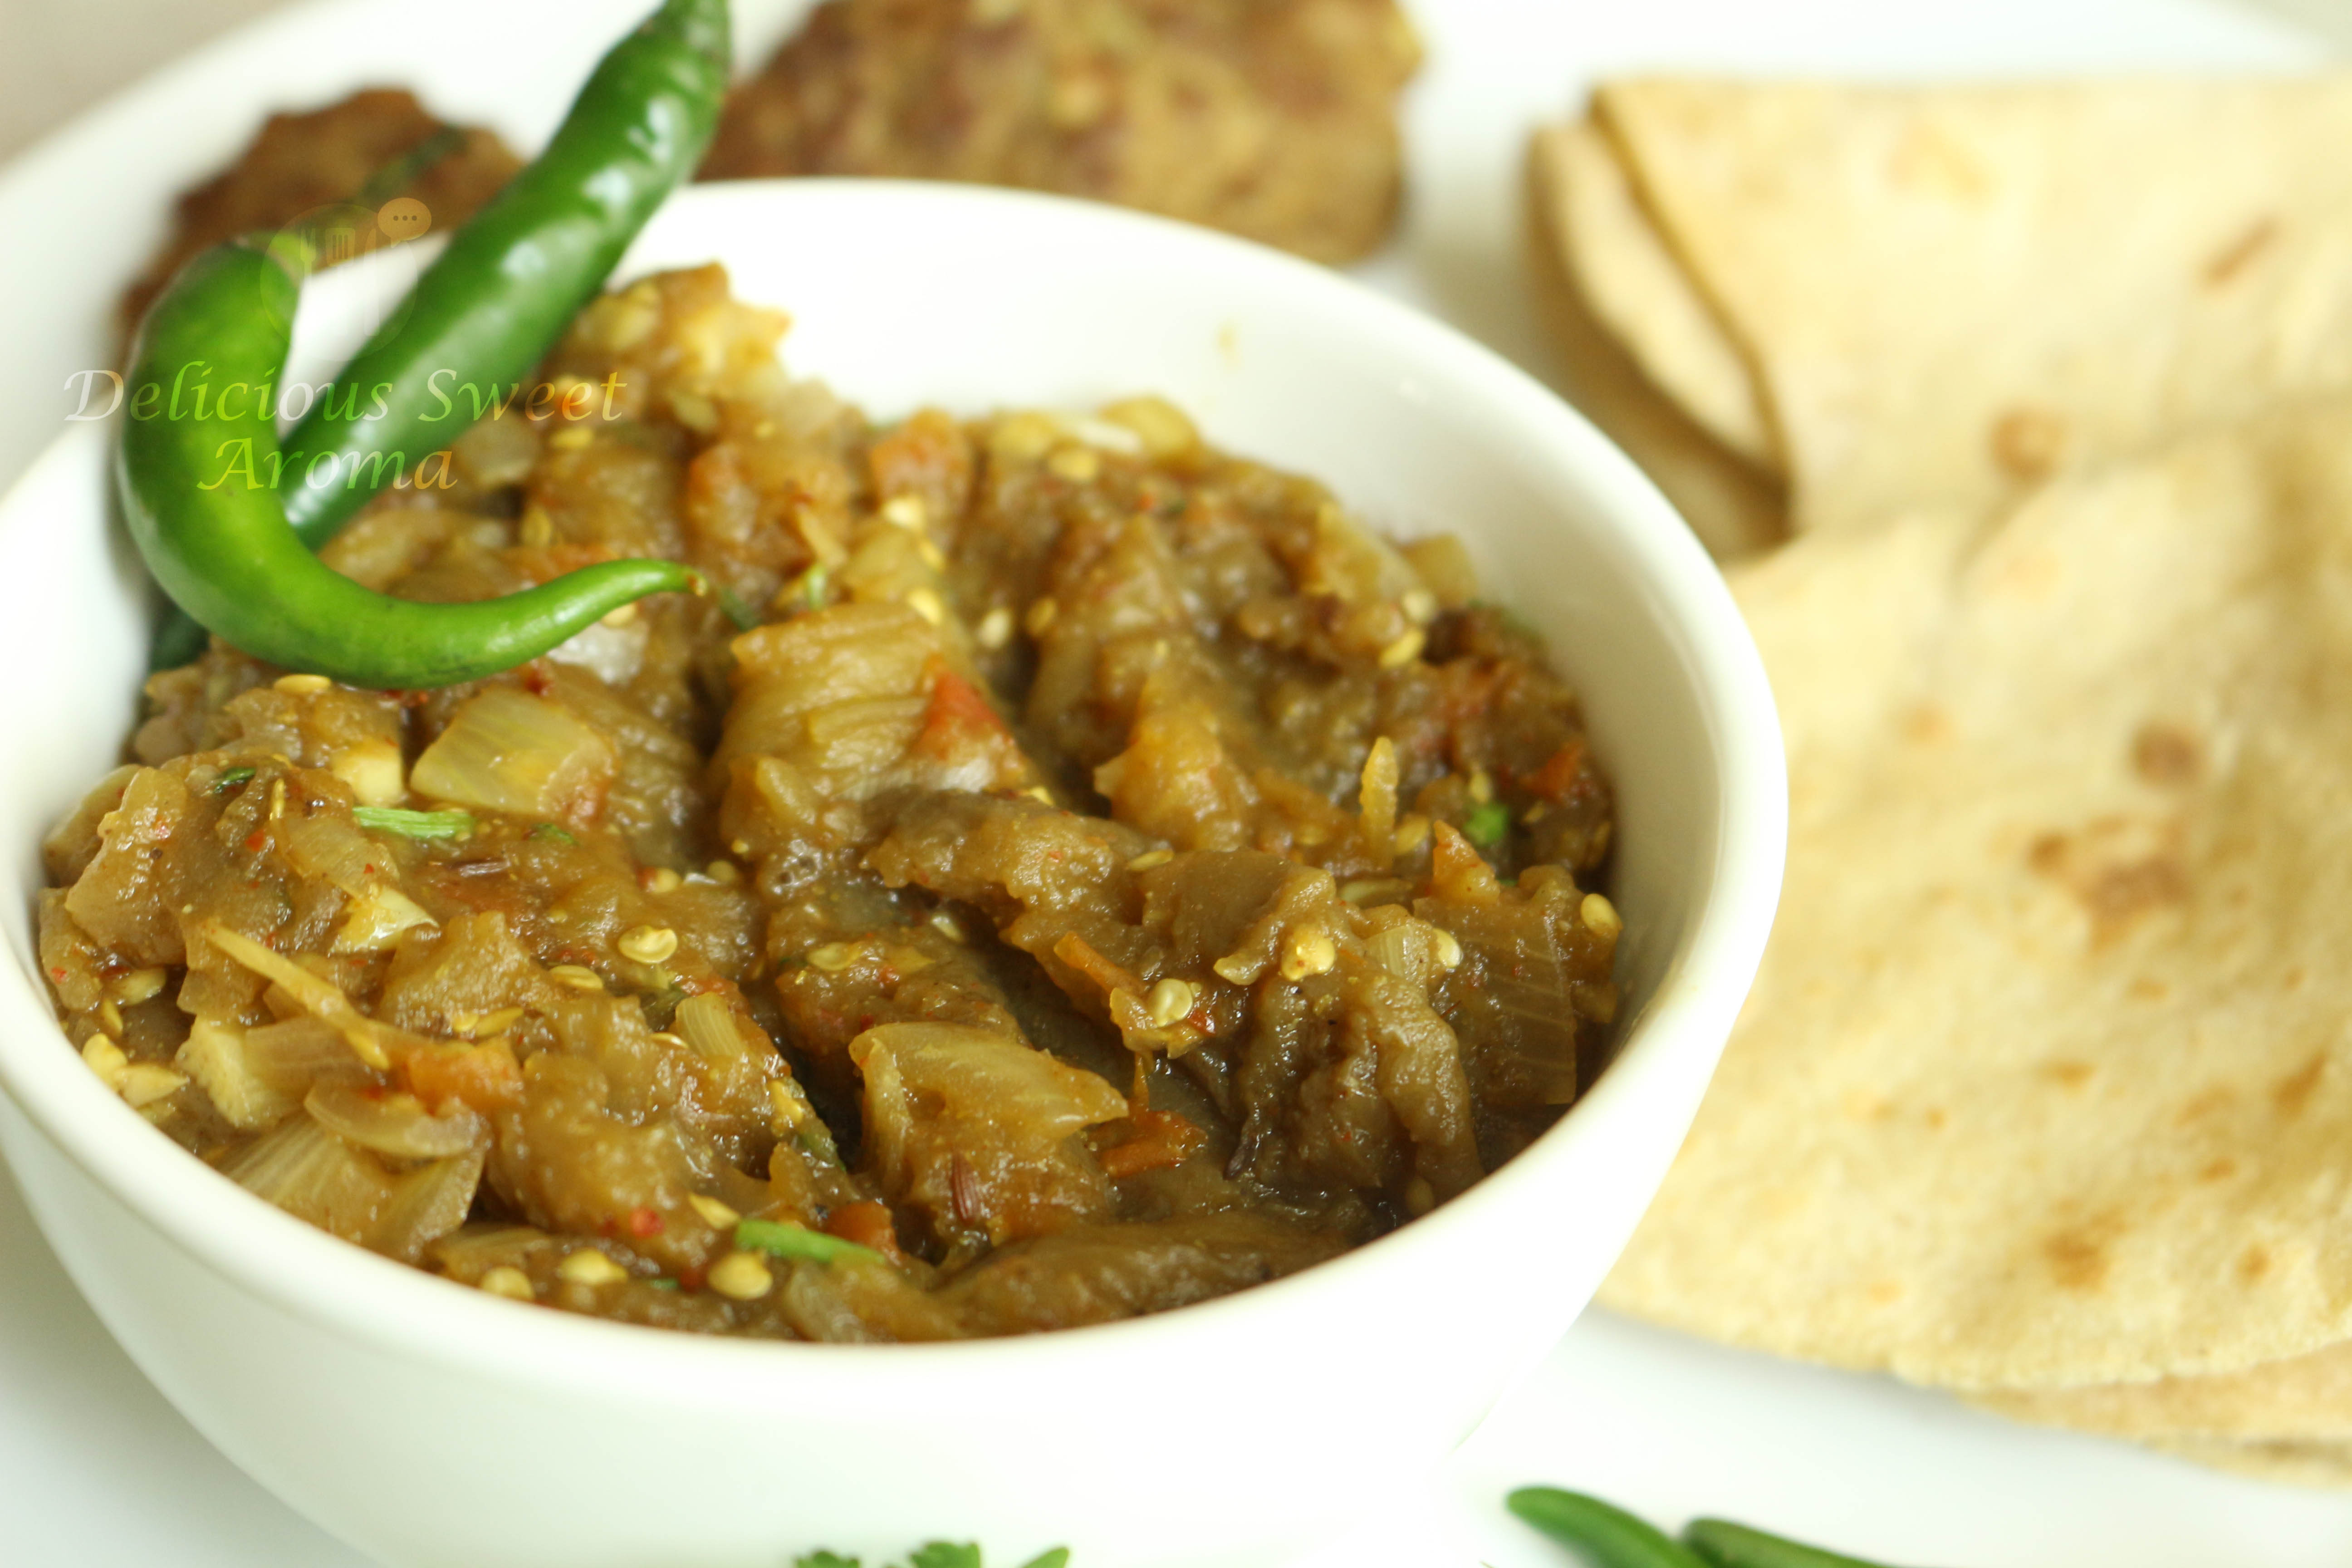
Baigan (eggplant/aubergine/brinjal) Barta is named in Hindi language is Punjabi origin. In this recipe I have baked the aubergines to get a soft, tender pulp. They are peeled and mashed which is then mixed with onions and very few basic Indian spices. Traditionaly served with Indian Roti (bread).

Another fantastic way to use roasted Aubergines is preparing a Mediterranean dip called Baba Ganoush served with Middle Eastern flatbread. I have put up this recipe on my Facebook page if it interests you.

Preparation time: 5 minutes

Cooking time: 25 minutes + grilling

Serves: 4

Ingredients

Egg plant or Aubergine – 500 g, usually 2 (*see notes)

Olive oil – 1 tbsp

Garlic cloves – 5, finely chopped

Cumin seeds – 1 tsp

Onions – 1 large, chopped

Tomato – 1 large, chopped

Red chilli powder – 1 tsp

Coriander powder – 2 tbsp

Cumin powder – 1 tsp

Garam masala powder – 1/2 tbsp

Coriander leaves for garnish, small bunch

Salt as required

Directions

1. Preheat the oven at 200 degrees Celsius. Poke the aubergines (it wouldn’t make much of a difference without poking) with a fork all over and place them driectly on a low oven rack.

Egg plant

Roast it in convection mode for 35 to 50 minutes turning them frequently until they turn wrinkled and soft.

2. Use tongs to remove them from the oven. If you have the time let them cool completely. Peel, discard the skin and mash the flesh with a large spoon or you can cut them in half to scoop out the flesh.

How to use Aubergine/Baigan/Brinjal Flesh | Smoked or Grilled Eggplant

Set aside.

3. Meantime, prepare the rest of the ingredients.

4. Heat a deep-bottomed medium container with olive oil or ghee. Add cumin seeds, fry them for a minute. Then add onions and garlic. Fry until the onions turn translucent.

Cumin onion garlic

5. Add chopped tomatoes along with the rest of the spice powders such as red chili, cumin and garam masala powders. Mix and cook with some salt until soft.

Basic ingredients for Brinjal Recipe | Baingan Barta

6. Add Aubergine mash and cook for 7 -10 minutes on medium-low heat. Add more salt if needed. Garnish with coriander leaves.

Mashed Eggplant | Eggplant Recipe | Baingan Barta

Serve them with french loaf, chapathi, roti of your liking. It is quiet filling as I had mine with Indian chapathis and Beef Cutlet. See notes on how you can make use of roasted aubergines other ways.

Eggplant or Aubergine Recipe | Vegetarian | Delicious Baingan Barta


Baingan Barta Recipe| How to make Easy Vegetarian Recipes


Notes:

* Baking time for aubergines sometimes depends on the size of the eggplant.

*Peeled and roasted eggplant can be stored in airtight container in the fridge for 3-4 days. They also taste great for dips by drizzling some olive oil, salt, pepper and some coriander powder.

*One could also grill the eggplant on fire directly until the skin blackens or chars and the flesh softens which is also another best way to roast it.


Stay Healthy!

Read More

Paneer Dry with Nando’s Sauce

This is a recipe which I prepare quiet often when I am on the hustle and one of the easiest recipes to side with anything. Now, that is one good reason why I couldn’t post this recipe earlier. However, this time with my husbands help in clicking pictures I could post this recipe today.

For a thick gravy follow through my previous post on Paneer Butter Masala recipe. You can also find us on Facebook at Delicious Sweet Aroma page.


Preparation time: 5 minutes

Cooking time: 20 minutes

Serves – 2

Ingredients

Paneer / Indian cottage cheese – 240 g

Garlic cloves – 2, finely chopped

Onion – 1 medium, roughly chopped

Vinegar – 1 tbsp

Tomato ketchup – 2 tbsp


Nando’s Peri -Peri sauce (mild) – 3 tbsp, depending on spice level

Oyster sauce – 1 tbsp

Soya sauce – 2 tbsp

Sesame sauce – 2 tsp

Green chilies –  1 small

Bell Peppers / Paprika ( red preferably) – 1, chopped with seeds removed 

Pepper powder – 1/2 tsp

Salt


Directions

1. Heat a saucepan with oil on medium-high. Once hot add chopped garlic and fry for a minute until the raw smell goes away. Add chopped onions and fry till they turn translucent.

Add tomato ketchup.

Garlic onions

2. Add the sauces of Nando’s peri-peri, oyster sauce, chilli powder, coriander powder and vinegar. Mix and combine well.

Sauces

3. Add soya sauce, sesame oil and toss in the paneer cubes with salt. Mix to coat it with the mixture. Do not over mix.

Cover and cook for 4 – 6 minutes on medium until paneer is cooked.

paneer & sauce

4. Lastly, add the green chilies and chopped paprika. I didn’t have the red paprika that day which I usually prefer adding to this dish for a intense flavor so I used green pepper.

Mix and let it cook for another 2 minutes.


Serve as sides with bread or rice.


Stay Healthy!


Read More

Vermicelli Pudding or Kheer


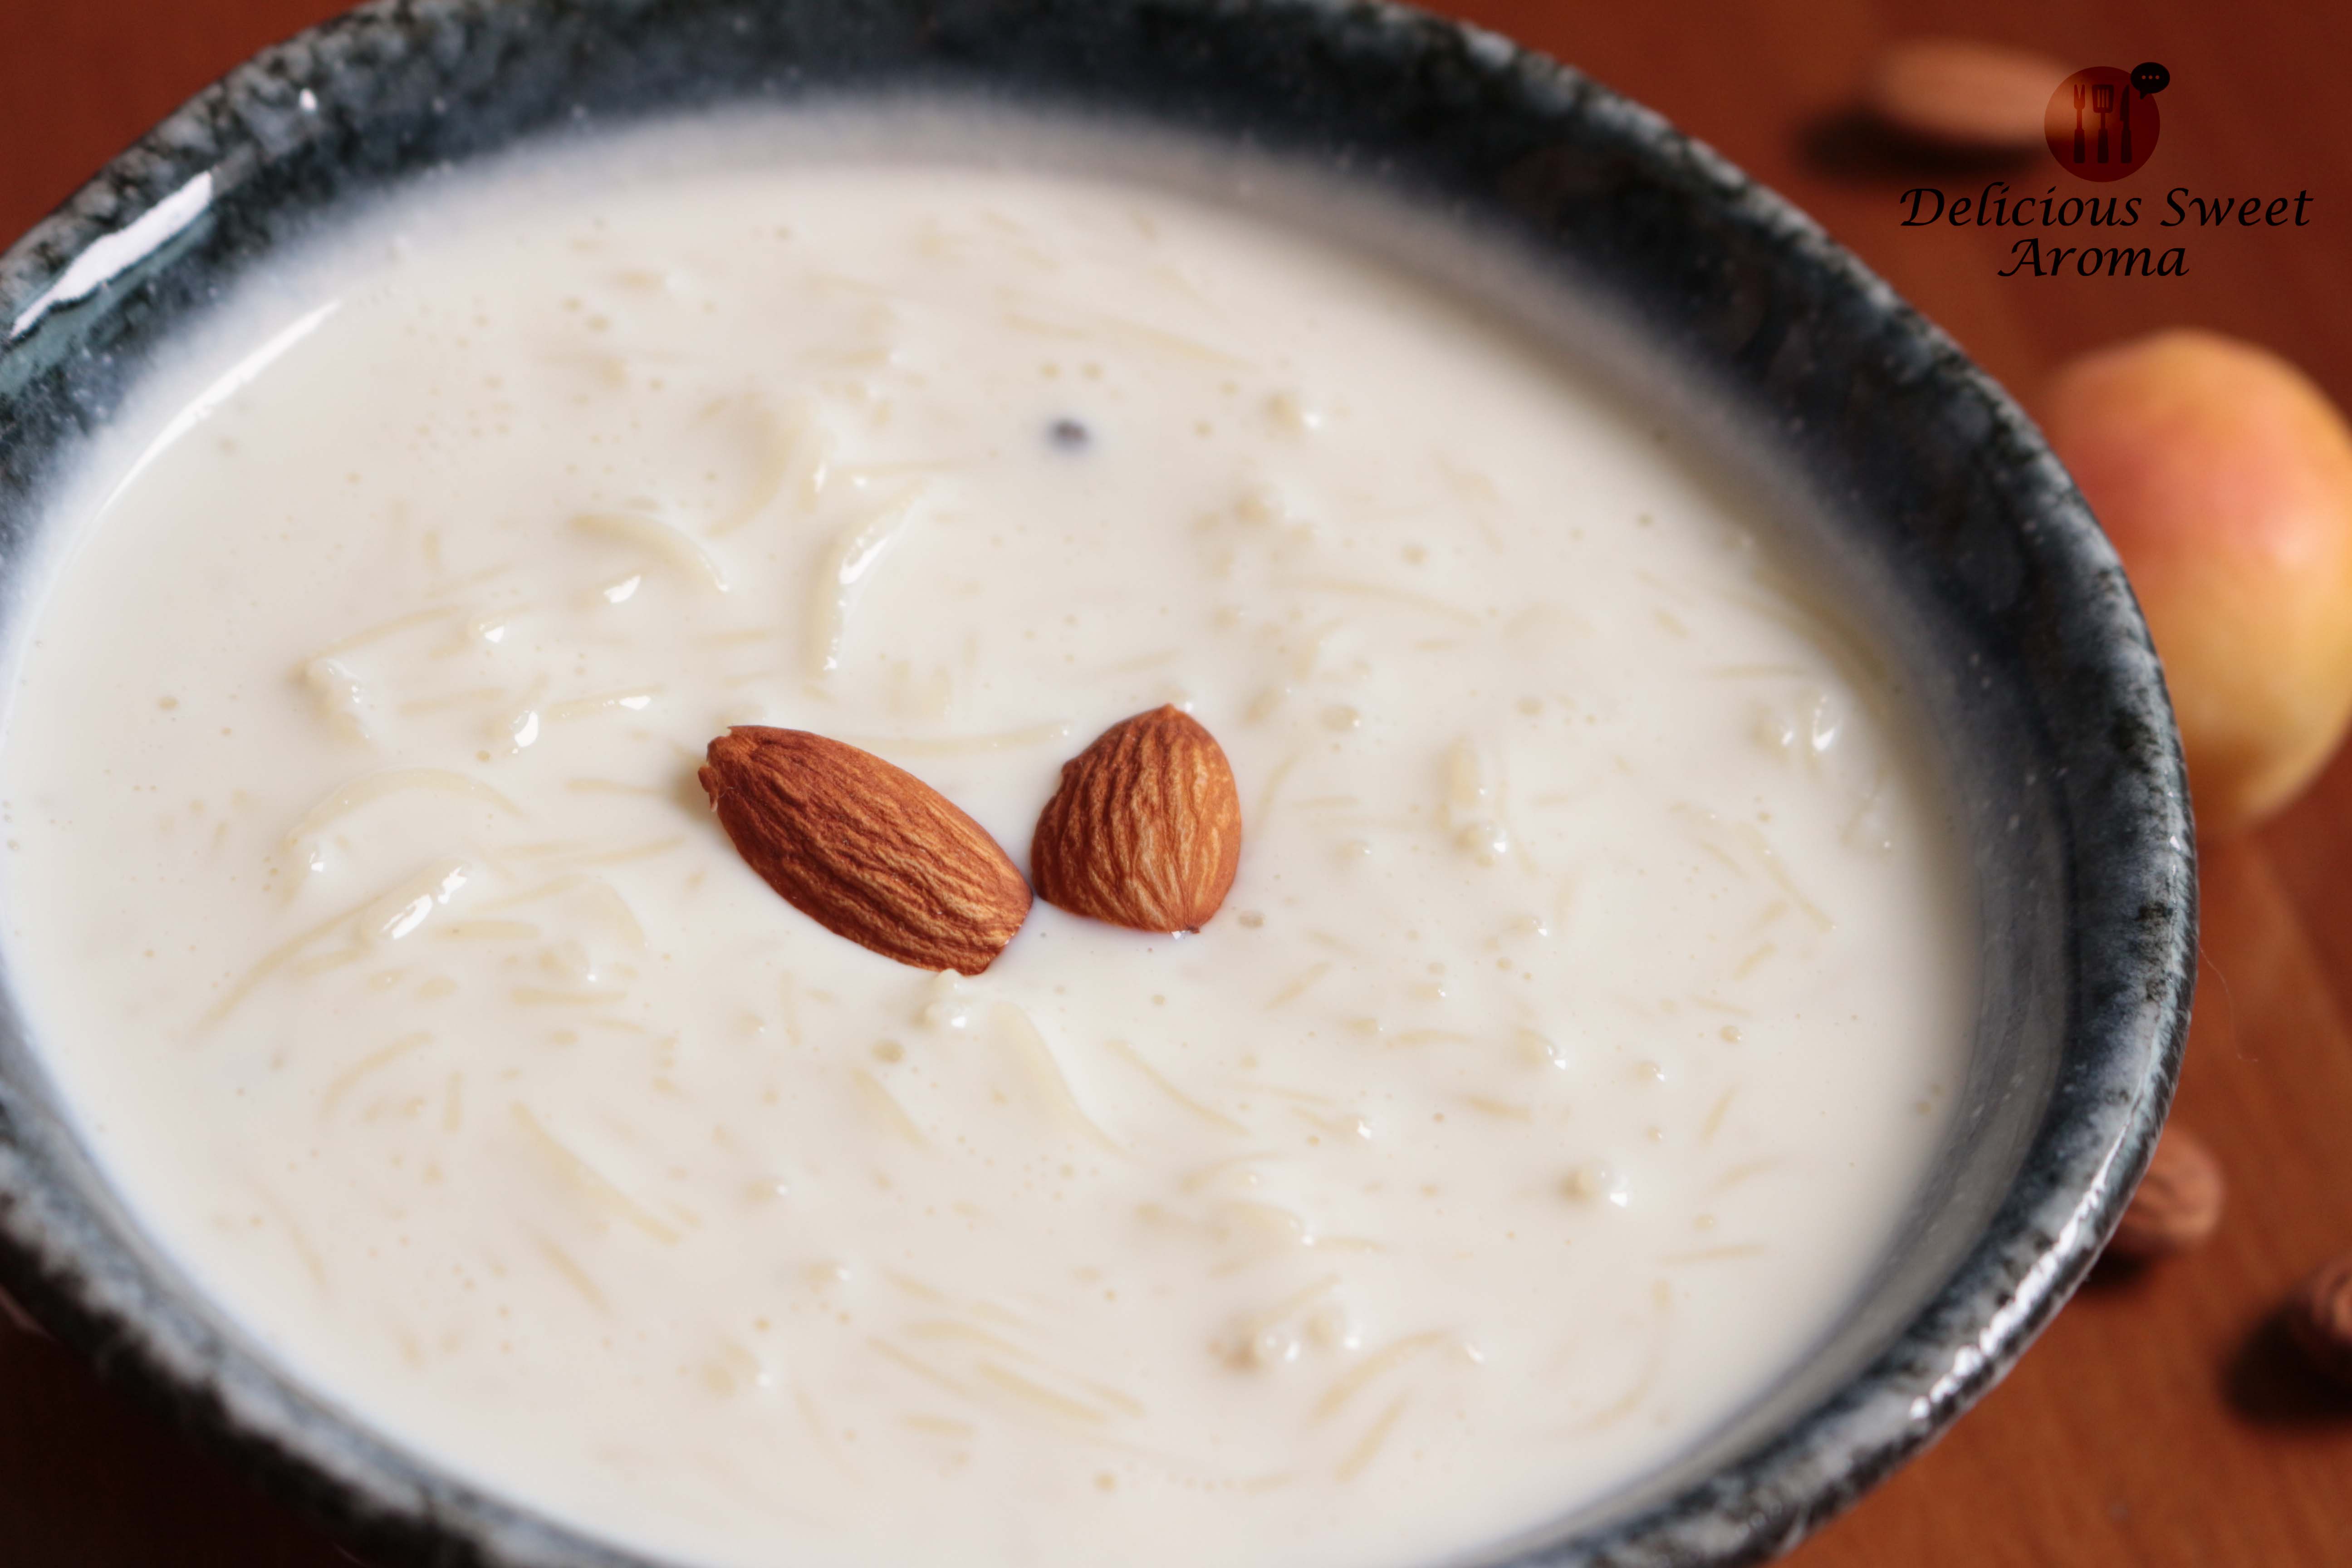
Kheer is a term used for milk pudding. In some region of India they call it payasam.

This simple recipe is prepared mainly with Vermicelli and a handful of other ingredients for a lighter dessert. You can also replace vermicelli with rice, sago, tapioca pearls etc. For flavor, cardamom (MUST!), cashews, raisins, almonds etc are used. Sometimes some recipes use condensed milk for a rich flavor. I prefer less sweet dessert with minimal sugar to give mild sweetness and is best suited after having a heavy meal.

The process of slow cooking of milk along with the vermicelli  gives it a thick texture which comes out fabulous in 15-minutes time.


Preparation time: 2 minutes

Cooking time: 15 minutes

Serves: 4


Ingredients

Milk (pasteurised) – 2 1/2 cups

Wheat Vermicelli plain – 1/2 cup (*see notes)

Vermicelli plain pack | RiceKheer recipe| Delicious Sweet Aroma

Granulated Sugar – 4 tbsp, (less sweet) depending on sweetness

Cardamom – 1, powdered or whole seeds

Cloves – 2 (optional)

pinch of salt


Directions

1. Take a deep-bottomed container with milk (if its not boiled then get it to a boil) on medium heat. Add vermicelli, cardamom, cloves if using, sugar and salt.

Vermicelli plain | Kheer or Vermicelli pudding recipe

Kheer Ingredients | Easy | Delicious Sweet Aroma

2. Using a wooden spoon give it an occasional stir so the milk does not stick to the bottom. As it thickens keep stirring. This takes up-to 15 minutes or less. Turn off heat and remove from stove top.

Vermicelli Kheer or pudding | Easy dessert | Delicious Sweet Aroma

If it becomes too thick add more milk at the end depending on how much thick you love to have.

3. Serve hot. You can drink it or have it like a dessert.

Kheer or Vermicelli pudding | Easy dessert in 15-minutes

Once cooled, store it in the fridge covered.


Cook’s tip:

Heat it and serve. You can store it for 3 days in the fridge.


Notes:

*Add nuts of choice such as raisins, cashews etc. They were out of stock so I prepared it without them and still tasted lovely.

*Can also use Rice Vermicelli if this one is not available. I prefer the non-roasted one as I like it white and not brown.


More dessert recipes click below 👇:

Caramel Orange Pudding

Layered Jelly & Custard Dessert


Stay Healthy! ☺

Read More

Flower Crab – Curry (Mangalorean Recipe)

I have been wanting to make these crabs for so long but always had something else planned for the weekend. I have never cooked crabs nor had the slightest idea what should be done if the crab is alive, neither did my husband. I told my husband: “My job is to cook the crab yours is to kill it” (fair enough right? 😜). So, on Sunday we finally managed to wake up a bit early with excitement to get fresh crabs from the wet market near us. Hoping they were still available at the market we happily found them at one of the stalls I intended to buy from. I was expecting the crabs to be alive but they were slightly cold when touched, mostly frozen when transported from the port I believe, tied with rubber bands not moving. Husband: “My job is done!” with a grin. We let the person at the stall pick the crabs for us as he was better at picking the fresh ones, 4 huge crabs for 22$.

The process of cleaning crabs takes less than 15 mins for 4 crabs. Prepare a curry paste and let the crabs cook in the spice paste for 20 minutes. You must definitely give it a try by referring to pictures below 👏. Happy cooking!

IMG_8198

Preparation time: 20 minutes

Cooking time: 20-25 minutes

Ingredients

Flower crabs 🦀 – 1.5 kg, 4 large size

Olive oil – 2 tbsp

Curry paste:

Grated coconut – 150 g / 1 1/2 cup

Red dry Kashmir chili – 6, medium long

Coriander seeds – 1 tbsp

Garlic cloves – 3

Cumin / Jeera seeds – 3/4 tsp

Mustard seeds – 1/4 tsp

Black peppercorns – 8 

Turmeric powder – 1/4 tsp

Medium Onion – 1/2, roughly chopped

Tamarind – tennis ball size, soaked in water 

IMG_8203


Directions

>> How to clean Flower Crabs? It’s easy!


1. Turn the crab upside down. Lift the flap and discard.

IMG_8207

2. Grab the bottom end in one hand and the upper end in the other. Lift the upper end of the shell and discard. Use a spoon to scoop out the soft roe (mostly in brown) out of them.

IMG_8209

3. Remove the gills (spongy brown stuff) on both sides of the crab. I didn’t know those were gills until after I cooked them and realized they were inedible.

Gills_IMG_8198

4. Using kitchen scissors ✂ cut the walking legs (with hair) and discard.

Crab legs

5. Remove the entire claw of each crab (to make space in the cooking pot).

IMG_8211

6. In the end give it a through rinse to remove all the inedible stuff. If your container doesn’t hold the crab body, cut them into halves.

The crab is all ready to be cooked now.


1. Prepare the curry paste by adding all the ingredients in a blender. Grind to a smooth paste with water.

2. Heat oil in a wide deep-bottomed container. Add the curry paste and 1.5 cups of water for consistency along with 1 tsp of salt.

IMG_8218

3. Add the crabs to coat with the paste enough to stick to the crabs. Cover and cook on medium-high heat for 20 minutes.

IMG_8219


In 20 minutes they are done! It reminded me of mom making this for us when we were kids.

IMG_8224

We served them in separate plates with a bowl of rice 🍚. Used our hands and teeth (or crab Cracker) to bite and suck the juices. They tasted delicious and flavorful 😋😍. When they are hot juices ooz out as you break them apart and the flesh can easily be sucked out.

IMG_8229


Even if you have never tried cooking crabs. This is still the BEST recipe for a beginner. I hope you enjoyed reading though the fun process of how to clean and cook a crab in this post.


Cook’s tip:

*For left over crabs store it in an airtight container in the freezer. Since seafood tends to go bad soon it’s best not to store it in the fridge.


Stay Healthy!


Read More

Soup of Mutton Bone-Marrow

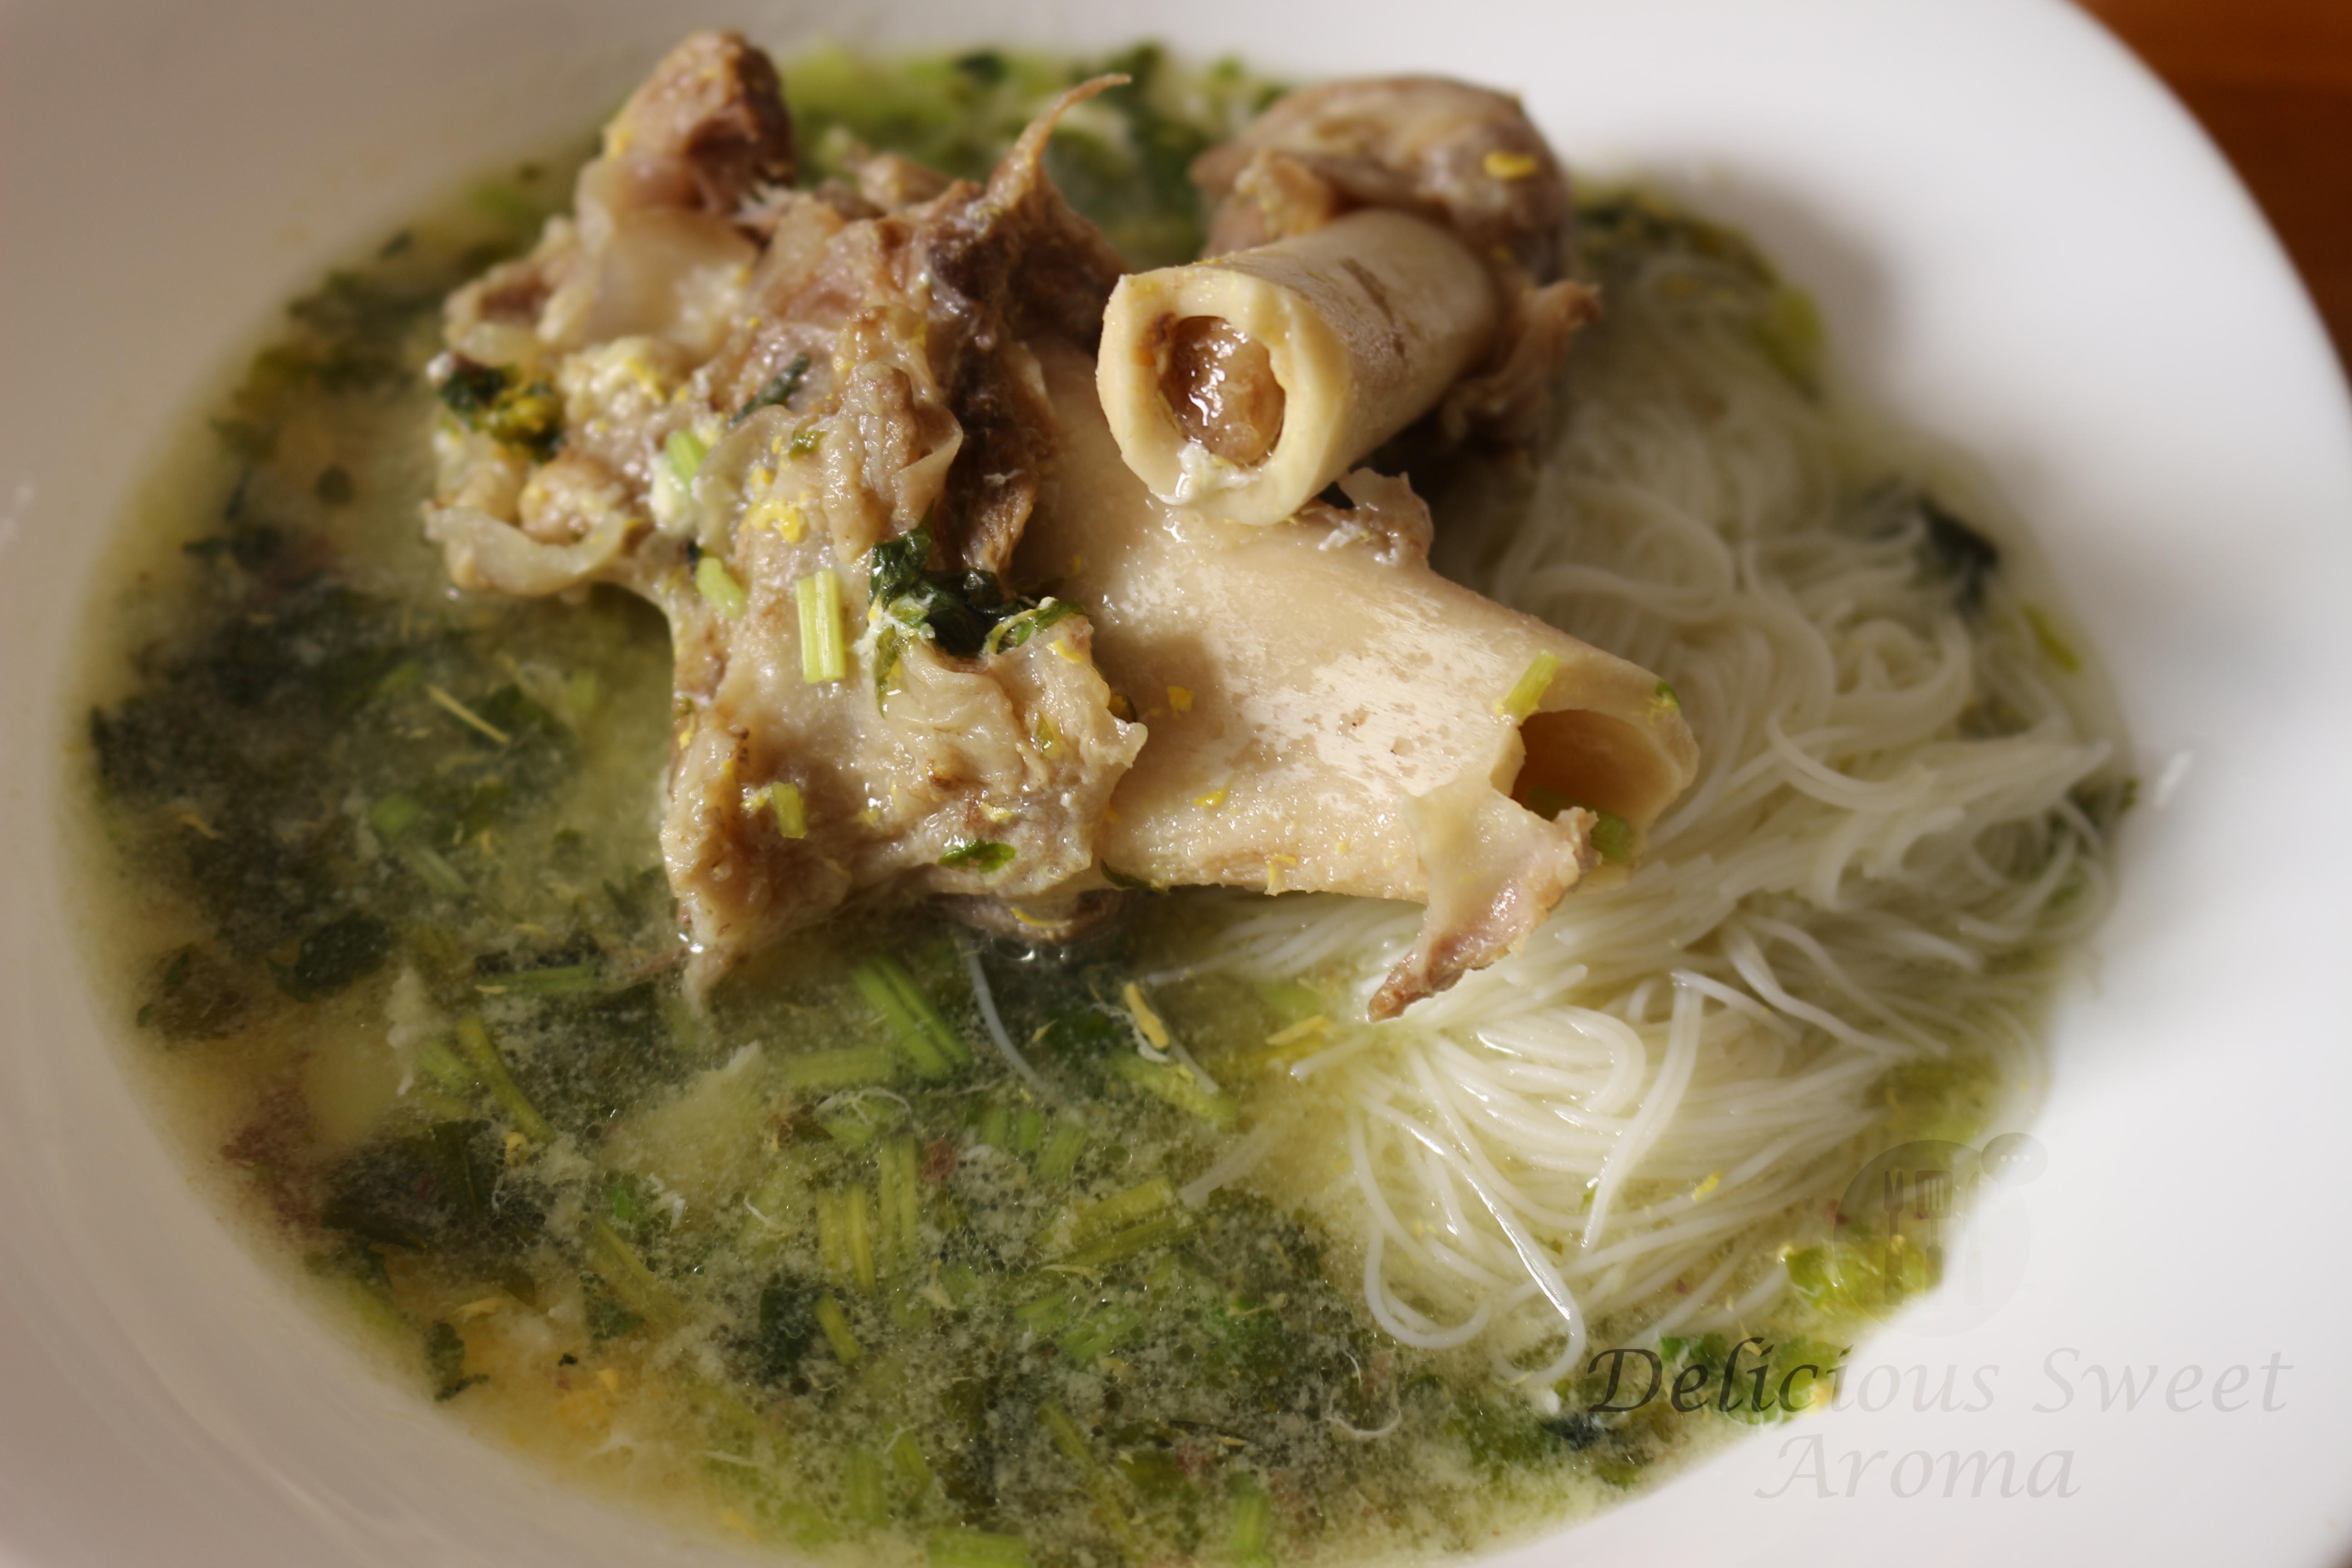
Bone-Marrow is considered a delicacy in many countries with India being one of them.

We in Mangalore prepare variety of mutton dishes with bone marrow in them. Not everyone accepts the taste of the bone marrow flesh but, I suggest you taste it once. Eating with hands is the best way to enjoy the bone marrow. Taste it and drop by again until my next post. Would loved to hear back if you’re still reading. Ciao!!

Preparation time: 5 minutes

Cooking time: 45 minutes

Serves: 2

Required appliance: Pressure cooker (Mine is a Prestige hard-anodized which comes with a insertable pressure regulator on the lid.

Ingredients

Bone marrow (frozen or fresh) – 5 or more chopped, with flesh

Celery leaves or 2 stalks – 1/2 cup, chopped

Egg – 1

Corn flour (optional) – 1 tbsp

Salt as required

Water – 3 cups

Rice vermicelli noodles/Egg noodles – for 2 servings

Directions

1. Into a large pressure cooker, place the mutton bones along with 2.5 cups of water. Add 1/4 tsp salt. Close the lid and Insert the pressure regulator (Check instructions on how to use a pressure cooker for the type you own). Set the heat high.

Since mine comes with an insertable pressure regulator. Take 6 – 7 whistles. This must take approximately 25 – 30 minutes. Turn off heat and let the steam escape on it own.

Cooked soup of Mutton

2. Remove lid, placing it on heat add celery. If you’re using corn flour take some of the liquid from the soup into a glass with some cold water, add flour, mix. Add this to the soup (adding corn flour directly into very hot liquid will form lumps).

Celery, a good add on to soups | Delicious

3. After a boil. Lightly whisk the egg with a fork and immediately stir until it gets mixed into the soup. Add salt and pepper powder. Turn off heat.

Cook the rice noodles as per instructions on the package in a separate container. Strain and serve it over the soup.

Rice Vermicelli for soup

Done! And, it’s that easy 🙂

Soup of Mutton | Delicious Sweet Aroma

Enjoy the flavored bone flesh with hot soup.

Soup of Mutton | Delicious Sweet Aroma


EDIT 1:

When I prepare with Celery stalks.

with celery stalk

Mutton soup with celery stalk


If you have any questions please feel free by commenting below 👋 🌹

Stay Healthy!


Read More

Goli Baje Recipe

Hubby loves Goli baje’s, sounds funny, haha..Well, I came to know more of his tastes after getting married to him. And I love making them occasionally.

Goli baje (in Tulu, Indian cuisine) is a deep-fried tea-time snack popular in Mangalore-Udupi region. It is also known as Mangalore bajji or Mangalore bonda. Yes, my posts are often from Mangalore, being a Mangalorean myself they are served locally in restaurants for breakfast or evening tea along with a dip called chutney made of Coconut, coriander or others. Goli Baje’s have a unique taste with a smooth exterior and a spongy interior that suits well during the monsoon season. After few trials and errors I learnt the precise measurements to obtain a good texture. The texture also depends on the fermentation time and thickness of batter before frying. I have provided the precise quantity of all ingredients. The coconut-coriander chutney was just a perfect dip to enjoy it.

Preparation time: 10 minutes, plus 2 hrs fermenting time

Cooking time : 20 minutes

Makes: 25 – 30


Ingredients

Vegetable oil for deep-frying

Plain Flour / Maida – 1 cup / 150 g

Gram flour/Chickpea flour/Besan – 4 tbsp / 25 g

Yogurt – 1/2 cup / 160 g (thick)

Water -1/2 cup

After fermentation:

Ginger paste / fresh ginger – 1 tsp, chopped

Cumin seeds – 1/2 tsp

Green chili – 1 tsp / 1 small, chopped

Grated coconut – 2 tbsp

Caster sugar – 1 tbsp

Salt – 1/4 tsp

Baking soda – 1/2 tsp

Coriander (optional) – 1 tbsp, chopped

Warm water – 4 tbsp


For Coriander Chutney / Coriander Sauce (A dip that goes well with Goli Baje)

Fresh coriander/ Cilantro/ Chinese parsley- 25 g to 40 g, washed and roots removed (depending on quantity required)

Fresh grated coconut – 1/2 cup or as required (also, depending on quantity)

Salt – 1/4 tsp

Fresh ginger – 1 inch thick, small

Green chili – 3 small

Seasoning:

Vegetable oil – 2 tbsp

Red dried chili – 1 (if available)

Mustard seeds – 1 tsp

Curry leaves – 1 medium strip, washed & dried using towel (can use frozen)

Water as required for thickness


Directions

1. In a large bowl, to the the sifted plain flour, add chickpea flour, yogurt. Mix. Then add 1/2 cup water until well combined with no lumps in the batter.

chickpea flour, gram flour, besan added to maida, plain flour

curd added to Goli baje


2. Cover and set aside the batter in a warm place at room temperature for minimum 1 1/2 – 2  hours (I kept it for precisely  2 hrs). Even if it’s a little longer the better.

Goli baje batter of gram flour, plain flour, yogurt & little water


3. After 2 hrs: Add ginger, cumin, green chili, coconut, sugar, salt, baking soda (you can add coriander now if your using). Mix and add water to form a thick batter until there are no lumps (not too runny). Set aside for 5 minutes.

cumin seeds, grated coconut, ginger paste, salt, green chili, sugar, baking soda

4. Heat a container with oil on medium-high. Drop a pinch of batter, if oil is hot enough it will form bubbles around the batter and sizzle.

browning on one side of Goli baje

5. Take tablespoon of the batter, scoop it in your fingers and drop it in small amount into the hot oil. Do not overcrowd. In a few seconds flip to brown on the other side. Fry in batches.

Goli baje, Mangalorean bonda, Indian

Once they have turned brown, drain them on paper towels using a stainless steel slotted spoon (reduce heat to low while removing to prevent over browning). Serve hot with fresh coriander chutney.

goli baje with coriander chutney


Coriander chutney: Preparation time – 7 mins to 10 mins

1. In a blender add coriander leaves, coconut, ginger, salt, green chili and a little water. Blend until smooth paste.

2. Heat oil in a small deep bottomed, stainless steel container on medium. Add mustard seeds, it’ll start splitting. 

Coriander chutney, mustard seeds sputter

3. As the mustard seeds sputter add red-dried-chili and curry leaves. Reduce heat and toss for 5 seconds. Make sure not to burn.

mustard seeds, red dried chili, curry leaves

4. Now, add the coriander paste from the blender. Mix and let it boil over low heat. Add water depending on your choice of consistency for thickness.

Coriander chutney for Goli baje

Goli Baje with coconut-coriander chutney

Storage of Chutney:

+Store in an airtight container in the fridge or can also be frozen. Must be used within 2-3 days if stored in the fridge.


Note:

*I haven’t used coriander in the Goli Baje batter.

*If you do not have coriander for the chutney, substitute it with additional coconut to prepare a coconut chutney.

*While removing the goli baje from oil after it has turned brown, reduce heat to prevent burning.

*If the batter is too water you can add more plain flour/maida.


I would love to know how it turns out for you. Thank you for visiting 🙂


Stay healthy!

Read More