Customize Consent Preferences

We use cookies to help you navigate efficiently and perform certain functions. You will find detailed information about all cookies under each consent category below.

The cookies that are categorized as "Necessary" are stored on your browser as they are essential for enabling the basic functionalities of the site. ... 

Always Active

Necessary cookies are required to enable the basic features of this site, such as providing secure log-in or adjusting your consent preferences. These cookies do not store any personally identifiable data.

No cookies to display.

Functional cookies help perform certain functionalities like sharing the content of the website on social media platforms, collecting feedback, and other third-party features.

No cookies to display.

Analytical cookies are used to understand how visitors interact with the website. These cookies help provide information on metrics such as the number of visitors, bounce rate, traffic source, etc.

No cookies to display.

Performance cookies are used to understand and analyze the key performance indexes of the website which helps in delivering a better user experience for the visitors.

No cookies to display.

Advertisement cookies are used to provide visitors with customized advertisements based on the pages you visited previously and to analyze the effectiveness of the ad campaigns.

No cookies to display.

Author: Sherryl Andria

Spicy Banana Pepper Fritters

These Hot Chili Peppers which are commonly known as ‘Banana Peppers’ is named because it resembles the shape of a banana. It is 6-inch-long pepper, mild hot because of its seeds.

These banana pepper fritters are easy to make in less than 30 minutes. My husband wanted it spicy so I haven’t removed the seeds in my recipe. If you cannot take the spice, I recommend slicing the pepper vertically through the center and removing the seeds before coating with the chickpea flour.

Preparation time: 5 minutes

Cooking time: 20 minutes


Ingredients

Vegetable oil for deep frying

Banana peppers – 7 (spicy)

Chickpea / Gram flour (Besan) – 1 1/2 cup

Kashmiri Red chili powder – 1 tbsp

Salt – 3/4 tsp

Turmeric powder – 1/4 tsp

Water – 3/4 cup


Directions

1. Prepare a paste by adding all the ingredients: flour, chili powder, salt, turmeric. Add 3/4 cup water and mix to form a thick paste. Add more water if necessary, the batter must be thick.

chili powder & besan/chickpea flour for banana

saltturmeric for hot pepper fritter


2. Coat the peppers with the above chickpea mixture. Place it separately on a plate.

chili pepper fritter coating

3. Heat a deep-wide-bottomed container with 2 inch vegetable oil set at medium for deep frying.

Once its hot enough. Carefully place the peppers in hot oil. I fried 2 at a time in batches.

deep frying banana pepper

4. Fry on each side for 2 mins until they turn brown. Transfer and drain into paper towels.

5. Serve with coriander chutney, ketchup or can just be enjoyed plain with an evening cup of tea.

pepper fritter, hot pepper fritter

inside of Banana pepper


Notes:

*If you want to have a dip of coriander chutney, refer my previous post of goli baje recipe for instructions.


Hope you have a lovely Monday! Stay healthy!


Read More

Potato Cutlets with Egg

Vegetarian food has never appealed to me, until now, that I realized how much important it is to have greens and veggies in a diet. I cannot go without meat and I’m trying to add some vegetarian food from now on. Hopefully!!

Starting from here I wanted to learn some vegetarian recipes so I intended on going with potatoes. Potato cutlets are my first try at home apart from making a non-veg cutlet, this turned out surprisingly delicious.” Yumm!” was what my husband exclaimed as he took a bite of it.

It could also be great to have for breakfast or a quick snack or on the menu of kid’s classics.


Preparation time: 10 minutes

Cooking time: 30 – 45 minutes

Makes: 12

Ingredients

Potatoes – 350 g / 4 small size or  boiled & peeled potatoes

Spring onion – 6, finely chopped

Eggs – 2

Garlic cloves – 2, finely chopped

Salt – 1/2 tsp

Vegetable oil / olive oil for shallow frying


How to cook potatoes?

+Add potatoes (with skin) into a heavy-bottomed pan of cold, salted water and bring it to a boil. Cover and cook for 15 – 20 minutes until tender. To do this insert a skewer, it must get through easily.

+ If it is still firm, let it simmer for a couple of minutes. Then, leave it to stand in hot water for 10 minutes.

+ Drain them thoroughly. Peel the potato skin.


Directions

1. Mash the cooked potatoes with your fingers (or any other way most preferred) until no large lumps of potatoes remain.

2. To the mashed potatoes, add spring onions, garlic, eggs, salt. Using your fingers combine evenly.

vegetarian snacks

mashed potatoe

3. Heat a non-stick frying pan over medium-high heat. Drizzle oil, tilt to spread the base. Pour a tablespoon spoonful of the mixture in the pan of 5-7 cm (2 – 2.8 inch). Fry for 3-4 minutes on each side.

cutlet


4.Transfer to a plate. Repeat with the remaining oil and mixture of potato and egg.

Potato cutlet with Eggs

Serve with tomato ketchup or as side with pulav.

potato cutlet, vegetarian


Hope to serve you more with vegetarian recipes. Stay healthy!


Read More

Goli Baje Recipe

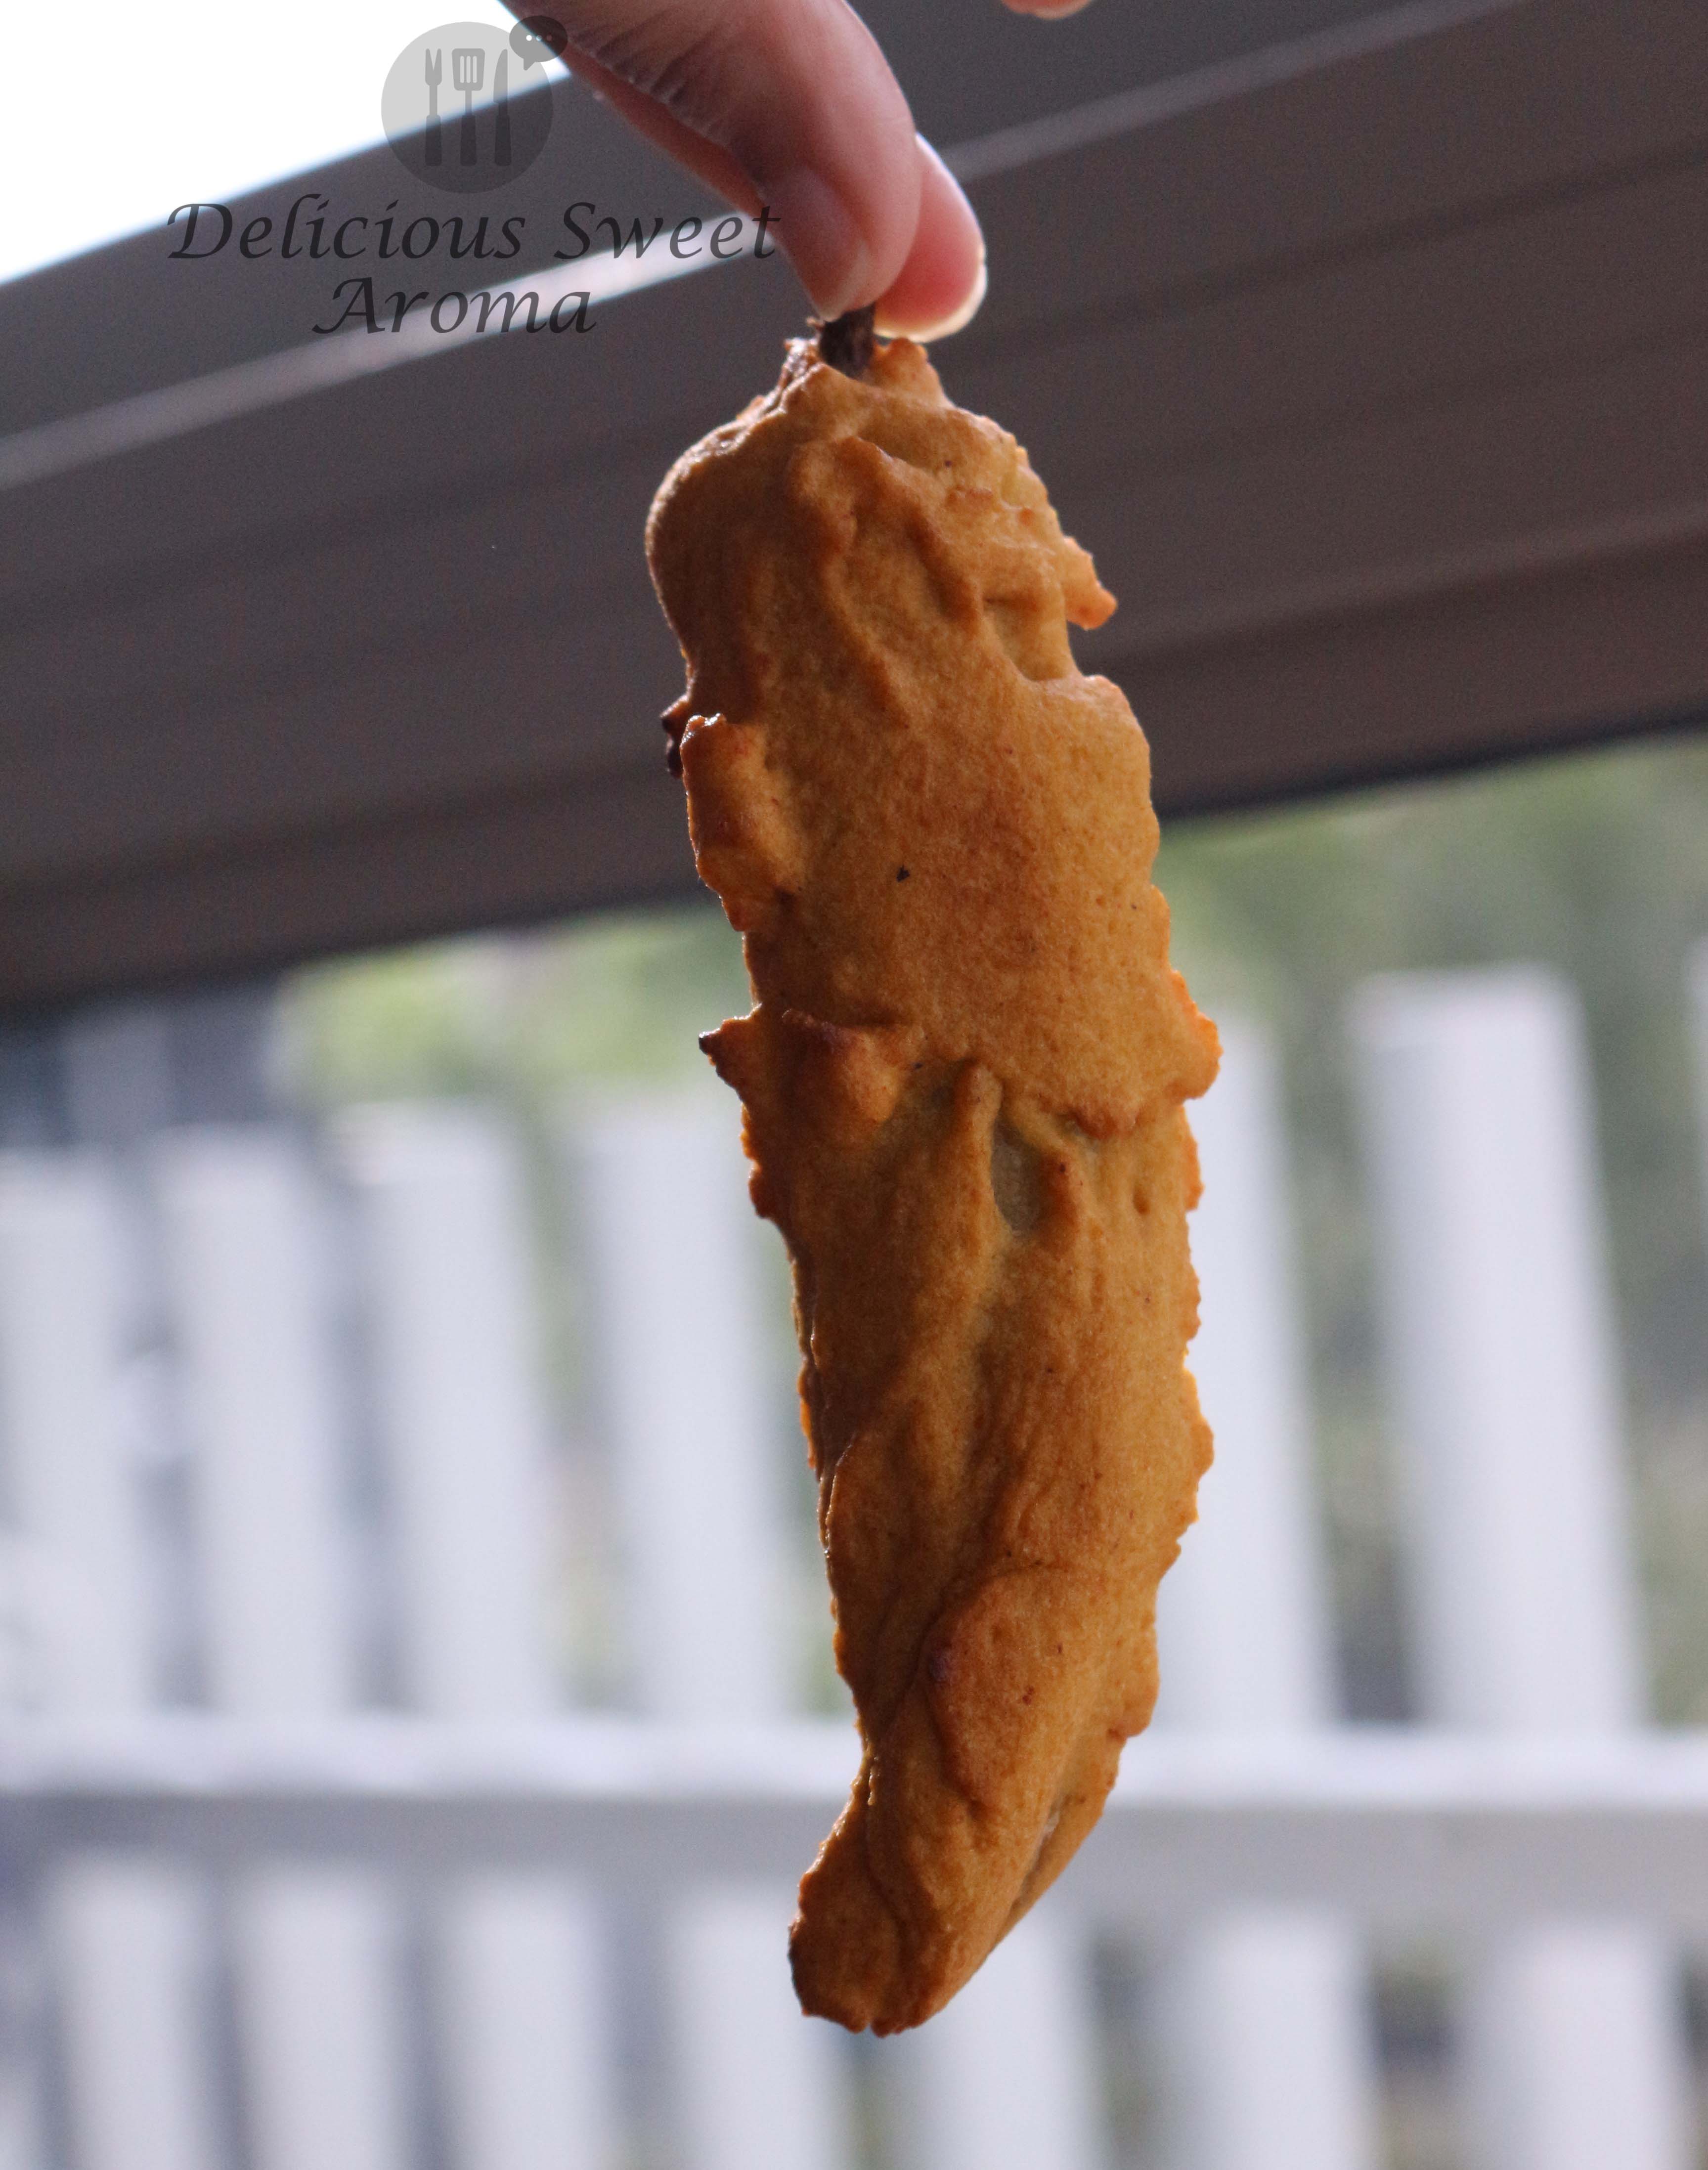
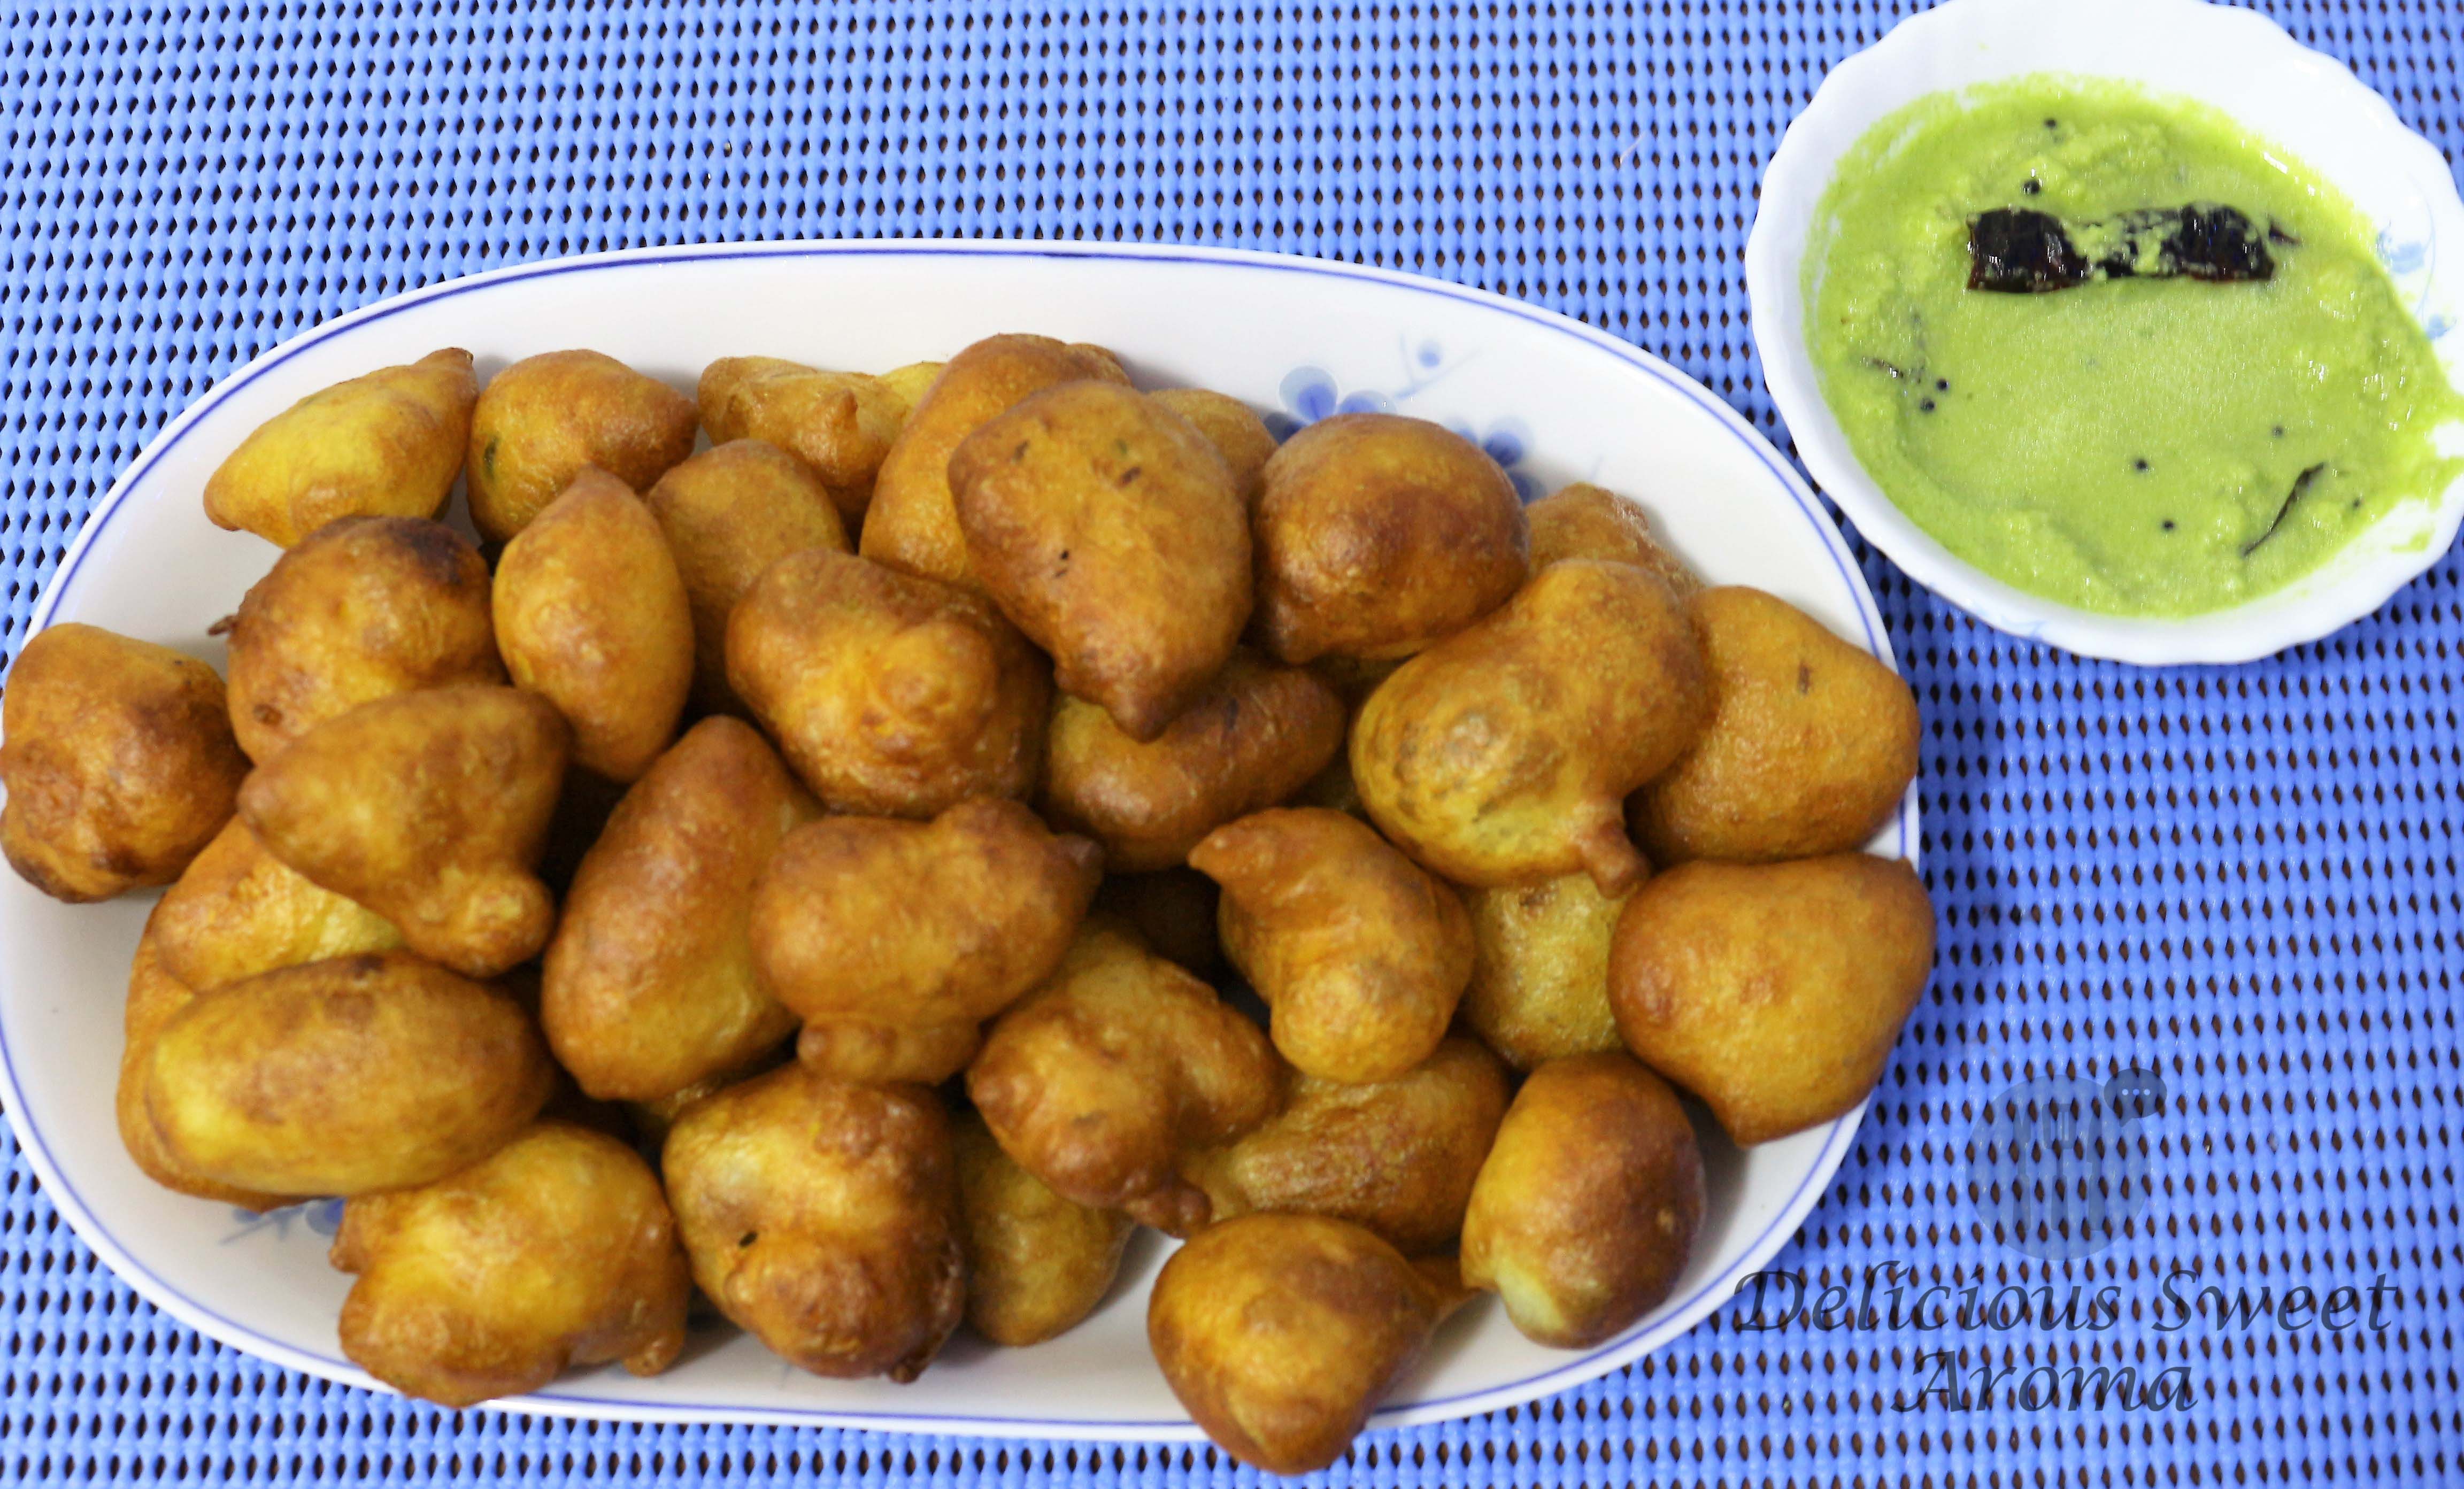
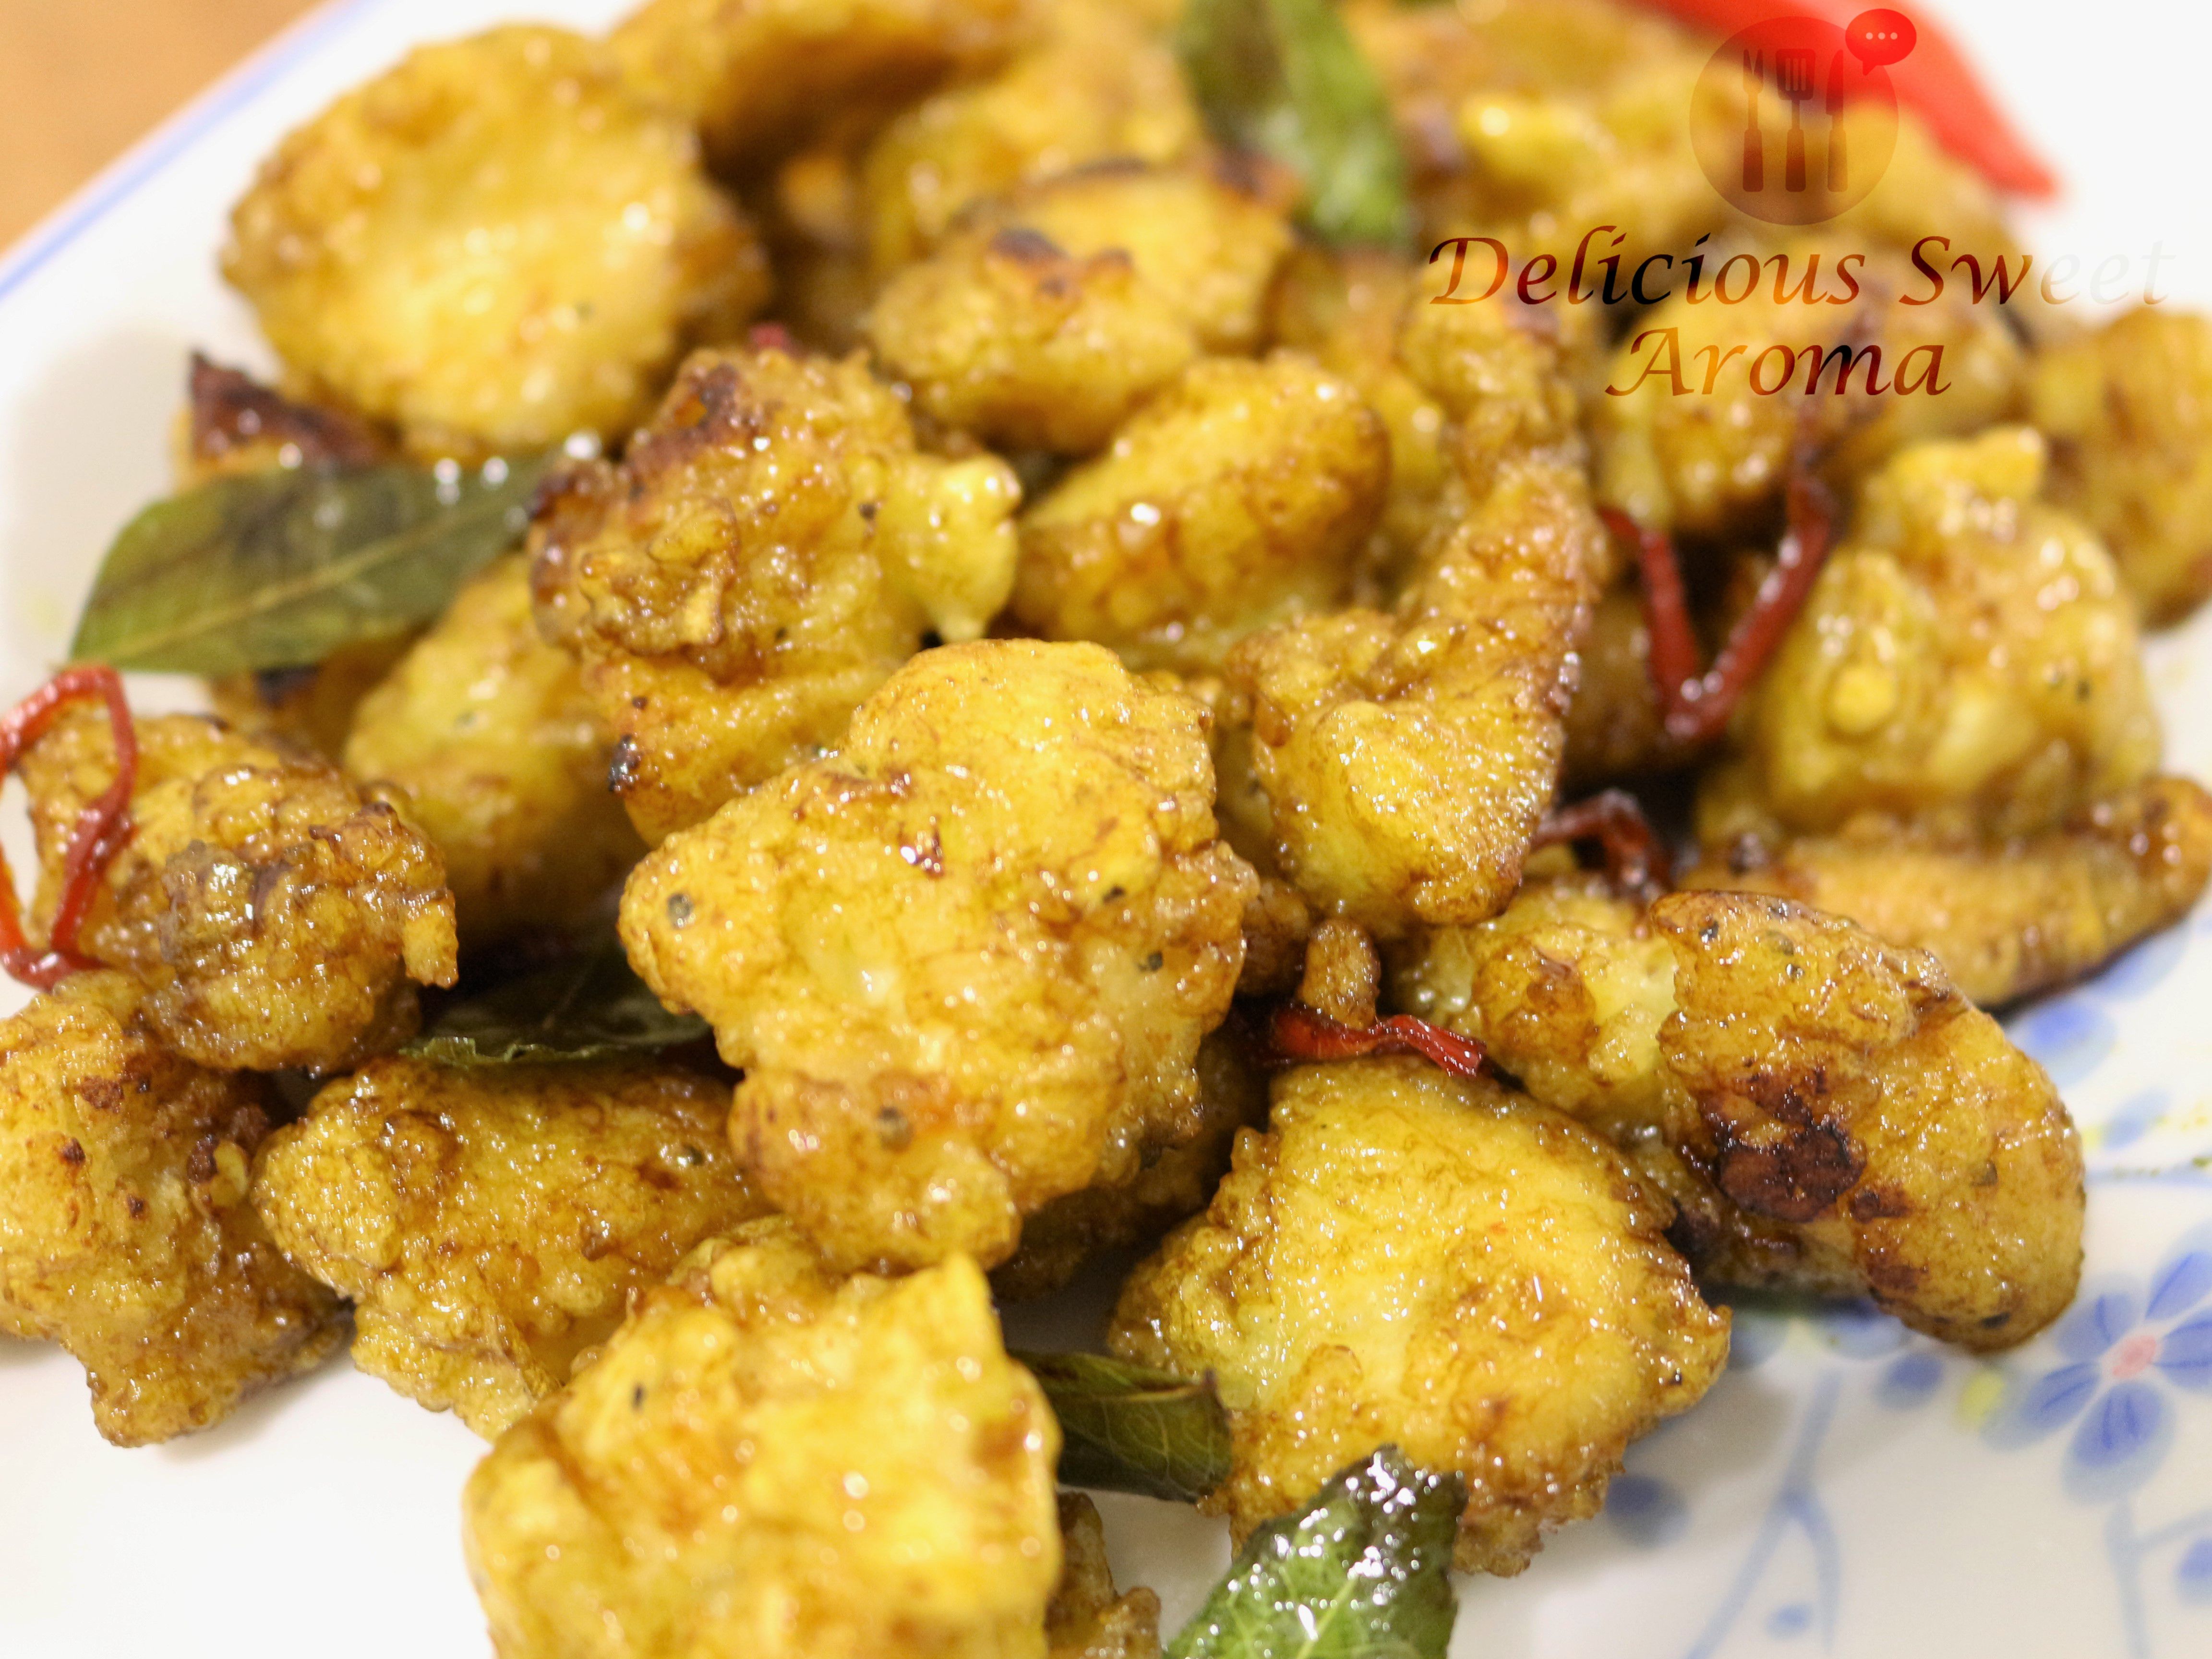
Hubby loves Goli baje’s, sounds funny, haha..Well, I came to know more of his tastes after getting married to him. And I love making them occasionally.

Goli baje (in Tulu, Indian cuisine) is a deep-fried tea-time snack popular in Mangalore-Udupi region. It is also known as Mangalore bajji or Mangalore bonda. Yes, my posts are often from Mangalore, being a Mangalorean myself they are served locally in restaurants for breakfast or evening tea along with a dip called chutney made of Coconut, coriander or others. Goli Baje’s have a unique taste with a smooth exterior and a spongy interior that suits well during the monsoon season. After few trials and errors I learnt the precise measurements to obtain a good texture. The texture also depends on the fermentation time and thickness of batter before frying. I have provided the precise quantity of all ingredients. The coconut-coriander chutney was just a perfect dip to enjoy it.

Preparation time: 10 minutes, plus 2 hrs fermenting time

Cooking time : 20 minutes

Makes: 25 – 30


Ingredients

Vegetable oil for deep-frying

Plain Flour / Maida – 1 cup / 150 g

Gram flour/Chickpea flour/Besan – 4 tbsp / 25 g

Yogurt – 1/2 cup / 160 g (thick)

Water -1/2 cup

After fermentation:

Ginger paste / fresh ginger – 1 tsp, chopped

Cumin seeds – 1/2 tsp

Green chili – 1 tsp / 1 small, chopped

Grated coconut – 2 tbsp

Caster sugar – 1 tbsp

Salt – 1/4 tsp

Baking soda – 1/2 tsp

Coriander (optional) – 1 tbsp, chopped

Warm water – 4 tbsp


For Coriander Chutney / Coriander Sauce (A dip that goes well with Goli Baje)

Fresh coriander/ Cilantro/ Chinese parsley- 25 g to 40 g, washed and roots removed (depending on quantity required)

Fresh grated coconut – 1/2 cup or as required (also, depending on quantity)

Salt – 1/4 tsp

Fresh ginger – 1 inch thick, small

Green chili – 3 small

Seasoning:

Vegetable oil – 2 tbsp

Red dried chili – 1 (if available)

Mustard seeds – 1 tsp

Curry leaves – 1 medium strip, washed & dried using towel (can use frozen)

Water as required for thickness


Directions

1. In a large bowl, to the the sifted plain flour, add chickpea flour, yogurt. Mix. Then add 1/2 cup water until well combined with no lumps in the batter.

chickpea flour, gram flour, besan added to maida, plain flour

curd added to Goli baje


2. Cover and set aside the batter in a warm place at room temperature for minimum 1 1/2 – 2  hours (I kept it for precisely  2 hrs). Even if it’s a little longer the better.

Goli baje batter of gram flour, plain flour, yogurt & little water


3. After 2 hrs: Add ginger, cumin, green chili, coconut, sugar, salt, baking soda (you can add coriander now if your using). Mix and add water to form a thick batter until there are no lumps (not too runny). Set aside for 5 minutes.

cumin seeds, grated coconut, ginger paste, salt, green chili, sugar, baking soda

4. Heat a container with oil on medium-high. Drop a pinch of batter, if oil is hot enough it will form bubbles around the batter and sizzle.

browning on one side of Goli baje

5. Take tablespoon of the batter, scoop it in your fingers and drop it in small amount into the hot oil. Do not overcrowd. In a few seconds flip to brown on the other side. Fry in batches.

Goli baje, Mangalorean bonda, Indian

Once they have turned brown, drain them on paper towels using a stainless steel slotted spoon (reduce heat to low while removing to prevent over browning). Serve hot with fresh coriander chutney.

goli baje with coriander chutney


Coriander chutney: Preparation time – 7 mins to 10 mins

1. In a blender add coriander leaves, coconut, ginger, salt, green chili and a little water. Blend until smooth paste.

2. Heat oil in a small deep bottomed, stainless steel container on medium. Add mustard seeds, it’ll start splitting. 

Coriander chutney, mustard seeds sputter

3. As the mustard seeds sputter add red-dried-chili and curry leaves. Reduce heat and toss for 5 seconds. Make sure not to burn.

mustard seeds, red dried chili, curry leaves

4. Now, add the coriander paste from the blender. Mix and let it boil over low heat. Add water depending on your choice of consistency for thickness.

Coriander chutney for Goli baje

Goli Baje with coconut-coriander chutney

Storage of Chutney:

+Store in an airtight container in the fridge or can also be frozen. Must be used within 2-3 days if stored in the fridge.


Note:

*I haven’t used coriander in the Goli Baje batter.

*If you do not have coriander for the chutney, substitute it with additional coconut to prepare a coconut chutney.

*While removing the goli baje from oil after it has turned brown, reduce heat to prevent burning.

*If the batter is too water you can add more plain flour/maida.


I would love to know how it turns out for you. Thank you for visiting 🙂


Stay healthy!

Read More

Carrot Soup

I love thick creamy soups that are full of natural flavor. A vegetarian supplement is essential and I wanted to prepare it in the form of a soup.

I usually find soup recipes have some cream added for more flavor but this Carrot soup recipe was easy to make without the cream, a delicious soup that can be enjoyed all year round.

Preparation time: 5 minutes

Cooking time:25- 30 minutes

Serves: 4

Ingredients

Olive oil / butter – 2 tbsp

Carrots – 325 g / 4 medium, roughly chopped into 1 inch after peeling

Potato – 100 g/1 small, peeled & chopped

Pepper – 1 tsp

Salt – as per taste

Water – refer below


Directions

1. Heat olive oil in a medium, heavy bottomed pan over medium heat. Add chopped carrots and potatoes, stirring for a couple of minutes.

carrot and potato's cooking

Season with salt and pepper. Add 1/4 cup of water. Cover and cook, stirring occasionally for 5 to 10 minutes until they are almost soft. Turn off the heat and let it cool.


2. Once they have cooled. Place the carrots & potatoes in a blender with 1 cup water to make a smooth paste.

placing carrots in a blender to make a smooth paste

Smooth paste of carrot & small potato


3. Transfer it into the same heavy bottomed pan you used earlier. 

Smooth paste of fresh carrots

Heat until it boils. Serve hot with bread.

Carrot Soup | Delicious Sweet Aroma


Good with: Crusty bread


Stay Healthy!

Read More

Moist Scrambled Eggs

I think most people know how to prepare an egg even for a beginner. If there is nothing else to eat in the kitchen counter, eggs are good enough to go for breakfast, lunch or dinner. I haven’t posted any breakfast recipes with egg and the idea of making a scrambled egg that is moist and creamy was the perfect choice for a healthy breakfast with whole-grain-bread that I wish to share.

My hubby would never get tired of having this every morning for breakfast. And the best part is seasoning the bread topped eggs with black pepper for extra flavor. The texture of fluffy, soft, moist and buttery flavor is totally satisfying.

I have not posted any step-by-step pictures here, forgive me for my first post without detailed pics. I believe you can still make a great moist scrambled egg with just the instructions provided below.

Preparation time: 3 minutes
Cooking time: 5 minutes
Serves: 4

Ingredients

Slices of Whole grain bread – 4
Eggs – 4 large
Unsalted Butter – 2 tbsp / 2 small cubes
Milk – 2 tbsp
Fresh Chives – 2 tbsp, finely chopped
Salt as per taste
Pepper


Directions

1. Whisk eggs, milk, fresh chives and salt in a medium bowl.

2. Melt butter in a large frying pan. Add egg mixture.

3. Cook, stirring, over low heat until creamy for 5 minutes. Transfer immediately onto a plate.

4. Serve them on bread or toast. Sprinkle with pepper.


Thank you for stopping by Delicious Sweet Aroma 🙂


Stay Healthy!

Read More

Lemon Cake

This is a delicious pound cake infused with lemon juice and zest. Lemon cake is an easy baked cake especially for beginners who are learning to bake.

With a nice cup of tea it tastes amazing. I did not add any topping or sugar glaze because I do not have a sweet tooth. The same reason why you find less of my posts on desserts. If it were a decision between sweet and savory, I pick savory always. However, sometimes I would still have a bite or two if I had a choice of sharing it with someone.

I hope you have a lovely week! 🙂


Preparation time: 15- 20 minutes

Cooking time: 25 – 30 minutes

Required appliance: Hand mixer


Ingredients

Rectangular tin – 12”x 8” (30 cm x 20 cm) 

Unsalted butter – 125 g, soft at room temp

Caster sugar/ Fine sugar – 1/2 cup

Large Eggs – 2

Plain flour (unbleached) / Self-raising flour – 175 g  (skip the baking powder & salt if your using self-raising flour)

Baking powder – 2 tsp

Pinch of salt

Lemon – 1, grated zest & juice


Directions

Preheat oven to 180 degree Celsius or 350 degree Fahrenheit for 10 minutes before baking. Grease the rectangular tin with butter and set aside.

1. In a large bowl, add butter, sugar and cream together until soft and fluffy.

butter, sugar

butter & sugar cream

2. Beat the eggs in small bowl with a spoon, then gradually add a little of the egg to the creamed mixture.

To the flour mix baking powder and salt.

Add a little flour after each addition of egg mixture. Do this until all the egg and flour are well combined.

adding egg in small portions to the cream

adding flour after the egg in small portions


3. Now, add the grated zest of lemon into the cream mixture and stir. Beat well.

grated lemon zest for lemon cake

4. Squeeze the juice of lemon, strain and then add it to the mixture. Beat to make it smooth.

Extracting lemon juice for lemon cake

5. Spoon the cream mixture into the rectangular greased tin, level the surface. Bake in the preheated oven at 180 degree Celsius or 350 degree F for 25 – 30 minutes.

lemon cake cream mixture before baking

6. With a fine skewer, prick the cake all over to check for doneness. Let the cake sit in the oven for 5 minutes if your using a convection oven. Once its cooled, cut into desired pieces and serve.

baked lemon cake

pound cake

Notes

*Since I didn’t have enough butter I added ghee to make up 175 g.

*You will notice that I added granulated sugar as I was out of caster sugar or super-fine sugar. But I recommend using caster sugar as it dissolves quickly.

*If your using self-raising flour, skip the baking powder and salt. Self-raising flour already contains a bit of salt & baking powder.


Stay Healthy!


Read More

Black Pepper Pork

Sometimes when there are celebrations at home, Black pepper pork is prepared by us Mangalorean’s. The local pork is mixed with organic pepper seeds from the creepers in our home yard. This combination definitely makes a rocking recipe of black pepper pork. It’s an all-time favorite. It’s not so fiery, you can moderate this by reducing the quantity of pepper. Using whole black pepper seeds which is later coarsely ground gives depth and awesomeness to this dish.

Organic home grown Back peppers | Recipes with Pepper

Creepers of black pepper seeds | Recipes

Harvested black peppers | Home grown Pepper Creepers

Related Pork Recipes:

Pork Recipe- Mangalorean Pork Bafat

Pork Steak with Salad and Corn


Please note that the original recipe does not call for cumin seeds.

Preparation time: 10 minutes

Cooking time: 45 to 60 minutes


Ingredients

Pork belly – 1 kg, cut into small pieces

Black pepper seeds / powder – 2 to 5 tbsp (Depending on spice level, see notes)

Cumin seeds –  1 tsp (optional)

Salt

Ginger – Garlic paste – 1 tsp

Olive Oil – 2 tbsp

Turmeric – 1/4 tsp 

Onions – 2 medium, chopped into 1 cm thickness

Lemon – as required


Directions

1. Heat a small pan. Fry the pepper seeds for 1-2 mins or until they start dancing in the pan. (Initially, I took 2 tbsp of pepper.)

cumin & whole black pepper seeds for frying

Blend the pepper seeds along with cumin seeds in a small mixer jar into coarse powder. You can blend extra pepper separately to add later if you need more spice.

powdered black pepper & cumin seeds

2. In a large container, heat olive oil. Add pork, pepper powder, 1/2 tsp salt (you can add turmeric). Mix thoroughly to coat with pepper. If your not sure the spice level of pepper add less initially.

olive oil

olive oil with pork and black pepper

3. Fry the pork for 5 minutes on high. Add ginger-garlic paste. Stir fry making sure it does not stick to the bottom of the pan. Add  1/8 cup of water if necessary but not too much.

frying pork & adding ginger-garlic paste


4. Cover and cook on medium heat for 30 minutes, stirring occasionally.

5. Check for salt (I added 4 more tbsp of pepper for spice). Add Onions and mix. Onions release water after a couple of minutes. Cook for another 10-15 minutes on medium.

adding onions to pork after 30 mins


6. Turn off the heat. Squeeze some lemon if it turns out spicy to reduce the heat.

Black Pepper Pork


Notes

*Initially add 2 tbsp of ground pepper powder before cooking meat as directed in step 2. You can add more pepper powder after the meat is cooked for 30 minutes. Taste it and adjust depending on your spice level. Left over powder can always be used for other recipes so take generous amount of seeds.

*Turmeric powder is used to get a brownish color which I skipped using.


Stay Healthy!


Read More

Chicken Bites

The reason I made Chicken bites with chicken breasts is because it’s bite size, easy and so much better than take-outs. Takes 35 – 40 minutes max. I cannot tell you how much I loved the taste of it after tossing the fried chicken in the sauces. Make sure you do not use salty soya sauce. Chicken bites makes a great side for two. You can double the portion for more servings.

Chicken breast recipes makes delicious sides. My previous post on Chicken Schnitzel is another recipe for easy meals.


Preparation time: 15 minutes

Cooking time: 20 minutes

Serves: 2


Ingredients

Chicken breasts – 300 g , cut into small chunks

Pepper – 1 tsp

Salt -1/3 tsp

Sugar -1 tbsp

Egg – 1

Tapioca starch/flour – for coating

Vegetable oil for deep-frying


Butter – 3 tbsp

Red chilies – 1 (spicy or non-spicy), chopped

Curry leaves -1 strip

Oyster sauce – 2 tbsp

Light soya sauce – 5 tbsp


Directions

1. In a small bowl with chicken chunks, salt, pepper, sugar, egg. Mix around.

marinade: salt, pepper, egg

2. In a plate containing tapioca starch. Give attention to each piece and coat chicken with the starch or flour. Place it in a separate plate.

chicken coated in tapioca flour

3. In a large skillet or deep-fryer, heat oil ( hot enough that it bubbles as you place chicken). Drop the chicken pieces one at a time, and fry until slightly brown.

chicken after deep frying

Cook meat in batches to maintain oil temperature. Drain briefly on paper towels.

4. Add butter to a large saucepan on medium heat. Add red chili. Toss, then add oyster sauce, soya sauce, curry leaves. Stirring constantly for a few seconds.

buttter, red chili, curry leaves, oyster sauce & soya sauce

5. Add chicken and mix well to coat evenly. Serve hot.

chicken in soya sauce


Stay healthy!

Read More

Prawn with Coconut Milk

I’m so glad to be posting again. My first post of the year with fresh white prawns, all time favorite!

I prepare prawns with coconut milk quiet often, so I don’t have to spend a lot of time in the kitchen. It’s goes well with rice , bread or rice pancakes which I have posted earlier. If you can find fresh prawns at your local stores it’s a must try recipe with coconut milk. From my previous experience frozen prawns do not give a flavored taste as much as the fresh prawns do. I made use of a spice powder called Chicken sukka powder, believe me, this recipe tastes delicious with this ingredient. Even if you don’t have it you can substitute it with fish curry powder or any prawn spice powder. It’s available at the Asian stores if you have trouble finding.

Happy New Year! 🙂 🙂


Preparation time: 5 minutes

Cooking time: 25 minutes

Makes: 6 servings

Ingredients

Ghee or vegetable oil – 2 tbsp

White fresh prawns – 325 g, deshell  deveined

Onions – 1 medium, chopped

Ginger-Garlic paste – 1 tsp

Potatoes – 4 small/2 medium, peeled & chopped

Green chili – 1

Tomatoes – 1 large, chopped

Chicken Sukka powder – 1 1/2 tbsp (trust me!)

Fish curry powder – 1 tsp

Coconut powder / Milk – 50 g powder or 3/4  cup milk (powder mixed in 1 cup water until dissolved)

Coriander powder – 3/4 tsp

Cumin powder – 1/4 tsp

Turmeric powder – 1/4 tsp

Salt

Coriander leaves for garnish


Directions

1. To the deshelled prawns sprinkle salt and set aside.

fresh white prawns

2. Heat a large deep container with ghee or oil on medium heat. Add onions. Fry until translucent or lightly brown. Add ginger-garlic paste. Stir fry for a couple of seconds.

onions

onions, ginger-garlic

3. Add green chili and potatoes. Stir fry for a minute. Add tomatoes, 1/4 tsp salt, mix and cover. Let the tomatoes get mushy, stir frequently so it doesn’t get burnt.

onions, ginger-garlic & chili

tomatoes, potatoes , onions, ginger-garlic & chili

tomatoes, potatoes , onions, ginger-garlic & chili

4.  Next, add chicken powder, fish powder. Mix well and stir fry for a minute.

Chicken sukka powder for prawn curry

masala for the prawn curry


5. Pour coconut milk, 2 cups of water and salt. Mix. Add coriander, cumin and turmeric powder.

coconut milk added to the masala


6. Cover and cook till it boils. Check if potatoes are cooked by piercing a fork. Check salt. If necessary add more salt.

7. Add prawns. Mix and cook until it boils. Switch off the heat. Garnish with chopped  coriander leaves.

fresh prawn with coconut milk & spices


Prawn curry


Stay Healthy!


Read More

Fish Fillet with Couscous

This recipe of Fish fillet with Couscous is unbelievably one of the easiest, and simplest to make. If you haven’t heard of Israeli couscous, may be its time you try one. They are little pasta shaped balls developed in Israel, hence the name.

Prepare the parsley sauce and add it to the cooked Couscous. Fry the fillet of choice, salmon fillet tastes even more delicious. Serve this with your green couscous. You can sprinkle the fillet with some herbs if you like.

Preparation time : 5 mins

Cooking time: 20 mins

Serves – 2

Ingredients

Pearl Israeli Couscous – 200 g or  1 1/4 cup 

Skin-on fish fillet/ Salmon fillet – 225 g to 400 g (seasoned with salt and pepper)

Onion – 1 large, chopped

Olive oil – 1 tbsp

Butter – see below

Lemon – 3 tbsp

Parsley – 50 g 

Salt 


Directions

For the couscous:

1. Fill a saucepan with 1 cup or 1.5 cup of water. Bring it to a boil.

2. Drizzle 1 tbsp of olive oil. Sprinkle 1/4 tsp salt. Very little is absorbed by the couscous. Taste and check for salt.

3. After sprinkling salt, add the couscous. Reduce the heat to medium-low and cover the pan (meantime step 5).Step2_IMG_5675

4. After its cooked, pour the contents into a colander. Shake gently to remove excess water.

couscous

Fried fillet: In the Meantime (while you wait for the couscous to cook) fry the fillet.

5. Heat a frying pan with 2-3 tbsp butter. Place the fillet with skin side down. Cook on high for 3-5 mins, change the side. Cover and cook for another 2-4 mins to keep it’s juices.

easy way to fry fish fillet

When it’s done the fish starts to flake out easily with a fork.

6. Using a blender, grind the parsley into a fine paste and add it to the couscous. Mix well.

making a parsley sauce

parsley sauce

7. If you want onions in your couscous follow this step:

Melt butter in a saucepan. Add onions and fry until translucent. Add this to couscous. Mix.

butter

onions

8. Add lemon. You can now serve your green couscous with fish fillet or even with Salmon.

Israeli couscous mixed with parsley served with fish fillet

Notes

*If you do not have a colander: Hold both hands on opposite sides. Position the lid so there is a gap between the lid and the edge of the pan. This gap should be smaller than the size of the couscous. and tilt the pan to remove excess water. Use mittens to protect from the steam.

*If your parsley comes with roots. Remove the roots. Dunk a bunch of parsley in a bowl of cold water & swish it around. Repeat once again to remove any particles of mud.

Stay Healthy!

Discover more delicious seafood recipes below for tasty meal ideas and cooking inspiration

Flower Crab – Curry

Fresh Clams in Coconut Milk

Spicy Clam Recipe (Mangalorean cuisine)

Read More