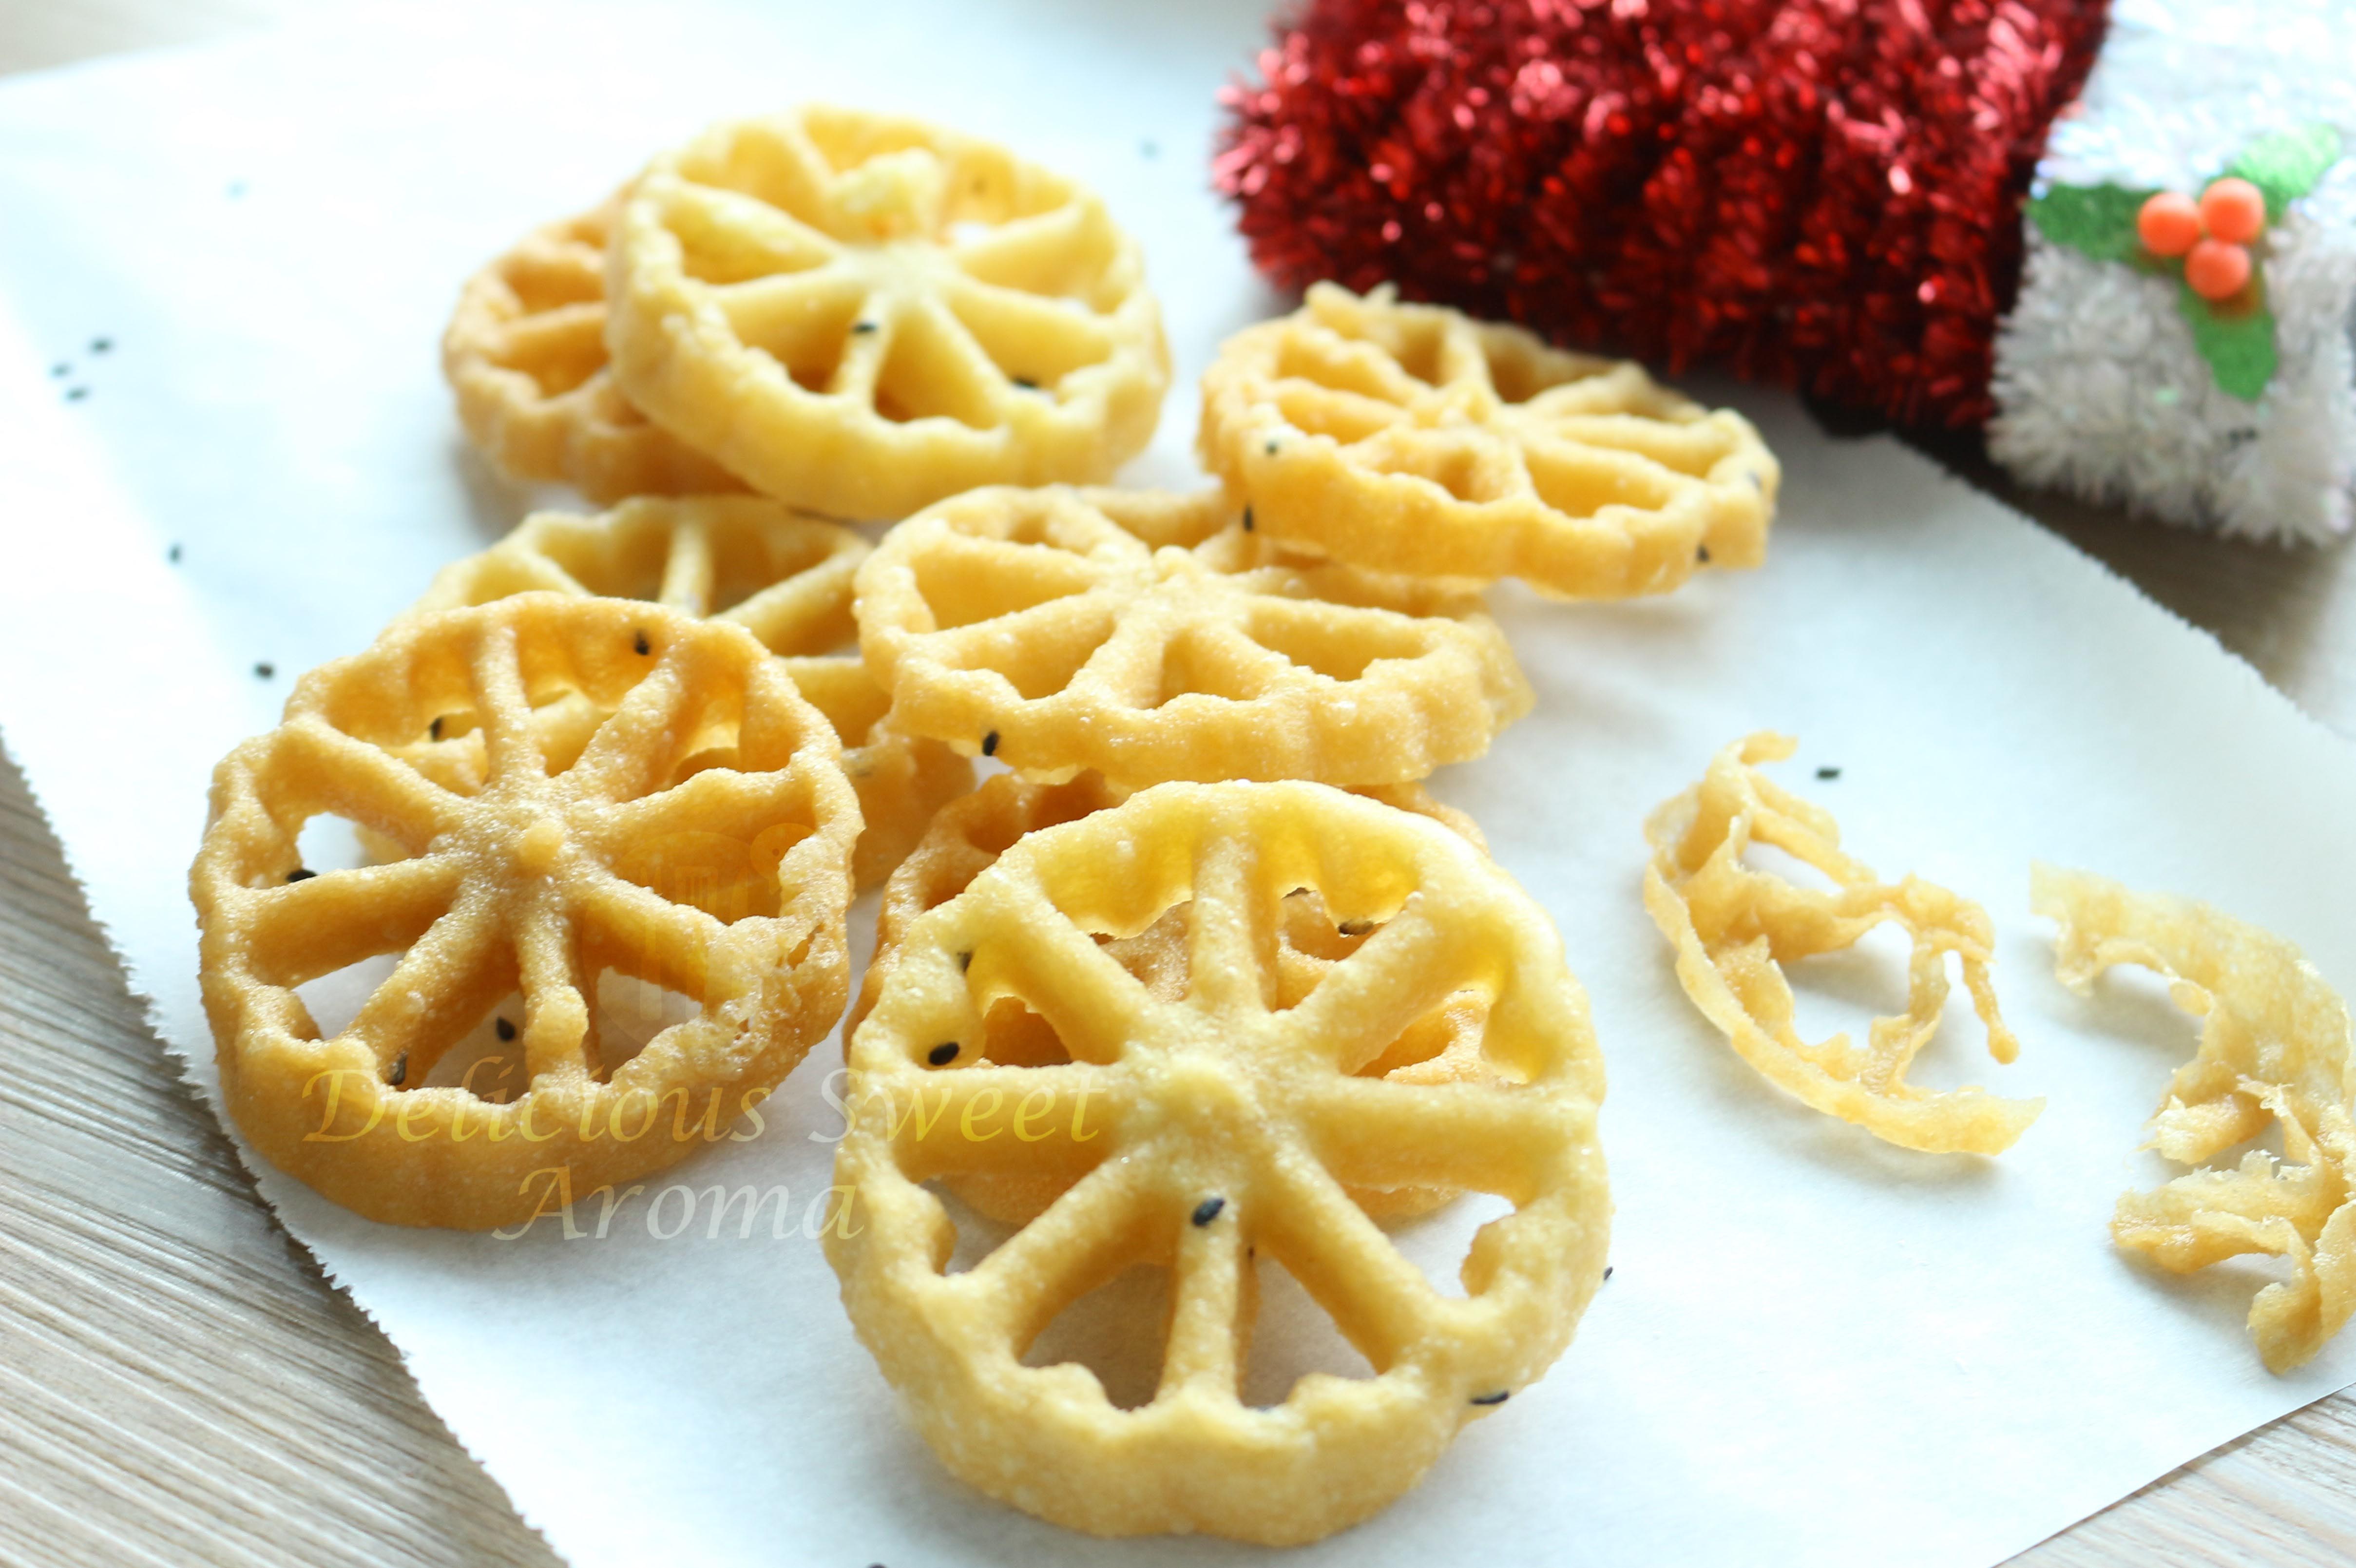
Rose cookies are traditionally prepared before New Year in South-Indian Christian households. They are always available in Mangalore supermarkets during Christmas. There, you can find varieties of other crispy and savory Christmas snacks.

Kokis are made using a special round iron mould. The mould is in the shape of a flower with a long handle to hold. This is called ‘kokis achchuwa.’ I bought it from Mangalore the last time I visited home. I have seen a few different designs of moulds here in Singapore. They can also be used to make kokis. In Mangalore, we call it Kokkisan (or kokis). It is called Rose cookies because of its rose-shape. In various regions, it is named differently. In Scandinavia (Swedish or Norwegian), it’s called Rosette cookies. It’s known as Achu murukku in Tamil and Achappam (Malayalam) in Kerala. Similar mould is also available on Amazon Rose cookie mould.
Rose cookies are not baked. They are deep-fried from either freshly ground rice grains or rice flour batter. These contain coconut milk, sesame seeds, and egg. Some recipes use other extra spices to make savory varieties. It might get a bit tricky at first. Once you get a hold of how it works with the batter and the mould, it is very easy. If you prepare with rice grains, make sure to get the Kerala idli rice. These are usually available at Indian stores. Make a thin batter with the other ingredients mentioned below.
How to use a new cookie mould?
Wash the cookie mould with soap and then, applied oil to the mould 2 hrs prior to doing the following :
- Drop the mould completely submerged in oil. Keep it dipped in oil until hot.
- Once the mould has heated in hot oil, remove it. Promptly dip the mould in a bowl of water at room temperature. You will hear it sizzle.
- Tap dry of any moisture on the cookie mould. Continue with step 3 (under step-by-step pictures) until it gets heated on medium-low heat.
Tips to prepare rice paste
- Soaking – Rinse the rice with running water until the water runs clear. Transfer to a large bowl and add enough water to cover it. Cover with a lid and let it soak for 4.6 hours. The soaking process softens the rice and makes it easier to grind into a smooth batter.
- Grind the batter – After soaking, drain the water from the rice. Using a mixer jar or blender grind the rice into a smooth batter with some water (approx. 1/2 cup). The lesser the water the finer the paste. But make sure the blades keep moving.
- Consistency – The batter should have a thick yet pouring consistency. To achieve the right texture add water as needed.

How to make Rose Cookies with step-by-step pictures
1. Take the bowl containing rice paste, add salt, sugar, sesame seeds and mix. Pour coconut milk and the egg. Stir to combined together to make a thin batter of pouring consistency.

2. Add more coconut milk if the batter is very thick. The batter must be of pouring consistency (*see notes). Reserve until your ready with next step.

3. Heat a heavy bottomed container with enough oil up to 3-inchs to submerge the mould. Place the mould in oil completely covering the whole mould till the top.

4. When the mould is heated, you will know it is radiating heat. Place your palm a few inches away from it to feel the heat. Be careful not to touch it.

Dip the mould in the batter making sure the sides are 3/4 covered in batter (see picture below). Hold steady in the batter for minimum 10 seconds and not less (it is important because otherwise it will form a shape in the batter itself and batter will not cling to the mould). Video clip here

5. After 10 seconds immediately place the batter covered mould completely dipped in hot oil to deep-fry (induction #6). You will see the oil bubbling. Hold it in oil for at least 10 seconds. Then gently shake the mould to release the cookies.

If not, It should loosen up in 30 secs to 1 minute from the mould. You could also use a wooden skewer to release it from the sides.
6. Meantime, leave the mould in hot oil for a few seconds. Wait until you are ready for the next cookie. Then continue with step 4. Depending on the size of the container used you can fry more than one but just make sure you have enough space to dip the mould after each cookie (*see notes).

7. Flip them with the wooden skewer to fry evenly until light brown color on both sides.
8. Remove the fried ones and place them on kitchen paper towels. Repeat from step 4 until all the batter is used.

Leave them to cool completely before storing them in an airtight container or airtight storage bags.


Rose Cookies with rice | Mangalorean Kokisan | Achu Murukku
Equipment
- Rose Cookie Mould
Ingredients
- ½ cup 250 g idli Rice / white small grain / Surai
- 1 water for soaking
- 3 tbsp caster sugar
- 1 tsp sesame seeds black
- 1 large egg, room temp
- ½ tsp salt
- ½ cup thick coconut milk
- ¼ cup water, if required for batter consistency
- 1 oil, for deep-frying
Instructions
- Firstly, in a large bowl take 1/2 cup idli rice.
- Soak in water for 6 hours.
- Drain the water and transfer it to mixer grinder jar.
- Grind to a smooth batter adding some water as required.
- Transfer the batter to a large bowl.
- Add salt, sugar and sesame seeds and mix. Pour 1/2 cup coconut milk and 1 egg. Stir to combine together.
- Add some water if required if its thick to make it pouring consistency.
- Heat a heavy bottomed container with enough oil upto 3-inchs to submerge the mould. Place the mould in oil completely covering the whole mould till the top.
- When the mould is heated you will know when it radiates heat by placing you palm few inches away from it (careful not to touch it)
- Dip the mould in the batter making sure the sides are 3/4 covered in batter (see picture below). Hold steady in the batter for minimum 10 seconds and not less (it is important because otherwise it will form a shape in the batter itself and batter will not cling to the mould).
- After 10 seconds immediately place the batter covered mould completely dipped in hot oil to deep-fry (induction #6). You will see the oil bubbling, hold it in oil for at-least 10 seconds then gently shake the mould to release the cookies.Use a wooden skewer to release it from the sides.
- Meantime, leave the mould in hot oil for few seconds until your ready for the next cookie and continue with step 4. Depending on the size of the container used you can fry more than one but just make sure you have enough space to dip the mould after each cookie.
- Flip them with the wooden skewer to fry evenly until light brown color on both sides.
- Remove the fried ones and place them on kitchen paper towels. Repeat from step 4 until all the batter is used.
- Leave them to cool completely before storing them in an airtight container or airtight storage bags.
Notes
- Make sure not to overheat the oil. You can keep the oil on medium-low heat (induction 5 or medium-low) if your preparing it for the first time . It might be hard to release the batter from the mould if overheated.
- If the batter is too thin you will know it once you prepare the first two cookies, since it tends to be very fragile and breaks off easily. And, the hot mould will need to be immersed in the batter for longer than 10 seconds for thinner batter.
- For deep-frying I used a flat deep-bottomed 7.5-inch / 19 cm wide container that could fry 3 cookies at a time.
- While dipping the mould in batter, tilt the bowl for even coating.
- If its too much batter to make at one-time. You can separate and use half the batter and keep the rest in fridge. I used half the rice paste for one-time which made 25 cookies, while the rest of the rice paste I stored it in the fridge for next day.


