Tag: Christmas goodies

Rose Cookies – Mangalorean Kokkisan

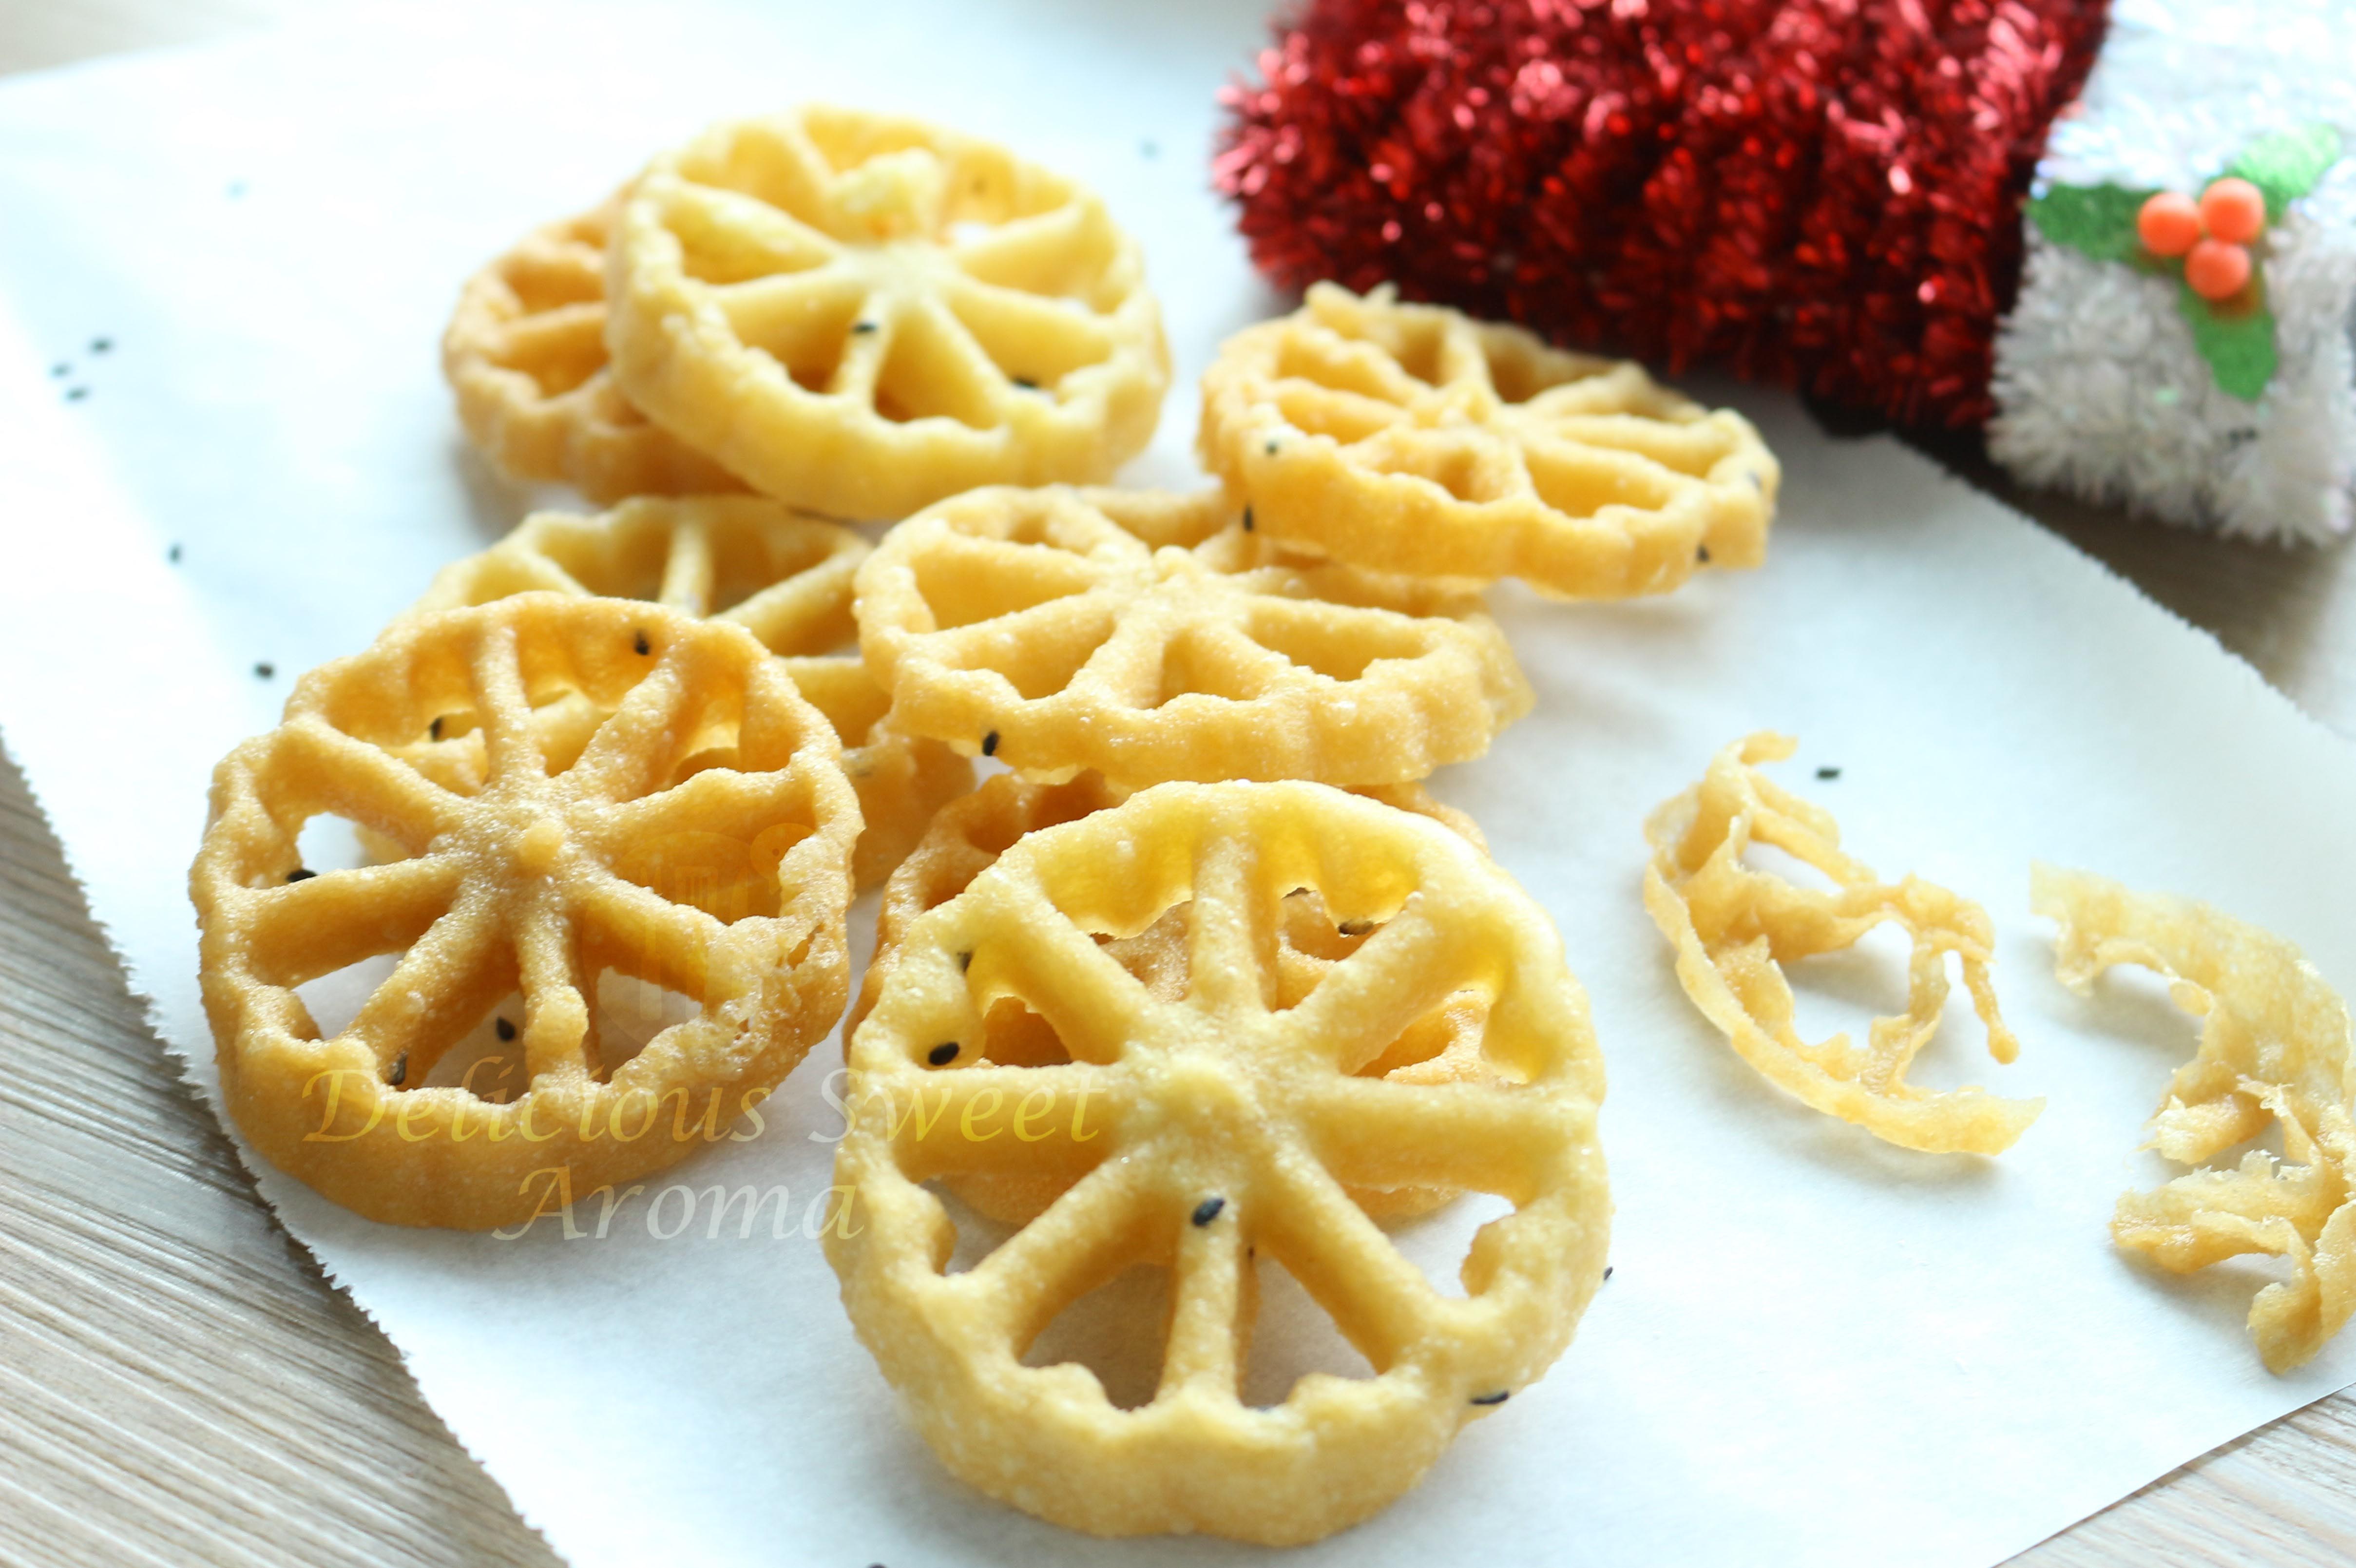
Crispy treat of rose cookies are traditionally prepared before new year in South-Indian Christian households are always available in Mangalore supermarkets during Christmas with varieties of other crispy and savory Christmas snacks.

Kokis are made using a special round iron mould in the shape of a flower with a long handle to hold called as ‘kokis achchuwa’ that I bought from Mangalore the last time I visited home. I have also seen a few different designs of moulds here in Singapore which can also be used to make kokis. In Mangalore we call it Kokkisan (or kokis), Rose cookies  because of its rose-shape named in various regions,  in Scandinavia (Swedish or Norwegian) its called Rosette cookies, Achu murukku in Tamil and Achappam (Malayalam) in Kerala. Similar mould is also available on Amazon Rose cookie mould.

Rose cookies are not baked but deep-fried from either freshly ground rice grains or rice flour batter that contain coconut milk, sesame seeds and egg. Some recipes use other additional spices to make savory varieties. It might get a bit tricky at first but once you get a hold of how it works with the batter and the mould it is very easy. If you prepare with rice grains make sure to get the Kerala idli Rice which are usually available at Indian stores and make a thin batter with the other ingredients mentioned below.


How to use a new cookie mould?

Wash the cookie mould with soap and then, applied oil to the mould 2 hrs prior to doing the following :

  1. Drop the mould completely submerged in oil. Keep it dipped in oil until hot.
  2. Once the mould has heated in hot oil, remove and immediately dip the mould in a bowl of water at room temperature. You will hear it sizzle.
  3. Tap dry of any moisture on the cookie mould. Continue with step 3  (under step-by-step pictures) until it gets heated on medium-low heat.

Tips to prepare rice paste

  1. Soaking –  Rinse the rice with running water until the water runs clear. Transfer to a large bowl and add enough water to cover it. Cover with a lid and let it soak for 4.6 hours. The soaking process softens the rice and makes it easier to grind into a smooth batter.
  2. Grind the batter – After soaking, drain the water from the rice. Using a mixer jar or blender grind the rice into a smooth batter with some water (approx. 1/2 cup). The lesser the water the finer the paste. But make sure the blades keep moving.
  3. Consistency – The batter should have a thick yet pouring consistency. To achieve the right texture add water as needed.
Rice paste


How to make Rose Cookies with step-by-step pictures

1. Take the bowl containing rice paste, add salt, sugar, sesame seeds and mix. Pour coconut milk and the egg. Stir to combined together to make a thin batter of pouring consistency.

ingredients for kokisan

2. Add more coconut milk if the batter is very thick. The batter must be of pouring consistency (*see notes). Reserve until your ready with next step.

Rose cookie Batter made thin

3. Heat a heavy bottomed container with enough oil up to 3-inchs to submerge the mould. Place the mould in oil completely covering the whole mould till the top.

Rose cookies mould

4.When the mould is heated you will know when it radiates heat by placing you palm few inches away from it (careful not to touch it).

Heating the mould

Dip the mould in the batter making sure the sides are 3/4 covered in batter (see picture below). Hold steady in the batter for minimum 10 seconds and not less (it is important because otherwise it will form a shape in the batter itself and batter will not cling to the mould). Video clip here

Mould dipped in Batter

5. After 10 seconds immediately place the batter covered mould completely dipped in hot oil to deep-fry (induction #6). You will see the oil bubbling, hold it in oil for at least 10 seconds then gently shake the mould to release the cookies.

release the mould IMG_9417

If not, It should loosen up in 30 secs to 1 minute from the mould. You could also use a wooden skewer to release it from the sides.

6. Meantime, leave the mould in hot oil for few seconds until your ready for the next cookie and continue with step 4. Depending on the size of the container used you can fry more than one but just make sure you have enough space to dip the mould after each cookie (*see notes).

reheating the mould

7. Flip them with the wooden skewer to fry evenly until light brown color on both sides.

8. Remove the fried ones and place them on kitchen paper towels. Repeat from step 4 until all the batter is used.

kokisan IMG_9389

Leave them to cool completely before storing them in an airtight container or airtight storage bags.

Rose cookies
deep-fried Rose cookiesIMG_9443
mangalorean rose cookies IMG_9445
Rose cookies /Kokisan | Mangalorean kuswar | Delicious Sweet Aroma

Rose Cookies with rice | Mangalorean Kokisan | Achu Murukku

Indulge in the delightful world of South Indian sweets with Rose Cookies, also known as Kokisan. Perfectly balancing sweetness and sophistication, Rose Cookies are not just a snack; they are a cultural celebration that captivates both the palate and the heart.
Prep Time 15 minutes
Cook Time 1 hour 30 minutes
Soaking Time 4 hours
Total Time 1 hour 15 minutes
Course Snack
Cuisine Indian, Malaysian
Servings 50
Calories 98 kcal

Equipment

  • Rose Cookie Mould

Ingredients
  

  • ½ cup 250 g idli Rice / white small grain / Surai
  • 1 water for soaking
  • 3 tbsp caster sugar
  • 1 tsp sesame seeds black
  • 1 large egg, room temp
  • ½ tsp salt
  • ½ cup thick coconut milk
  • ¼ cup water, if required for batter consistency
  • 1 oil, for deep-frying

Instructions
 

  • Firstly, in a large bowl take 1/2 cup idli rice.
  • Soak in water for 6 hours.
  • Drain the water and transfer it to mixer grinder jar.
  • Grind to a smooth batter adding some water as required.
  • Transfer the batter to a large bowl.
  • Add salt, sugar and sesame seeds and mix. Pour 1/2 cup coconut milk and 1 egg. Stir to combine together.
  • Add some water if required if its thick to make it pouring consistency.
  • Heat a heavy bottomed container with enough oil upto 3-inchs to submerge the mould. Place the mould in oil completely covering the whole mould till the top.
  • When the mould is heated you will know when it radiates heat by placing you palm few inches away from it (careful not to touch it)
  • Dip the mould in the batter making sure the sides are 3/4 covered in batter (see picture below). Hold steady in the batter for minimum 10 seconds and not less (it is important because otherwise it will form a shape in the batter itself and batter will not cling to the mould). 
  • After 10 seconds immediately place the batter covered mould completely dipped in hot oil to deep-fry (induction #6). You will see the oil bubbling, hold it in oil for at-least 10 seconds then gently shake the mould to release the cookies.
    Use a wooden skewer to release it from the sides.
  • Meantime, leave the mould in hot oil for few seconds until your ready for the next cookie and continue with step 4. Depending on the size of the container used you can fry more than one but just make sure you have enough space to dip the mould after each cookie.
  •  Flip them with the wooden skewer to fry evenly until light brown color on both sides.
  • Remove the fried ones and place them on kitchen paper towels. Repeat from step 4 until all the batter is used.
  • Leave them to cool completely before storing them in an airtight container or airtight storage bags.

Video

Notes

  1. Make sure not to overheat the oil. You can keep the oil  on medium-low heat (induction 5 or medium-low) if your preparing it for the first time . It might be hard to release the batter from the mould if overheated.
  2. If the batter is too thin you will know it once you prepare the first two cookies, since it tends to be very fragile and breaks off easily. And, the hot mould will need to be immersed in the batter for longer than 10 seconds for thinner batter.
  3. For deep-frying I used a flat deep-bottomed 7.5-inch / 19 cm wide container that could fry 3 cookies at a time.
  4. While dipping the mould in batter, tilt the bowl for even coating.
  5. If its too much batter to make at one-time. You can separate and use half the batter and keep the rest in fridge. I used half the rice paste for one-time which made 25 cookies, while the rest of the rice paste I stored it in the fridge for next day.
Keyword Achu Murukku, Crispy Rose Cookies, Indian Festival treats, Kokisan, Moulded Cookies, Rose Cookies, Traditional Indian Snacks

Read More

Diamond cuts (Tukdi)

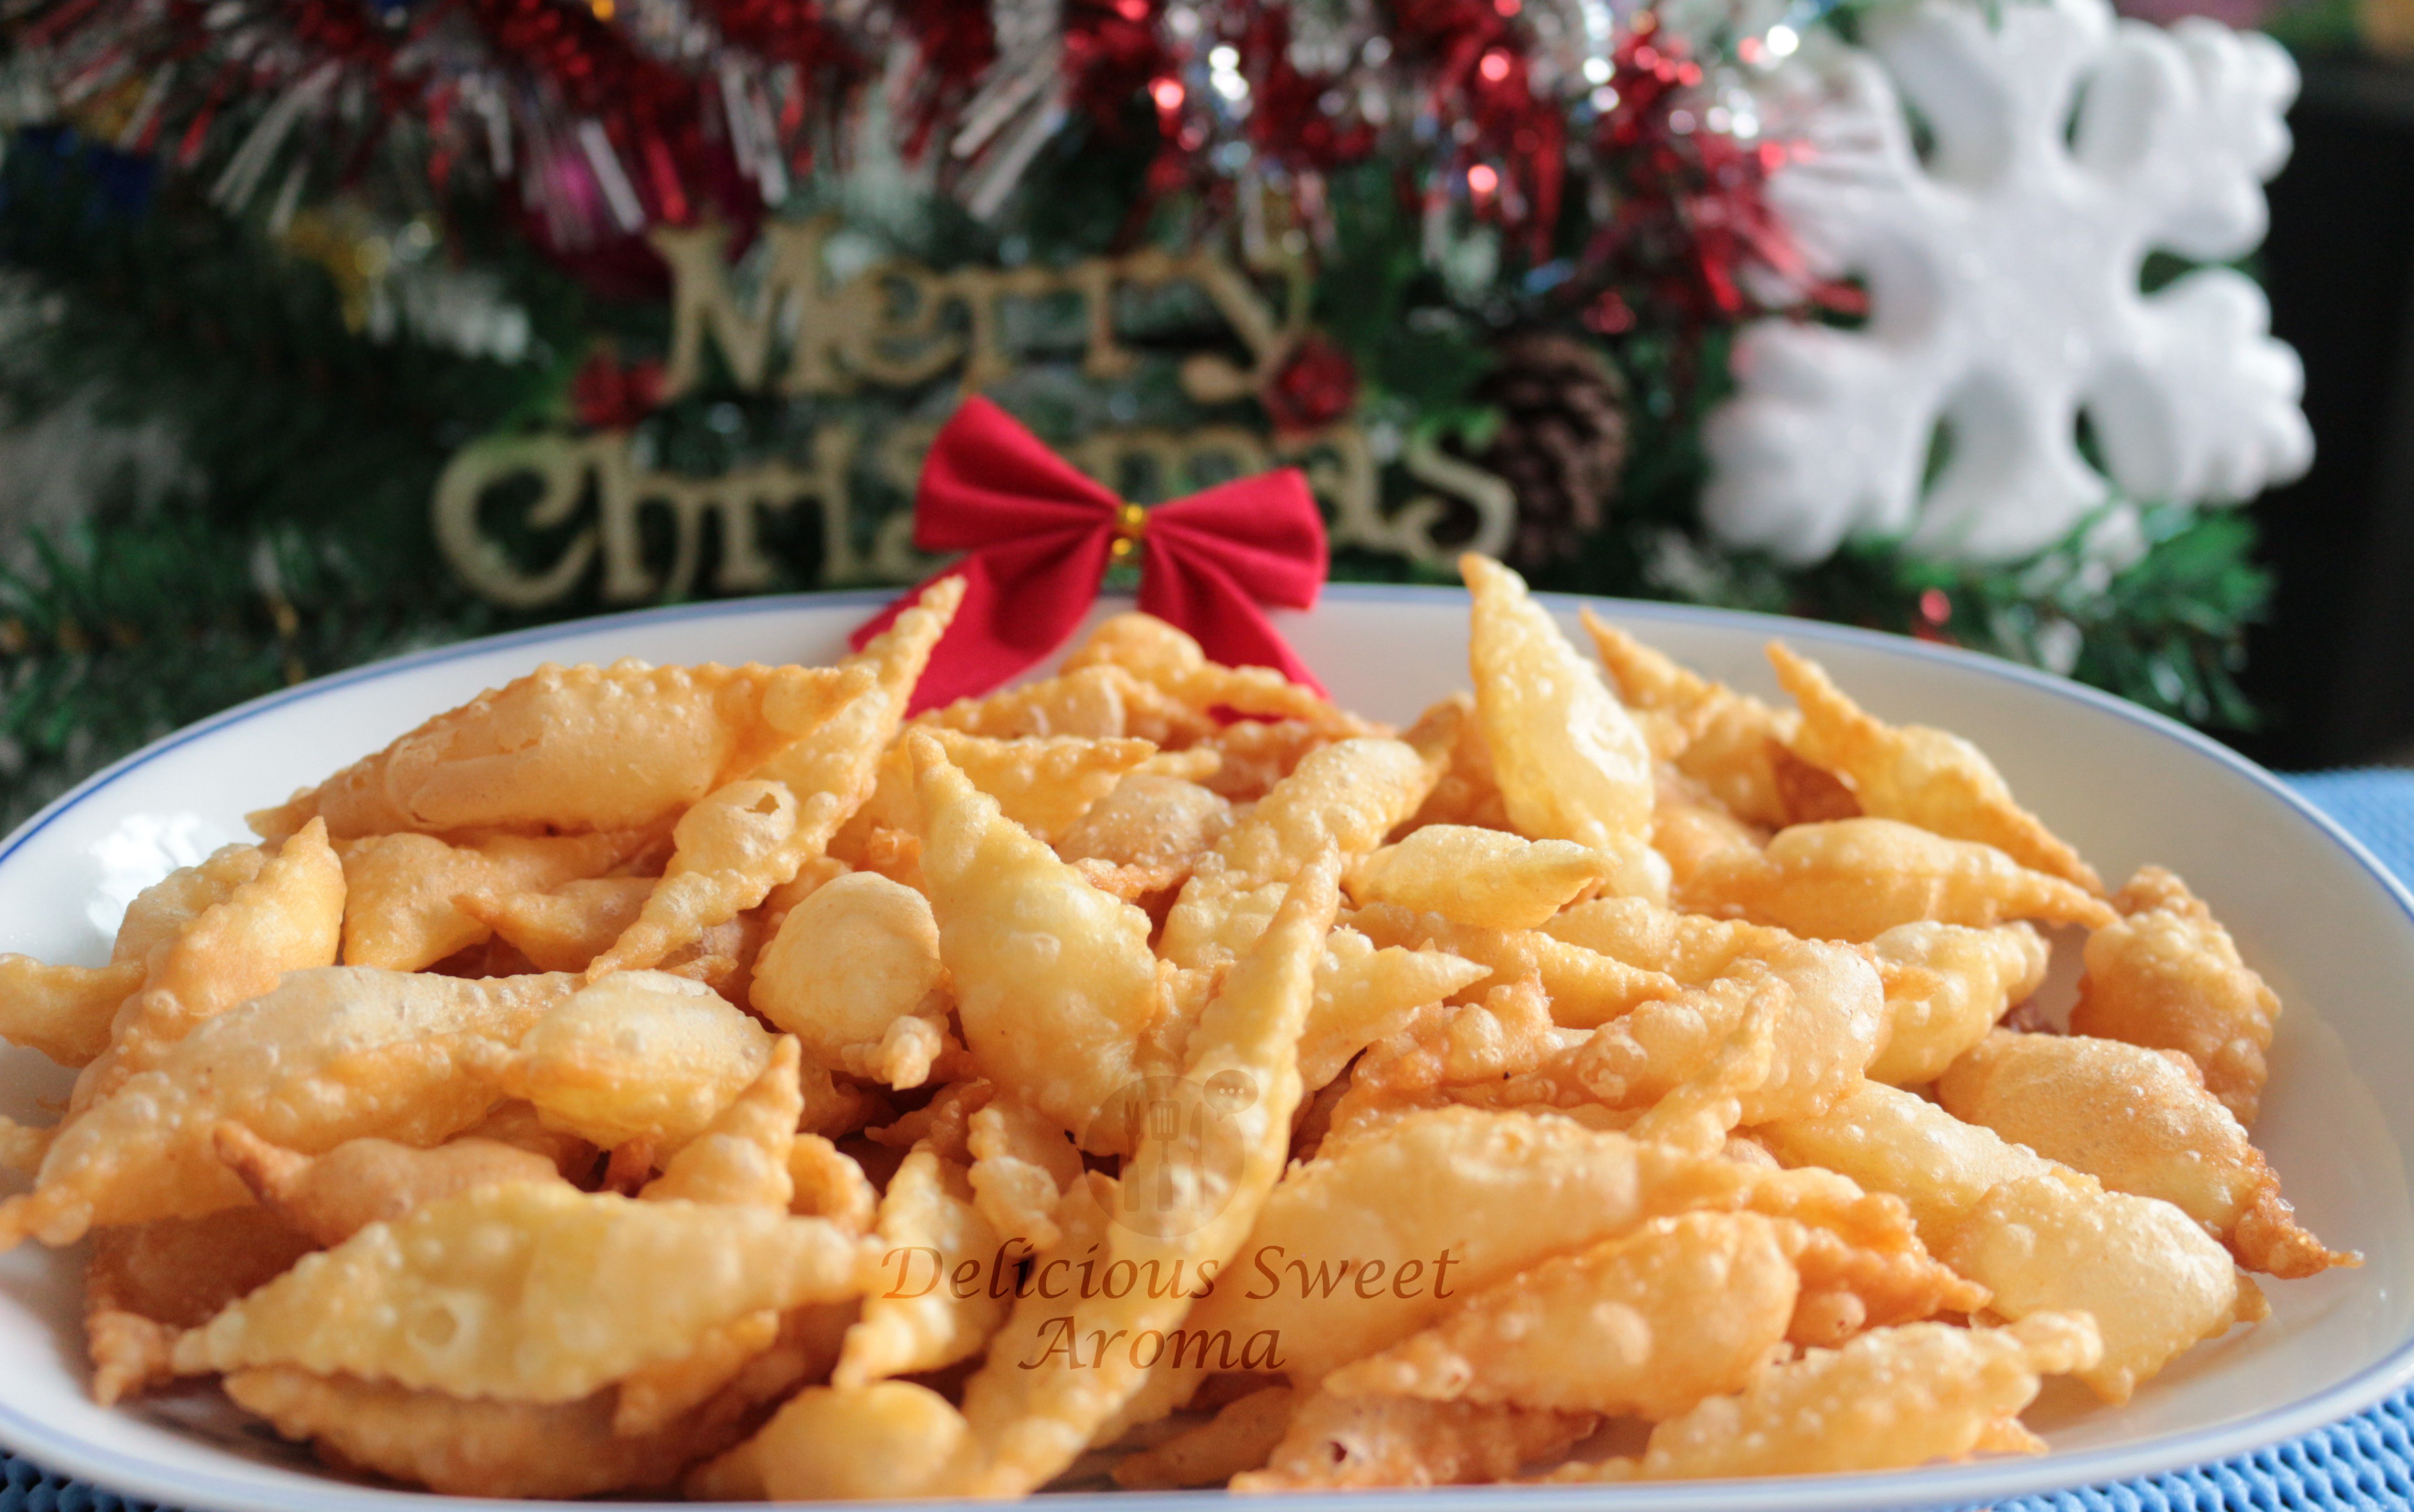
I’m quiet surprised that I’m making another snack for Christmas. After my Sweet curls recipe this is my second recipe on Christmas goodies. I prepared this yesterday and I loved the way they turned out.

Diamond cuts or Tukdi (we call it in konkani at home) is a traditional snack. It’s still a favorite snack to munch on while at home. They are crunchy, fluffy and hollow. It is made in different varieties, sweet or biscuit flavored. I made a small batch of it and the recipe is very easy.

Have a joyous Christmas 🎄🎅

Preparation time: 1 hour

Cooking time: 30 mins

Utensil : Pizza cutter/biscuit cutter

Roller pin


Ingredients

Vegetable oil for deep frying

Unbleached All-purpose flour/Maida + extra for dusting – 250 g

Unsalted butter (soft)- 2 tbsp

Chickpea flour – 25 g

Salt – 1/3 tsp

Water – 1/2 cup or as required for the dough ( *EDIT), room temp


Directions

1. In a medium bowl, add all-purpose flour,  chickpea flour, salt, butter. Mix together with your hand. Add water in parts and knead until you get a soft elastic dough. It’ll tend to be sticky at the beginning, keep kneading until it becomes smooth.

ingred_IMG_5908

Step1_IMG_5912

2. Prepare a rolling surface, dust the surface with flour. Take a small portion of the dough and form a ball. Place it on rolling surface and sprinkle some flour again. This will help prevent sticking.

Step22_IMG_5941

Now, using a rolling pin, roll the dough thin (not too thin or thick).


3. Using a small biscuit roller/pizza cutter, cut the flour vertically with 1.5 cm spacing between each line. Then, cut them in horizontal direction that shape it into a diamond form.

vertical cut of doughhorizontal cuts

diamond cuts from dough

Carefully transfer them, by using a knife edge to slide them onto a flat plate without disrupting it’s shape.


4. After your done making diamond cuts. Heat a container with oil on medium-high heat (If your using induction, keep it on 7).

5. Drop a piece to check if the oil is hot. It’l start sizzling and bubbling. Slide the diamond cuts in oil in batches, not to over-crowd them. It will start puffing up. Stir them gently so they get separated. Let it fry for a minute or two, until golden brown.

tukdiyo, tukdi, diamond cuts


6. Strain them into paper towel. Pour the next batch until all are done deep-frying.

diamond cuts, snack


Mangaloran snack, christmas snack

Storage:

* Keep them in airtight container to retain the crispiness once they have completely cooled down.


For updates on posts and recipes to come please follow the Fb page >> Delicious Sweet Aroma


Note:

*While kneading the dough, if it tends to be sticky add some flour.

*Dust generous amount of all-purpose flour before running the biscuit roller otherwise they stick to the plate which will tend to loose its shape while sliding into hot oil.


More on Christmas Recipes:

Sweet Curls /Kidyo or Kulkuls

Rose Cookies – Mangalorean Kokisan (NEW)

Traditional Christmas Cake – Fruit Cake (NEW)


Stay healthy!


Read More

Kidyo or Kulkuls (Sweet Curls)

These are my first time actually making homemade Christmas goodies or snacks and it turned out pretty amazing.  I believe everyone celebrates Christmas differently. It’s my first Christmas with my husband and I thought of preparing these delicious snacks of crispy sweet curls we usually make at home with family, to get into the Christmas spirit.

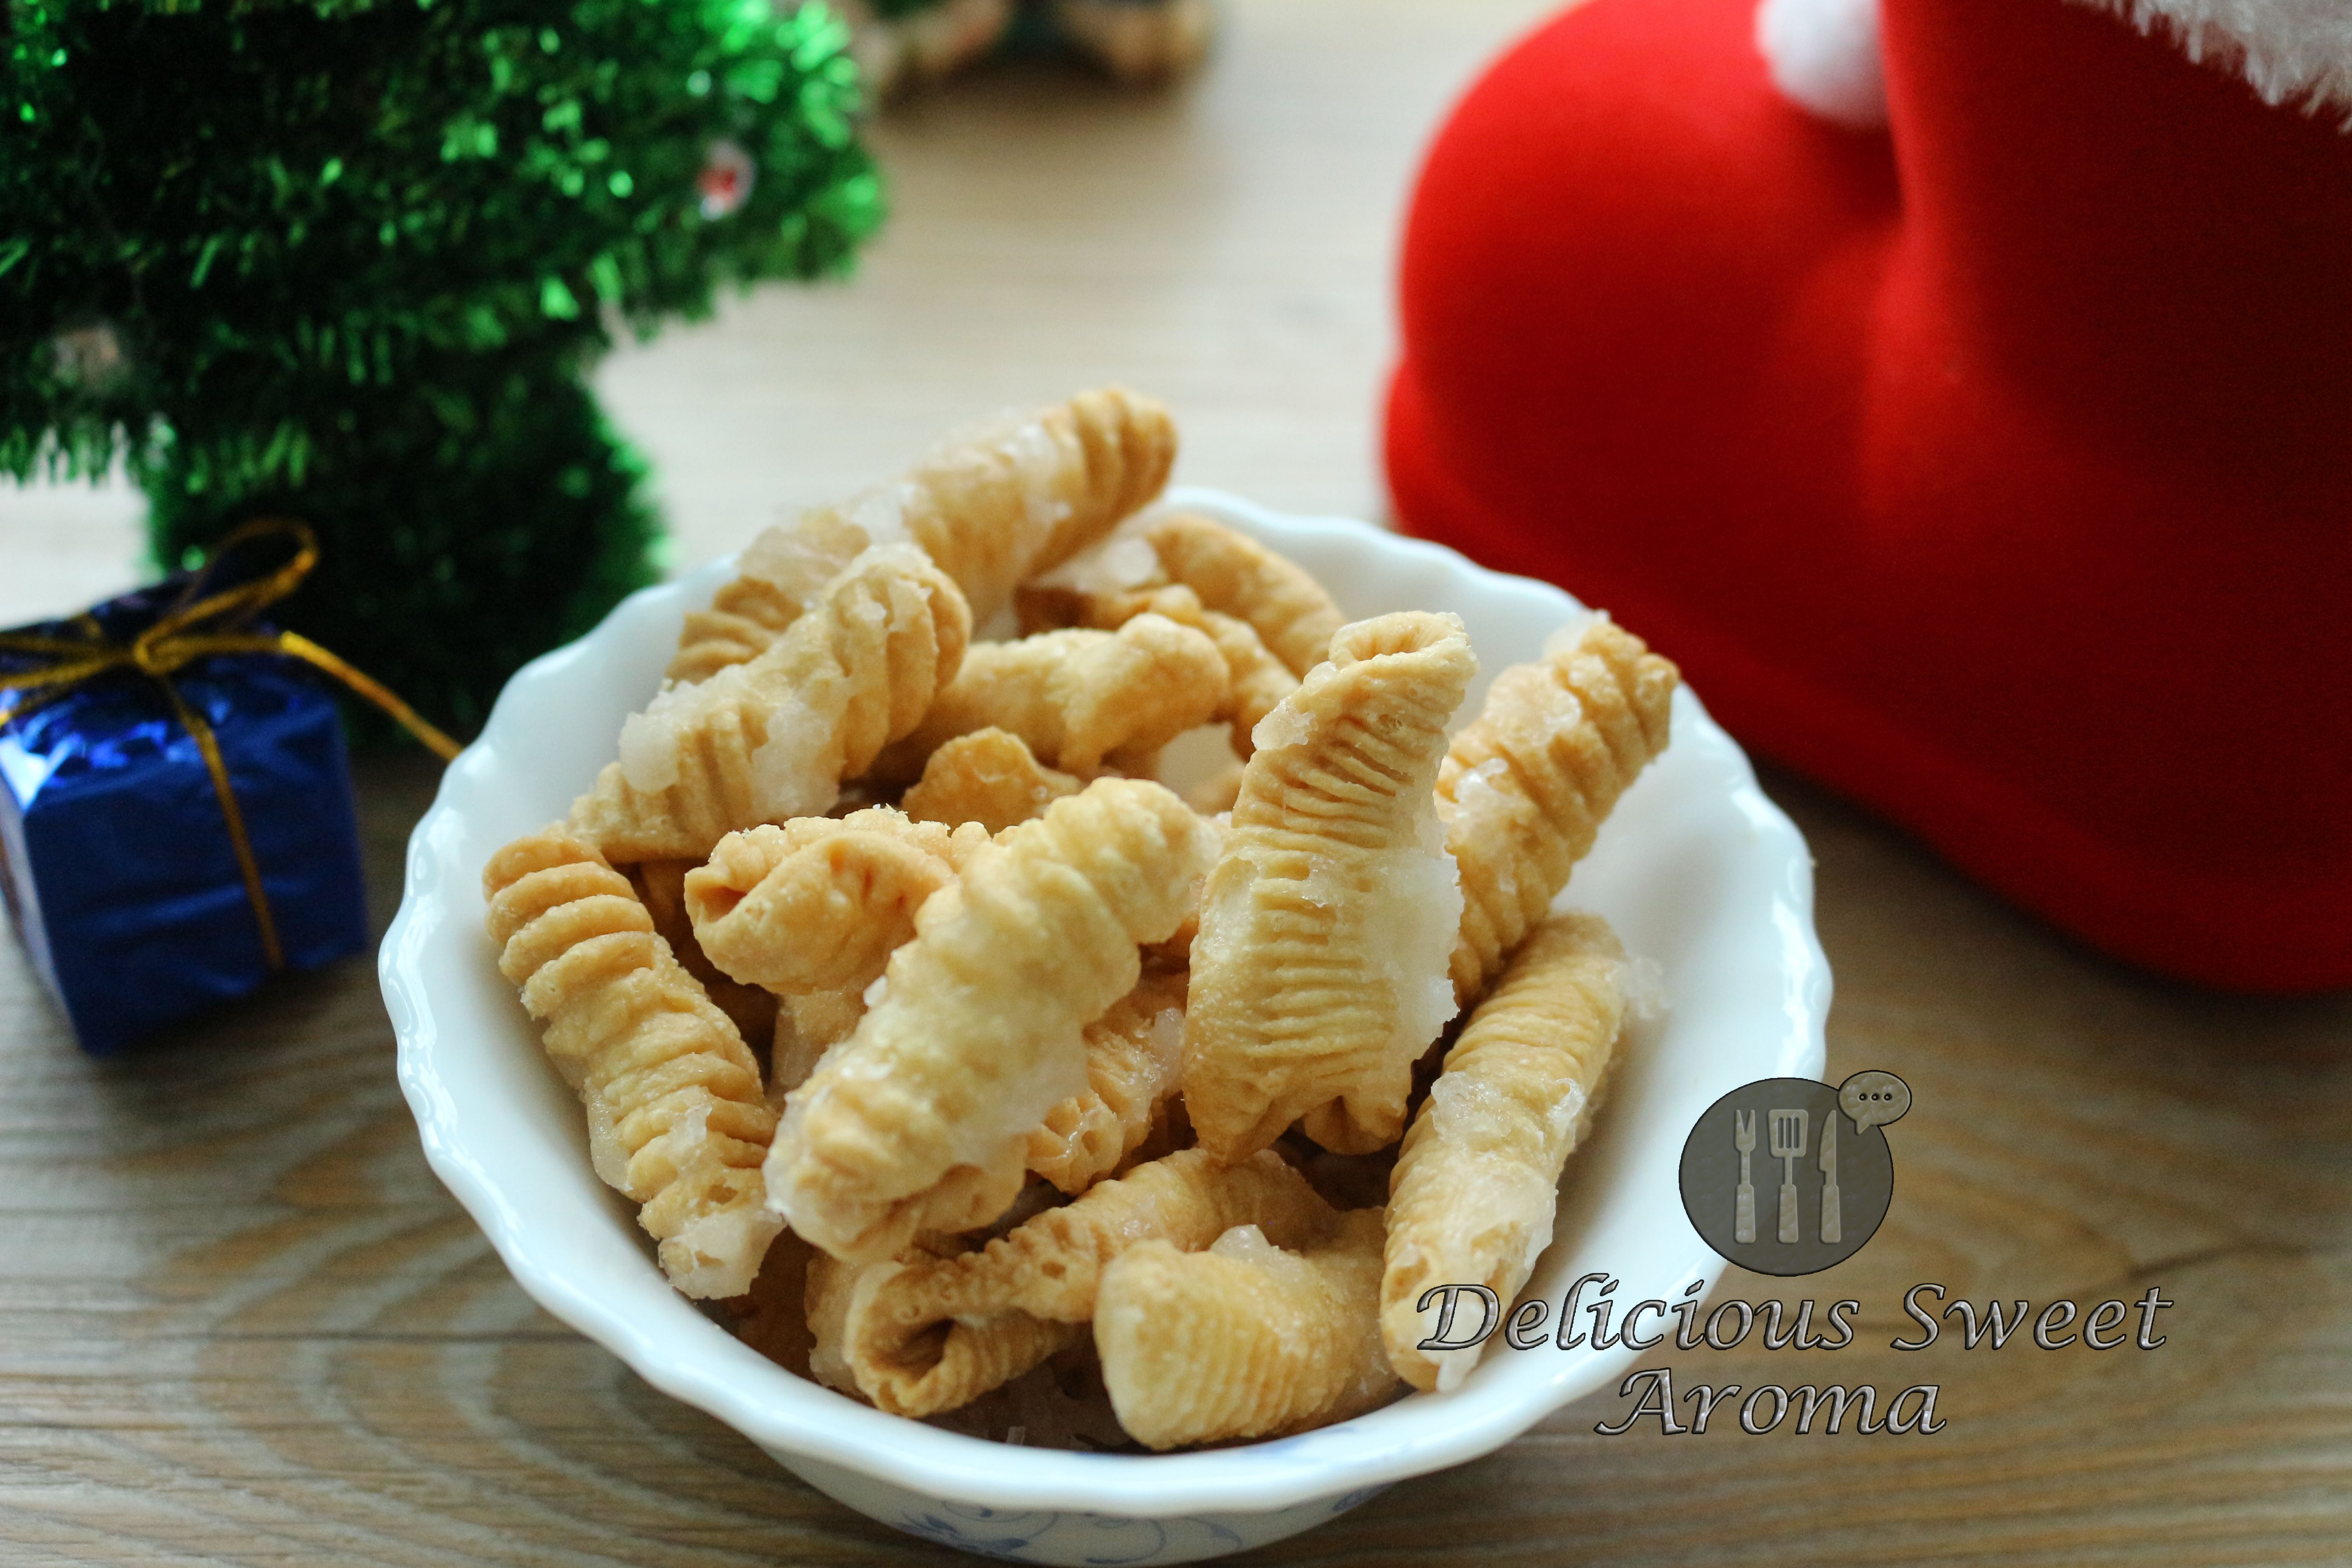
Kidyo (Kul Kuls) in Konkani is a snack prepared as one of Christmas goodies (called Kuswar) in South-India, especially in my hometown Mangalore, during Christmas. Initially, you prepare a dough with flour, butter, salt and coconut milk, shape them into curls, deep-fry and then coat them with sugar-glaze. It is crunchy, hollow on the inside. Tastes delicious with or without the glaze. We have grown up helping my mom preparing them since childhood. Holiday treats are creative and takes a lot of effort, but it’s worth it.

I made an attempt to set a schedule to prepare it during the weekend, so my husband could help me with it as it gets done faster. More the people, the merrier it is. I made a small batch of sweet curls for just the two of us. They can be made using a fork or a medium sized comb with teeth. A fork gives a wider impression/mould and makes a smaller sized curls slightly different than a comb. I used a comb, since I was more comfortable with it and it looks more prettier with thinner striations.

Merry Christmas to you! 🎄Have a wonderful holiday.

Preparation time: 1- 1.5 hrs

Cooking time – 30 minutes

Quantity made for 2


Ingredients

Vegetable oil for deep frying

Fork / Comb with teeth (depending on the number of individuals)

All-purpose flour / Plain flour/ Maida – 500 g

Salt – 1/2 tsp

Butter – 2 tbsp, (softened at room temperature)

Coconut milk – 1 1/4 cup (or as required to make a smooth dough)

Coconut milk, salt, butter, four/maida for chris


For Sugar Glaze:

White Confectioner / powdered Sugar- 1/2 cup

Water – 1/4 cup


Directions

Making the dough:

1. In a large bowl, combine flour, salt, butter. Mix. Add in small quantities of coconut milk working it into the flour using your hands. Punch and knead the dough, until a soft elastic dough is formed. It will tend to be sticky at the beginning but as you work through it, the dough becomes less sticky.

dough for sweet kurls during Christmas

Cover your dough with a damp cloth or a lid so it doesn’t get dry.

Preparing the Kidyo: This can be done by using a fork or a medium sized comb. I used the traditional way by using a comb.

2. Prepare a working surface. Take a small portion of the dough.

dough for sweet curls

Roll it back and forth on working surface (or by placing in between the palm of your hand and roll it back and forth) applying gentle pressure to taper the dough on the outer edges. Repeat for the other end of the strand or the areas which are fatter than the rest.

dough

Using a small knife start cutting the strand into small bits of 1 cm thickness. making this gets easier and faster than removing bits  of dough directly from the large portion of dough, preventing from making unequal size of curls.

Step2a_


3. Holding a comb in hand, place the dough over the teeth of the comb (If your using a fork, place the dough on back of your fork). Press it and flatten it gently (step 2, picture) . With you thumb, roll it away from you (step 3,4,5 picture). While ending the curl (step5, picture) seal them so they don’t open while frying.

Repeat the same for the rest and place it on a large plate without sticking them to each other.

How to make kidyo /sweet curls from dough

When this strand of dough is almost done. Continue from point 2. Finish making the kidyo/curls, until atleast half of your dough left, before starting to fry them.

how to make kulkuls/kidyo


Deep Frying:

4. Heat a container with oil on medium-high. When the oil is hot enough (oil will start bubbling if it is hot enough) carefully drop a portion of kidyo/kulkuls, make sure not to over-crowd.

making kidyo and deep-frying


Stir them gently so they get separated. Let it fry, until golden brown, by stirring a couple of times in between (this might take approximately 5 minutes).

how to prepare kidyo/kulkuls/sweet curls for christmas


Strain them into paper towel. Pour the next batch until all are done.

Once they have all completely cooled down, transfer them into a sealed container or large zip-lock bags if you are gazing them the next day.


Sugar Glazing: They need not be glazed, based on personal choice. You can leave out the sweet glaze for a less sweet treat.

* Place sugar and water together in a cooking pot. 

how to sugar glaze

*Cook the sugar and water over high heat, stirring occasionally until the sugar is completely dissolved. bring this mixture to a boil.

* To check if it has turned into a glaze, drizzle few drops into a stainless steal spoon dipped into bowl of water. If it hardens. It’s done.

hot to sugar glaze

*Immediately, glaze the curls or kidyo in parts and mix as you pour the syrup to coat all the curls.

Christmas kuswar sugar glazing kidyo/kulkuls

* Let the kidyo/curls/kulkuls cool. The coated sugar glaze hardens by time.

how to make christmas kuswar or sweets

*Store them in airtight container.


Note:

*When glazing the kidyo, make sure the syrup is used immediately after it’s removed from the heat. Otherwise, it hardens quickly if left to cool at room temperature and will have to repeat the sugar glazing process. You can glaze half batch and leave the other half unglazed if you prefer non-sweet curls.

*Make sure to frequently agitate the curls when deep-frying to fry them evenly, until brown.


Stay healthy!


More on Christmas Recipes:

Diamond Cuts (Tukdi)


Read More