Author: Sherryl Andria

Diamond cuts (Tukdi)

I’m quiet surprised that I’m making another snack for Christmas. After my Sweet curls recipe this is my second recipe on Christmas goodies. I prepared this yesterday and I loved the way they turned out.

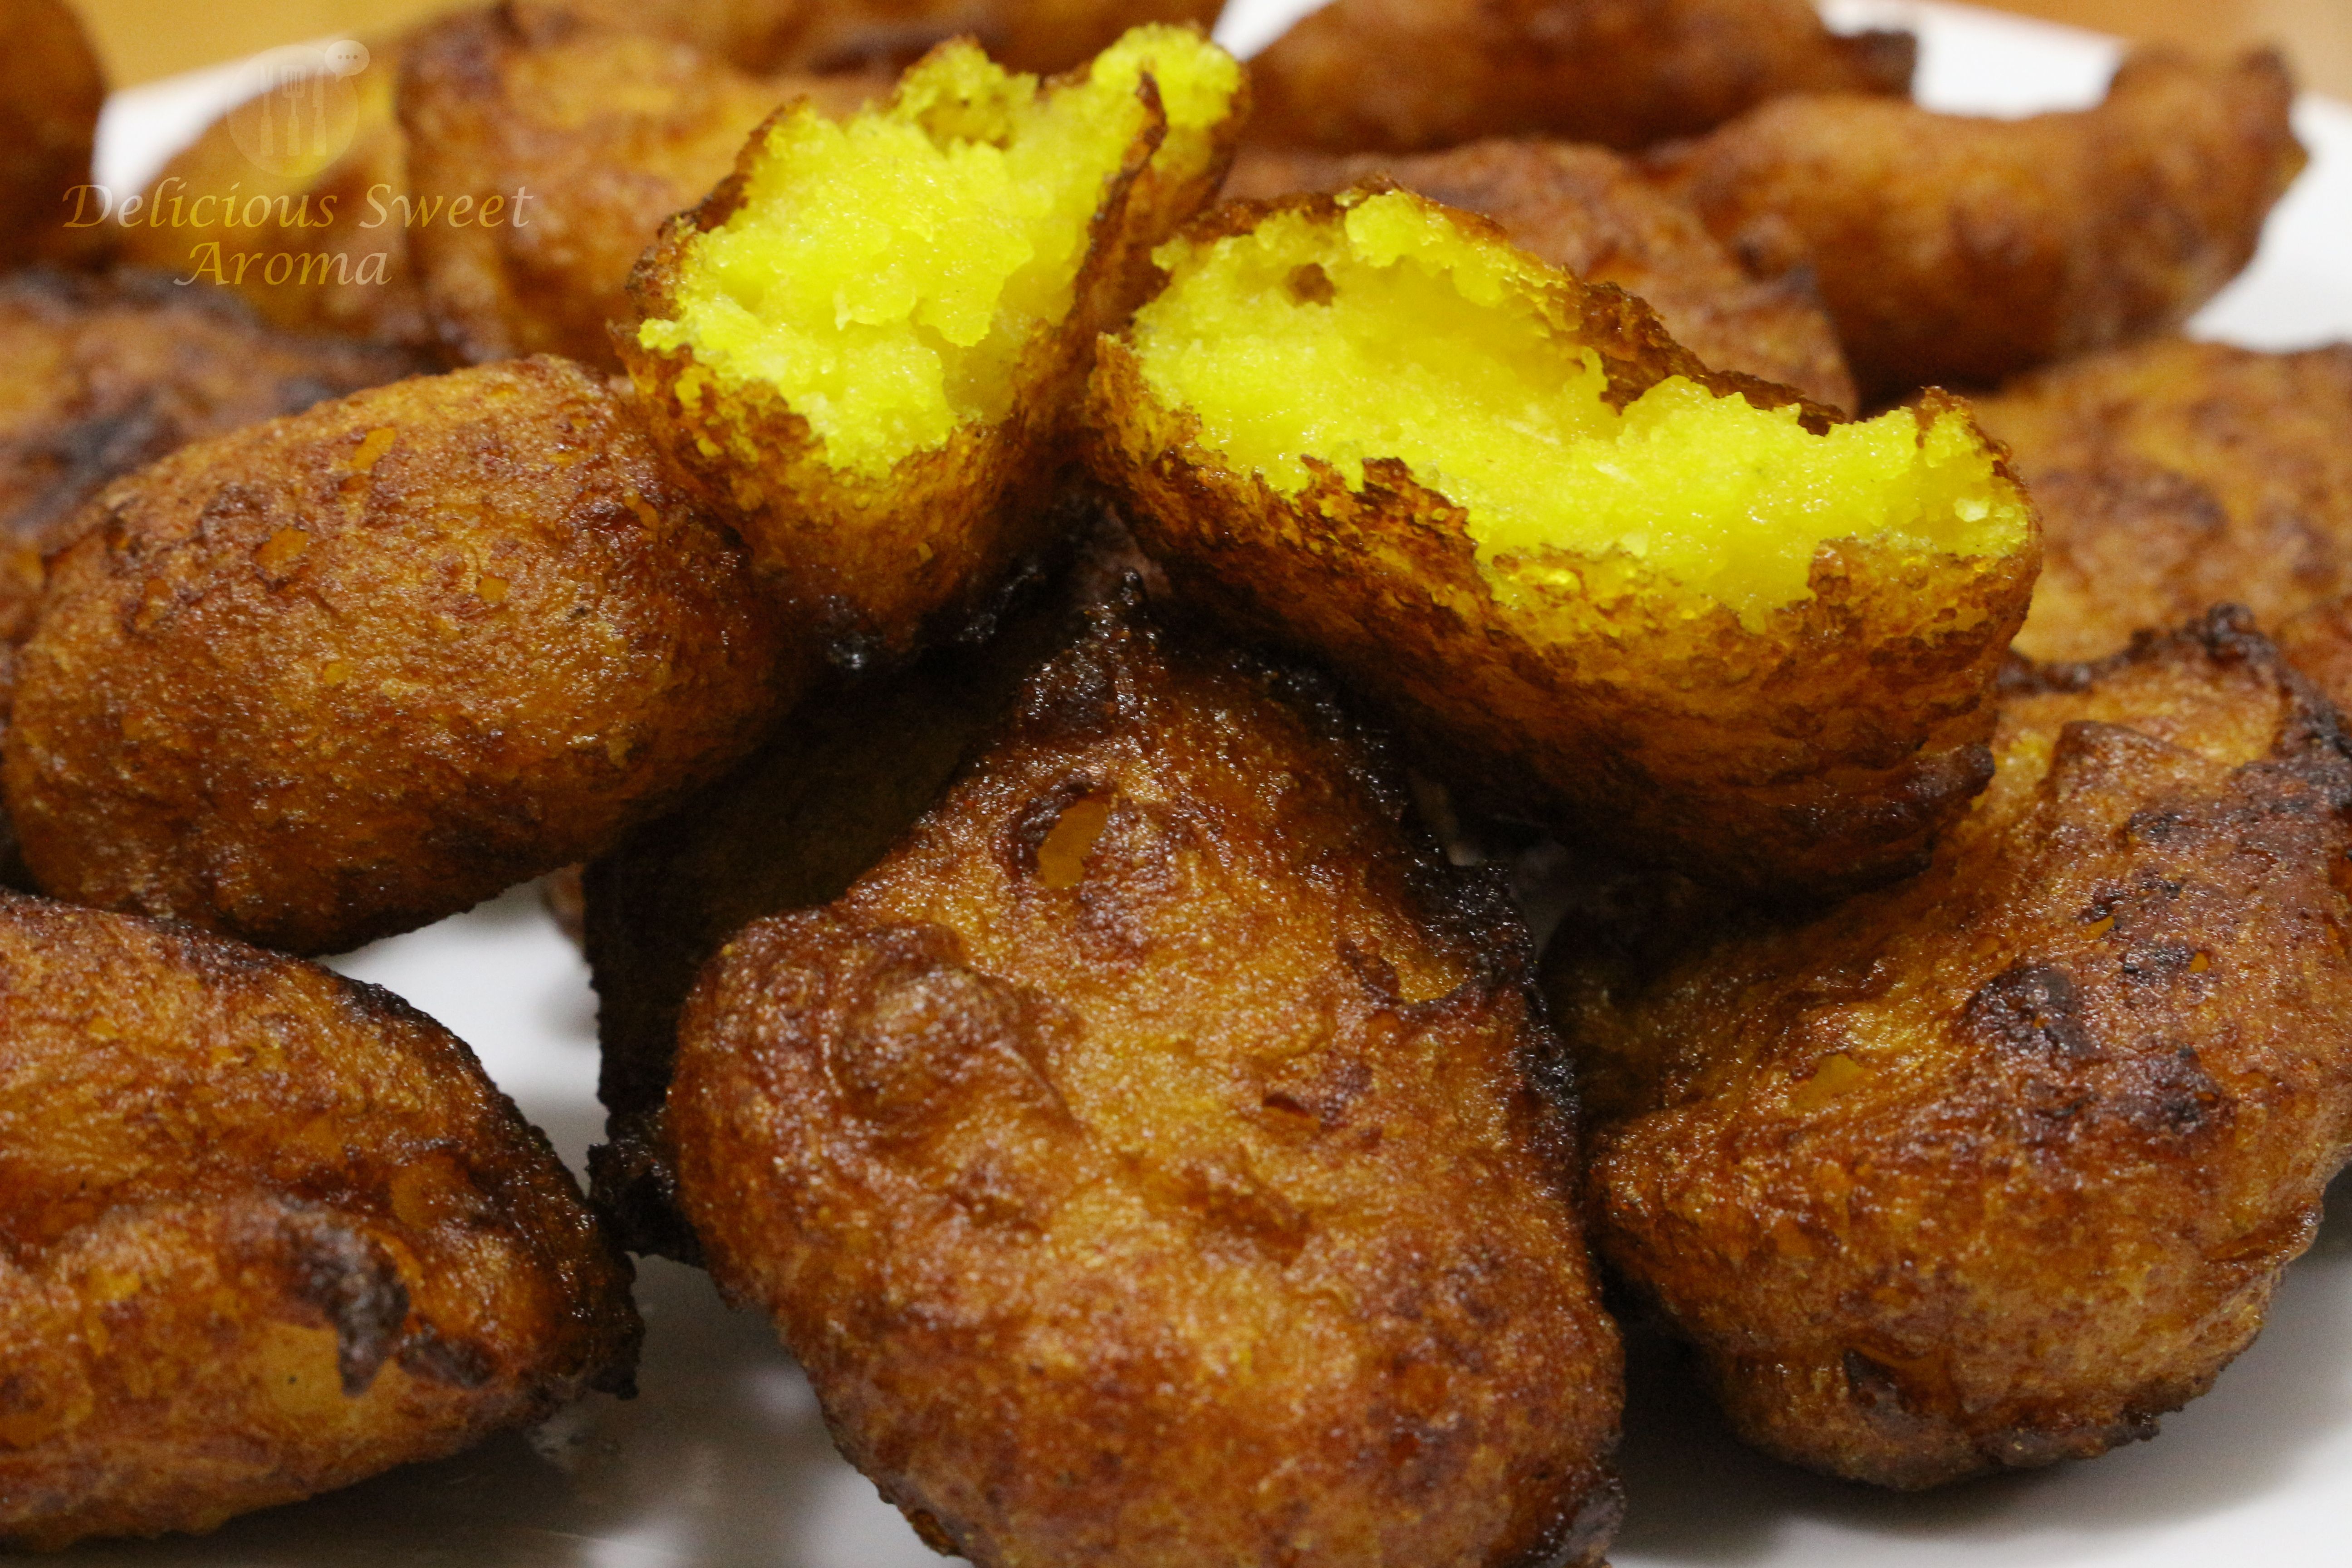
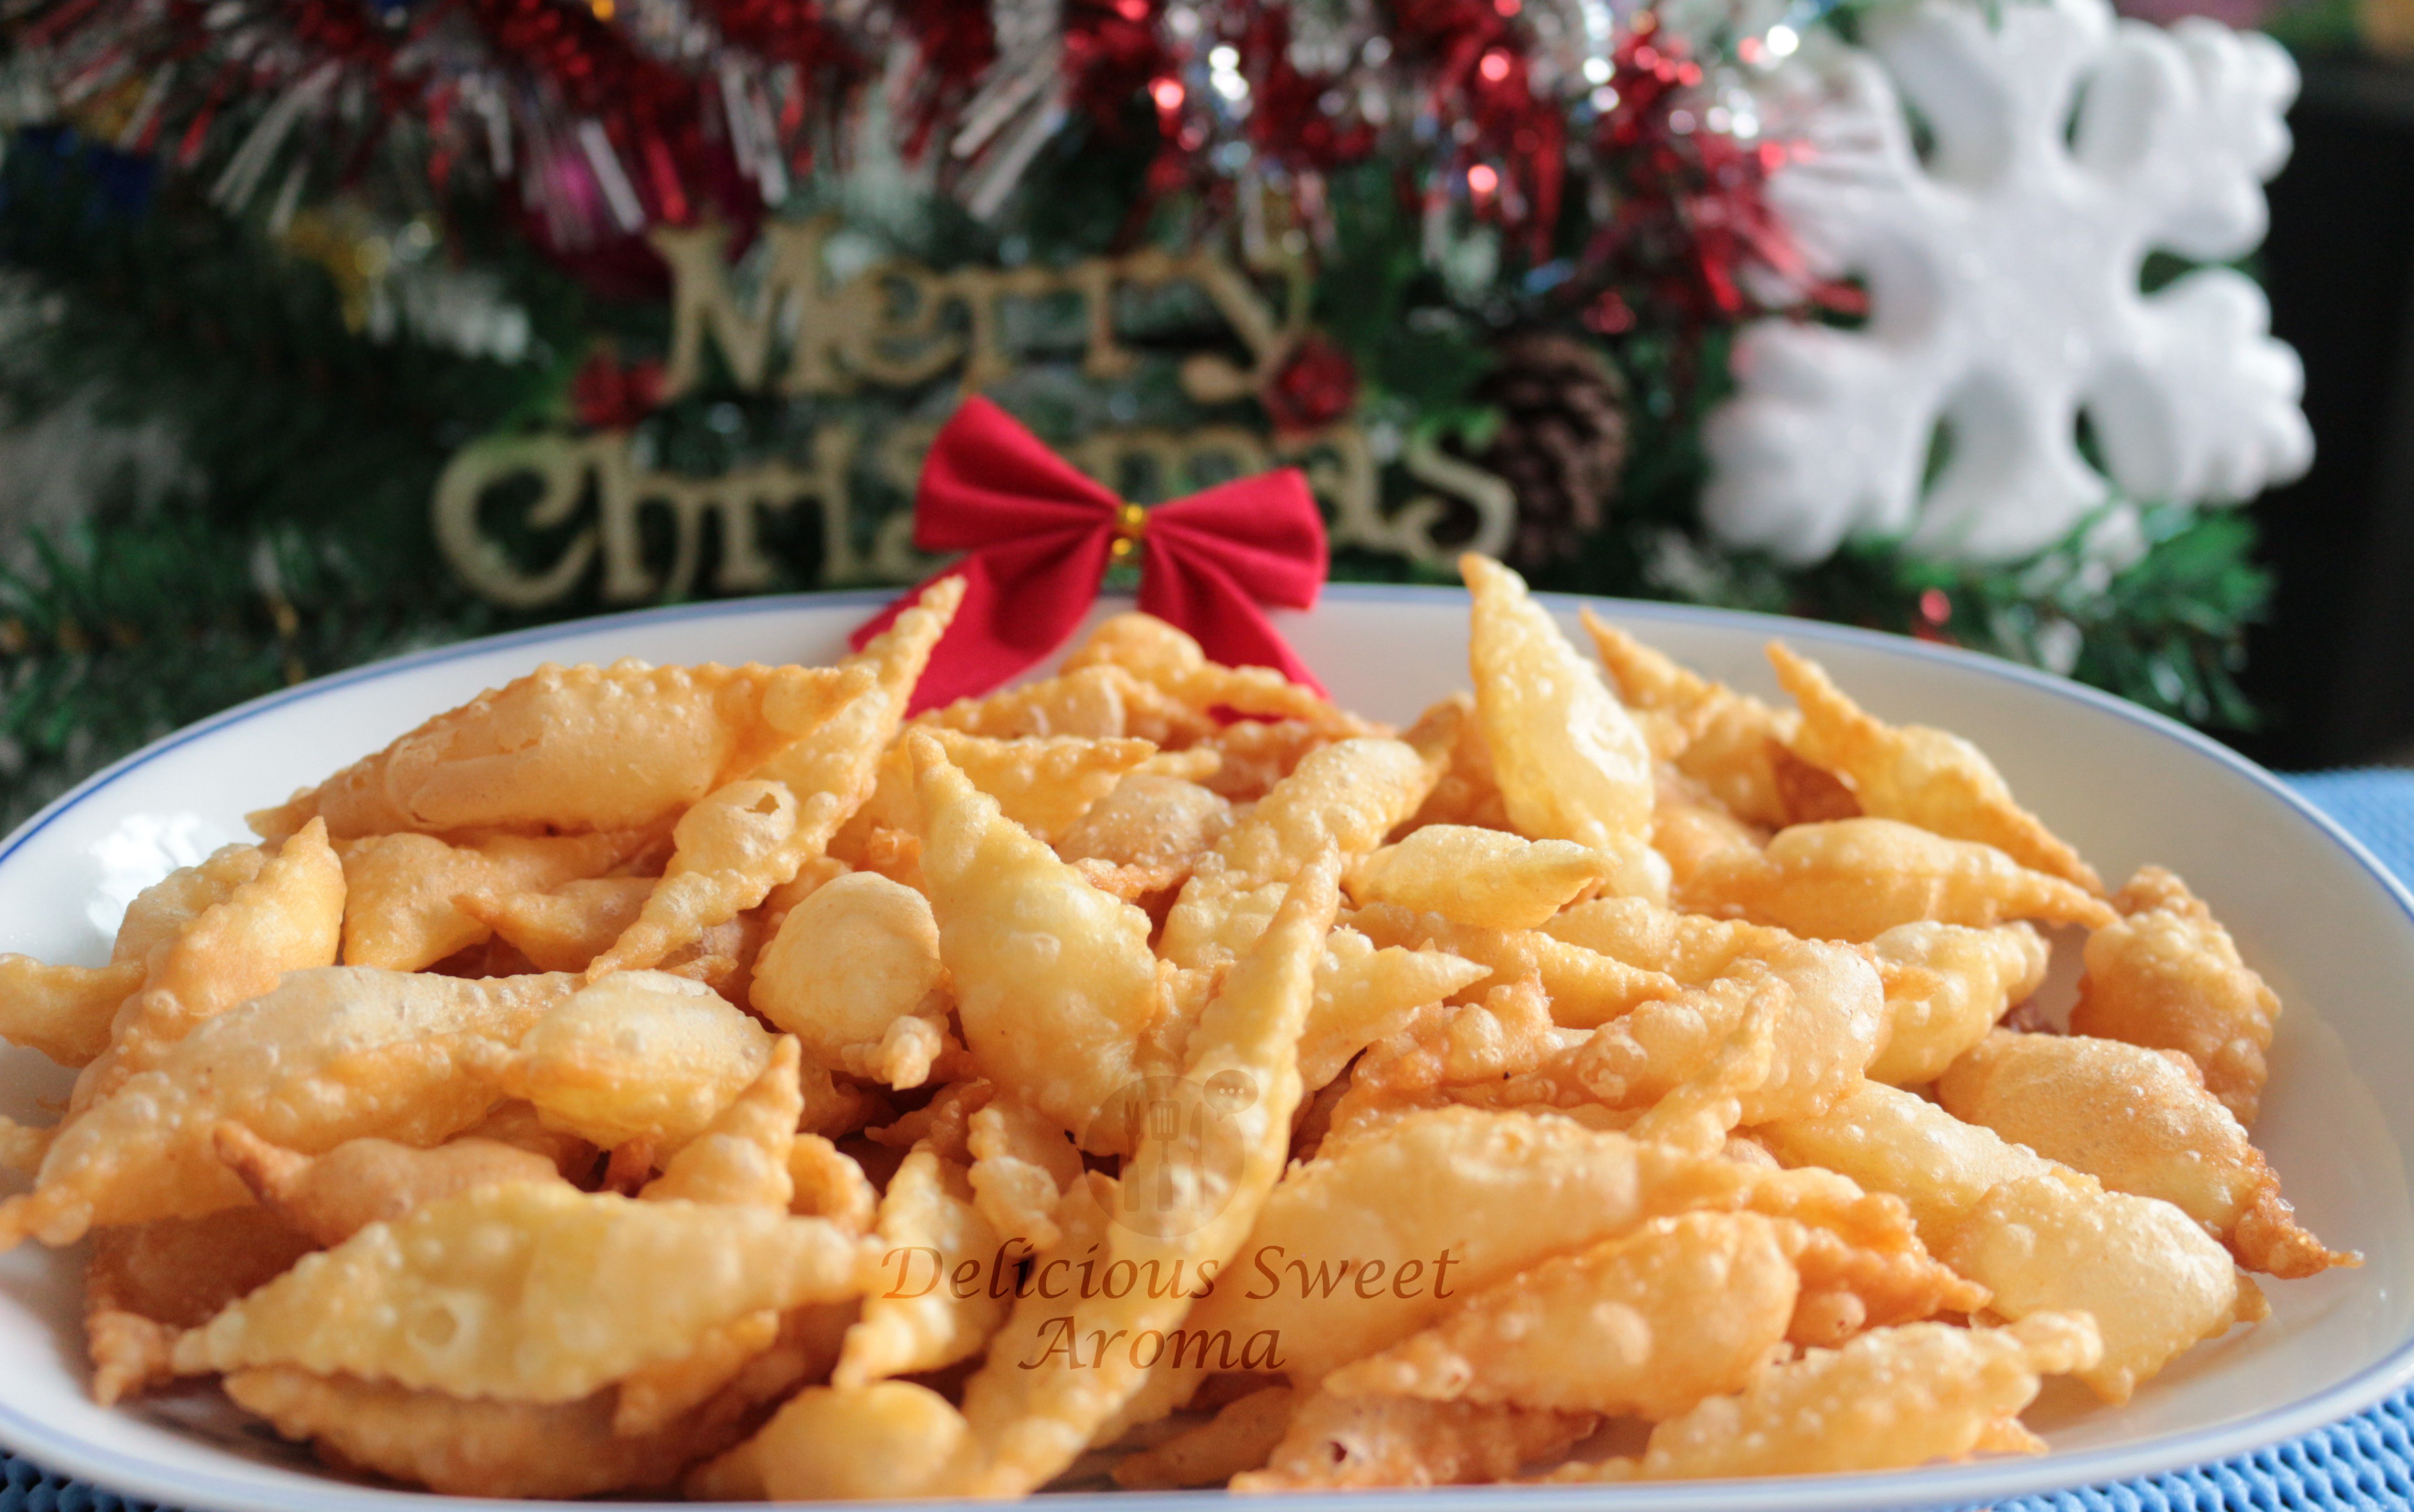
Diamond cuts or Tukdi (we call it in konkani at home) is a traditional snack. It’s still a favorite snack to munch on while at home. They are crunchy, fluffy and hollow. It is made in different varieties, sweet or biscuit flavored. I made a small batch of it and the recipe is very easy.

Have a joyous Christmas 🎄🎅

Preparation time: 1 hour

Cooking time: 30 mins

Utensil : Pizza cutter/biscuit cutter

Roller pin


Ingredients

Vegetable oil for deep frying

Unbleached All-purpose flour/Maida + extra for dusting – 250 g

Unsalted butter (soft)- 2 tbsp

Chickpea flour – 25 g

Salt – 1/3 tsp

Water – 1/2 cup or as required for the dough ( *EDIT), room temp


Directions

1. In a medium bowl, add all-purpose flour,  chickpea flour, salt, butter. Mix together with your hand. Add water in parts and knead until you get a soft elastic dough. It’ll tend to be sticky at the beginning, keep kneading until it becomes smooth.

ingred_IMG_5908

Step1_IMG_5912

2. Prepare a rolling surface, dust the surface with flour. Take a small portion of the dough and form a ball. Place it on rolling surface and sprinkle some flour again. This will help prevent sticking.

Step22_IMG_5941

Now, using a rolling pin, roll the dough thin (not too thin or thick).


3. Using a small biscuit roller/pizza cutter, cut the flour vertically with 1.5 cm spacing between each line. Then, cut them in horizontal direction that shape it into a diamond form.

vertical cut of doughhorizontal cuts

diamond cuts from dough

Carefully transfer them, by using a knife edge to slide them onto a flat plate without disrupting it’s shape.


4. After your done making diamond cuts. Heat a container with oil on medium-high heat (If your using induction, keep it on 7).

5. Drop a piece to check if the oil is hot. It’l start sizzling and bubbling. Slide the diamond cuts in oil in batches, not to over-crowd them. It will start puffing up. Stir them gently so they get separated. Let it fry for a minute or two, until golden brown.

tukdiyo, tukdi, diamond cuts


6. Strain them into paper towel. Pour the next batch until all are done deep-frying.

diamond cuts, snack


Mangaloran snack, christmas snack

Storage:

* Keep them in airtight container to retain the crispiness once they have completely cooled down.


For updates on posts and recipes to come please follow the Fb page >> Delicious Sweet Aroma


Note:

*While kneading the dough, if it tends to be sticky add some flour.

*Dust generous amount of all-purpose flour before running the biscuit roller otherwise they stick to the plate which will tend to loose its shape while sliding into hot oil.


More on Christmas Recipes:

Sweet Curls /Kidyo or Kulkuls

Rose Cookies – Mangalorean Kokisan (NEW)

Traditional Christmas Cake – Fruit Cake (NEW)


Stay healthy!


Read More

Kidyo or Kulkuls (Sweet Curls)

These are my first time actually making homemade Christmas goodies or snacks and it turned out pretty amazing.  I believe everyone celebrates Christmas differently. It’s my first Christmas with my husband and I thought of preparing these delicious snacks of crispy sweet curls we usually make at home with family, to get into the Christmas spirit.

Kidyo (Kul Kuls) in Konkani is a snack prepared as one of Christmas goodies (called Kuswar) in South-India, especially in my hometown Mangalore, during Christmas. Initially, you prepare a dough with flour, butter, salt and coconut milk, shape them into curls, deep-fry and then coat them with sugar-glaze. It is crunchy, hollow on the inside. Tastes delicious with or without the glaze. We have grown up helping my mom preparing them since childhood. Holiday treats are creative and takes a lot of effort, but it’s worth it.

I made an attempt to set a schedule to prepare it during the weekend, so my husband could help me with it as it gets done faster. More the people, the merrier it is. I made a small batch of sweet curls for just the two of us. They can be made using a fork or a medium sized comb with teeth. A fork gives a wider impression/mould and makes a smaller sized curls slightly different than a comb. I used a comb, since I was more comfortable with it and it looks more prettier with thinner striations.

Merry Christmas to you! 🎄Have a wonderful holiday.

Preparation time: 1- 1.5 hrs

Cooking time – 30 minutes

Quantity made for 2


Ingredients

Vegetable oil for deep frying

Fork / Comb with teeth (depending on the number of individuals)

All-purpose flour / Plain flour/ Maida – 500 g

Salt – 1/2 tsp

Butter – 2 tbsp, (softened at room temperature)

Coconut milk – 1 1/4 cup (or as required to make a smooth dough)

Coconut milk, salt, butter, four/maida for chris


For Sugar Glaze:

White Confectioner / powdered Sugar- 1/2 cup

Water – 1/4 cup


Directions

Making the dough:

1. In a large bowl, combine flour, salt, butter. Mix. Add in small quantities of coconut milk working it into the flour using your hands. Punch and knead the dough, until a soft elastic dough is formed. It will tend to be sticky at the beginning but as you work through it, the dough becomes less sticky.

dough for sweet kurls during Christmas

Cover your dough with a damp cloth or a lid so it doesn’t get dry.

Preparing the Kidyo: This can be done by using a fork or a medium sized comb. I used the traditional way by using a comb.

2. Prepare a working surface. Take a small portion of the dough.

dough for sweet curls

Roll it back and forth on working surface (or by placing in between the palm of your hand and roll it back and forth) applying gentle pressure to taper the dough on the outer edges. Repeat for the other end of the strand or the areas which are fatter than the rest.

dough

Using a small knife start cutting the strand into small bits of 1 cm thickness. making this gets easier and faster than removing bits  of dough directly from the large portion of dough, preventing from making unequal size of curls.

Step2a_


3. Holding a comb in hand, place the dough over the teeth of the comb (If your using a fork, place the dough on back of your fork). Press it and flatten it gently (step 2, picture) . With you thumb, roll it away from you (step 3,4,5 picture). While ending the curl (step5, picture) seal them so they don’t open while frying.

Repeat the same for the rest and place it on a large plate without sticking them to each other.

How to make kidyo /sweet curls from dough

When this strand of dough is almost done. Continue from point 2. Finish making the kidyo/curls, until atleast half of your dough left, before starting to fry them.

how to make kulkuls/kidyo


Deep Frying:

4. Heat a container with oil on medium-high. When the oil is hot enough (oil will start bubbling if it is hot enough) carefully drop a portion of kidyo/kulkuls, make sure not to over-crowd.

making kidyo and deep-frying


Stir them gently so they get separated. Let it fry, until golden brown, by stirring a couple of times in between (this might take approximately 5 minutes).

how to prepare kidyo/kulkuls/sweet curls for christmas


Strain them into paper towel. Pour the next batch until all are done.

Once they have all completely cooled down, transfer them into a sealed container or large zip-lock bags if you are gazing them the next day.


Sugar Glazing: They need not be glazed, based on personal choice. You can leave out the sweet glaze for a less sweet treat.

* Place sugar and water together in a cooking pot. 

how to sugar glaze

*Cook the sugar and water over high heat, stirring occasionally until the sugar is completely dissolved. bring this mixture to a boil.

* To check if it has turned into a glaze, drizzle few drops into a stainless steal spoon dipped into bowl of water. If it hardens. It’s done.

hot to sugar glaze

*Immediately, glaze the curls or kidyo in parts and mix as you pour the syrup to coat all the curls.

Christmas kuswar sugar glazing kidyo/kulkuls

* Let the kidyo/curls/kulkuls cool. The coated sugar glaze hardens by time.

how to make christmas kuswar or sweets

*Store them in airtight container.


Note:

*When glazing the kidyo, make sure the syrup is used immediately after it’s removed from the heat. Otherwise, it hardens quickly if left to cool at room temperature and will have to repeat the sugar glazing process. You can glaze half batch and leave the other half unglazed if you prefer non-sweet curls.

*Make sure to frequently agitate the curls when deep-frying to fry them evenly, until brown.


Stay healthy!


More on Christmas Recipes:

Diamond Cuts (Tukdi)


Read More

Jelly and Custard Recipe

A basic Jelly and Custard recipe is quiet simple dessert, even simpler when they have directions provided in a package. In fact, I had earlier posted a photo on my Facebook page without the recipe. I thought that the recipe is very basic. Anyone would be capable of making it. Nevertheless, I wanted to share the recipe that would absolutely impress anyone especially if your a beginner. So, if your on Facebook and have missed some of my posts make sure to check it out. Also, My Instagram page is very active. 🙂

Nowadays, I’m a decent from scratch cook when it comes to baking or even making desserts. Before making this dessert, I had to plan. I needed to decide whether to prepare the jelly first or the custard. I also had to organize my other chores. It’s very simple with less effort, mix it with fresh fruits or just eat plain. Not many think of eating plain I believe? You see a bowl of only Jello for a reason. I love eating plain raspberry or strawberry Jello just like that!


Preparation time: 10 minutes

Setting time: 1 – 2 hrs

Cooking time: 20 minutes


Ingredients

Muffin pan & 2 Dessert/Wine glasses for setting the jelly


For the jelly: I prepared this first and kept overnight in the fridge to set.

Jelly pack, raspberry flavor – 1 (90 g pack, used half the pack)

Water – 250 ml ( 125 ml hot water + 125 ml cold water)

Caster Sugar – 2 tbsp or more


For the Custard: The next day 

Custard powder – 4 tbsp (Bird’s custard powder, original flavor)

Cold milk – 900 ml

Caster sugar – 4 tbsp or more


Directions

Jelly

I used half the pack. The package comes with directions. Here is a more precise method I used for half pack jelly crystals. You can double the water content for whole pack.

1. Open the package.

Jelly pack

Heat a saucepan with 125 ml water. You can also use a microwave to heat the water. The container must be capable of filling 250 ml.

2. Pour half pack of jelly crystals (I didn’t measure) into hot water. Add 2 tbsp of sugar.

how to prepare jelly

Dissolve Jelly, stir it until it dissolves. Once dissolved mix the rest 125 ml of cold water.

3. Prepare the muffin pan by spreading a long towel over it.

Start by positioning the glass. Rest its base over a long towel at a 45 degree angle. This ensures it doesn’t slip. Roll the opposite corner of the towel to support the rim as seen below. Now, remove the glasses without moving the tray & pour the jelly halfway.

Put them back onto the tray. Place them in the refrigerator at the top of the shelf for 1 hour. Keep them there until they are set. They will set perfectly as long as they are not disturbed. I left it overnight in the fridge.

How to make layered jelly & Cus


Custard

1. Take any cup filled with 1/2 cup cold milk taken from 900 ml of milk. Add 4 tbsp of custard powder with 4 tbsp sugar.

Custard mixture

2. Mix smoothly until dissolved. In the meantime, place the rest of the milk in a saucepan to heat.

3. When nearly boiling. remove from heat, pour the mixed custard to milk, stir well.

Custard mixing into hot milk

4. Return the custard to heat and bring to boil, stirring continuously. Let it cool.

Preparing custard

Pour the custard into the set jelly glass. Place it back in the fridge and serve when ready.

Layered Jelly & Custard

Rest of the custard I mixed it with different fruits like papaya, apple, banana and served cold. You can serve warm or chilled.

Enjoy the creamy custard with jelly!

Custard with mixed fruits


Stay Healthy!


Note:

*Half pack of Jello is good enough to fill the glasses. The rest of the pack I used to eat plain 🙂


Read More

Banana Cream Shake

It’s been a while since my last post, but now I’m back. Well, I have been learning to bake and the best way I learn – Bake it yourself! Cooking is fun but sometimes it’s like a laboratory measuring, testing etc. That requires a lot of patience!

So, yesterday I thought of making a refreshing drink. The best part is it requires very little effort and time. All it takes is a few ingredients, blend it together and top with a dollop of homemade whipped cream. While the Greek yogurt adds protein, its creamy and tasty. This is my first topping on a drink and it got me instantly excited. It tasted great! Not too sweet which I always enjoy.

TGIF everyone!

Preparation time: 10 minutes

Serves: 2

Appliance needed: Electric Blender, Hand mixer

Ingredients

Banana – 2 medium

Greek yogurt – 3/4 cup, (I used farmers union Greek yogurt)

Cold milk – 1 cup

Vanilla essence – 1/2 tsp

Ice cubes as required


For the whipped cream

Whipping cream – 1/2 cup (keep this in the fridge until you’re ready to use)

Powder Sugar – 1 tbsp (Icing sugar will do)

Whipping cream to make whipped cream topping on banana shake

Directions

1. In a blender, mix banana, yogurt, milk, vanilla essence, ice. Blend until smooth.

Banana shake in a blender later topped with whipped cream

2. Remove the whipping cream from the refrigerator. Using a hand mixer whip the cream in a bowl (you can also use your hand to whip: use very very cold cream with a nice whisk).

step2_img_5355

3. Begin whipping initially on low speed at 1 and gradually increase to higher speed. In 2 – 3 minutes time it will form soft peaks.

Whipped cream- homemade for banana cream shake

4. Divide the shake between 2 glasses.

Scoop a tablespoon full of the whipped cream and top the banana shake. Top with nutella or any chocolate syrup desired. Enjoy!


Stay Healthy!


Notes

*I prefer less sweet. You can add more sugar if required.

*You can combine ice cream for more creamy flavor and use almond milk instead of plain milk.

Read More

Pork Wonton Soup Recipe

Preparation time: 15 minutes

Cooking time: 25 minutes

Serves: 4

It’s lovely exploring different cultures through food especially the Chinese food. I like Chinese food a lot and we have a lot of restaurants here that provide incredible food. Chinese wontons are commonly served which made me plan on making them at home as I was curious on how it would turn out.

Did you know that there is a difference between a wonton and a dumpling? I always thought they were the same! As I did some research I got to know the difference. A wonton skin is thinner than dumpling. It has a filling of pork or sometimes shrimp which is boiled and served as a soup whereas a dumpling is steamed, sometimes served with or without soup.

Finding a wanton wrapper was easy for me. At the grocery store it was available in the refrigerator section. If you have trouble finding them at your local grocery store look into the Asian/Chinese stores. They are found in round and square shapes mostly frozen I believe. I used the square wanton wrapper to give a desired shape while filling it with pork mince. Check out the video below if you like to know how to make wantons or dumpling in a creative way if you have the time. Until my next post, have a fabulous week!

Ingredients

Corn flour – 1 tbsp

Chicken stock cube – half

Oyster sauce – 1 tbsp

Spring onions & pepper powder for garnish

For the wonton filling:

Wonton pastry – 20 wrappers

Minced pork – 200 g

Spring Onions – 15 g

Ginger-Garlic paste – 1/2 tsp

Egg – 1

Garam masala powder- 1 tsp (optional)

Water / egg yolk for sealing the pastry

Salt

Directions

1. Add all the ingredients for wonton filling and mix together. Keep water in bowl to seal them (you can even use egg yolk) .Make the dumplings as shown in video.

2. In a pot filled with 2 cups boiling water add the rest of the remaining pork mince and cook for 10 mins on medium or until it boils.

remaining minced pork added to boiling water

3. In a small bowl containing 2 tbsp hot water ( I used 2 tbsp of soup), stir in the corn flour until no lumps are found. Also mix in the chicken stock cube. Add this to the pot. Add 1 more cup of water.

Corn flour

4. Carefully drop the wontons one-by-one into the pot. Add garlic. Take a tablespoon of oyster sauce and stir in lightly (you can also add the sauce before dropping the wontons).

Let it cook on low heat for 5 – 10 minutes or until it starts boiling.

wontons ready to cook

pork wontons droppped into the cooking pot with garlic

Oyster sauce

5. Garnish with spring onions and pepper powder. Serve hot.

Pork Wonton

Pork wontons soup garnished with spring onion

Note:

* If you have the wonton wrapper in the freezer. Place it in the refrigerator section for an hour or two before making the wontons. If you plan to make it right away keep it out in a warm area so it gets easier to remove the wrapper skin easily.


Stay Healthy!

Read More

Easy Cheese Pasta with Chicken Ghee Roast

Sometimes you get lazy and want to just relax. Times when you want to minimize kitchen time but still have a delicious dinner.

I loved this easy recipe of melted cheese mixed with pasta served with chicken ghee roast. Chicken Ghee Roast is a mouthwatering, spicy and highly aromatic recipe famous in South-Indian cuisine. I got a pack of chicken ghee roast powder when I visited India and it comes in handy when my taste buds feel the desperation of eating something fried.

It is a delicious dinner for two. A quick, easy recipe when you want something spicy to go with pasta. It’s a huge hit with my husband especially for a first try, win-win!

Preparation time: 5 minutes

Cooking time: 25 minutes

Ingredients

Spiral pasta – 1 cup (180 g), can use other variety of pasta

Butter – 3 tbsp

Cheddar cheese slices – 3 or more depending on the how cheesy you want

Mustard Sauce – 1 tsp

Dried herbs – 1 tsp

Tomato ketchup as required for pasta (optional based on taste)

Chicken Thighs – 2 large, cut into small pieces

Ghee – 3 tbsp

For Chicken Marinade:

+ Combine the following:

Yogurt – 2 tbsp

Salt – 1 tsp

Turmeric – 1/2 tsp

Ginger-Garlic paste – 2 tsp


+ Marinate the chicken pieces with the marinade. Place it in a zip-lock plastic bag for 4 hours or overnight.

marinated chicken with ginger-garlic paste, turmeric, salt and yogurt


For the Chicken Ghee roast paste (skip this step if you have a Ghee roast powder and follow the instructions on the pack)

+ Combine the following:

Chili powder/red chili paste – 2 tbsp (based on the spice level)

Cumin powder/jeera – 1 tsp

Garlic powder/paste – 1 tbsp

Natural spices / Mixed spices – 1 tsp

Salt -1/2 tsp

ghee roast marinade of chili powder, Cumin, Garlic, Natural spices and salt


Directions

Pasta

1. Fill a container with 3 cups of water, 1 tsp salt and 1 tbsp olive oil, get water to boil. Add pasta (In the meantime prepare for Ghee roast). Cook [pasta until done. Using a strainer, drain the pasta. Set it aside in a plate.

To check if it is done, taste and see for non-sticky soft texture.

Spiral Pasta in boiling water with salt and olive oil


2. Heat 3 tbsp butter in the same container on low heat. Add the pieces of cheese, mustard sauce and herbs. Mix until the cheese melts.

melted butter in cheddar cheese

mustard sauce

Melted Cheddar cheese, butter, mustard sauce and herbs


3. Toss in the pasta and mix well (prepare this one low heat without burning).


Chicken Ghee Roast


1. Heat a frying pan with 2 tbsp of ghee. Add the paste of ghee roast. Fry for a 2-3 minutes until the spices blend well.

Ghee

Chicken ghee roast marinade

Paste for ghee roast


2. Add chicken pieces. Fry one one side for a minute or two. Flip the side and coat the other sides with the spices.

chicken pieces for ghee roast

chicken ghee roast on frying pan

3. Cover and cook on medium heat for 10 minutes.

Remove the lid and flip the sides every few minutes without the lid until the sides are nicely coated with the spices for 5-7 more minutes.

Cheese pasta with fiery chicken ghee roast is  ready. If you want your pasta fiery hot mix the ghee roast spice paste.

Easy Cheese Pasta with Chicken Ghee Roast


Stay Healthy!


Read More

Butter Biscuits

I love biscuits that are very light flavored, so I thought of baking something easy like the butter biscuit. I had this at Texas Chicken and I loved the idea of making it on my own. This recipe is similar to the recipe I found in allrecipes.com of Kentucky biscuits but I made some adjustments in the ingredients.

Preparation time: 15 minutes

Cooking time: 15 minutes

Makes: 13

Ingredients

Parchment paper for lining the tray

Top flour/Cake flour/Self raising flour – 2 cups

Baking powder – 1 tbsp

Cream of tartar – 3/4 tsp (see notes for a substitute)

Unsalted butter (solid cubes) or vegetable shortening – 1/2 cup, 4 oz


Milk – 2/3 cup

Sugar – 3 tsp

Salt – 1/2 tsp


For Brushing the biscuits:

Melted unsalted butter – 1/8 cup or 2 tbsp

Honey – 1/3 cup

melted butter and honey mixture for brushing the butter biscuits


Directions

1. Preheat oven at 200 degree Celsius. Coat a 12”x 8” (can use a bigger size) rectangular tray with butter and line with parchment paper. Grease the paper lightly with butter.

2. In medium bowl add the sifted flour, baking powder, solid butter cubes, salt and cream of tartar. Mix with your hands until crumbly.

preparing the mixture of flour, baking powder, salt, sugar and butter

3. Pour milk and knead to make a dough by pushing the dough down and out until it gets less sticky for 5 minutes.

dough for butter biscuit

4. Scoop out the dough by tablespoons and roll into balls. Space the balls 11/2 inches apart on baking sheet. Brush the balls with the melted butter and honey mixture.

balls of dough for butter biscuit

5. Place the tray in the center of the oven and bake at 200 degrees Celsius for 10 – 15 minutes.

6. Bake until golden brown or until puffy. Remove the tray out of the oven and brush again with melted butter and honey.

Fresh butter biscuit from the oven

Butter Biscuit


Note:

*If you do not have cream of tartar just substitute fresh lemon juice or white vinegar.


Stay Healthy!

Read More

Jackfruit Fritters (Mangalorean Cuisine)

Jackfruit  is an exotic produce popularly found in South India. If you haven’t heard of this fruit before, you sure must be wondering what in the world is that and how does it look like?  Unfortunately, I do not have a picture of the whole jackfruit to share but will surely post it here when I do. It is extremely delicious, sweet and chewy. I have known of 2 varieties: One variety has a harder flesh with crunchiness. The other variety is very soft, stringy, juicy and slips easily through your fingers as you hold them. One can just swallow without biting.

I grew up in my native with these 2 varieties of Jackfruit trees in my granny’s yard. We rarely ate the softer jackfruits during those days. We used to just sit down for lunch with a big jackfruit and eat it until we became full.  My granny and mom are experts in cutting open a Jackfruit and it is a laborious one as it gets very messy because of its sticky white fluid that oozes from its core. To cut it,  a traditional Mangalorean Implement  called ”Adalo” in Konkani, which is a small stool that is attached to a sickle at one narrow end, is commonly used to cut big fruits or vegetables that would be usually hard to cut with a hand held knife.

I prepared Jackfruit Fritters (also called as Ponsache Gariyo in Konkani) from rice grains, a traditional way my mom used to make during the season of jackfruits. Also, make sure to check out my previous post on Banana fritters in case you haven’t which can be prepared using flour. Jackfruit fritters are brown and crispy on the outside. The inside is yellow and soft, full of fruity sweet flavor. You can double the ingredients for more fritters.

Preparation time: 15 minutes

Cooking time: 20 minutes

Makes: 15 – 20

Ingredients

Raw rice/white small grain + dosa/idli rice or Surai – 1/4 cup (mixed together in equal proportion)

Jackfruit – 280 g / 10 bulbs

Cardamom pod – 1, seeds to be used

Grated Coconut – 2 tbsp

Jaggery cubes – 50g, powdered (for sweetness as required)

Pinch of Salt

Vegetable oil for deep frying

Directions

1. Soak the raw rice and dosa rice mixed together covered in water for 2 hours.

Raw rice, ponni rice

Raw rice

idli rice, surai

Idli rice or Surai

2.Remove the seeds from the jackfruit bulbs.

jackfruit

Place the jaggery cubes in a zip lock bag and pound them to fine powder.

jaggery cubes

jaggery mash

3. Combine the rice, jackfruit, cardamom seeds and puree in a blender until smooth.

Jacfruit

Jacfruit batter

4. Transfer the puree to a mixing bowl. Add coconut, jaggery, salt and mix until well combined.

coconut

palm sugar, jaggery

2. Heat oil in wok on medium heat. To test if the oil is hot enough, drop a pinch of batter. If it bubbles around then its hot enough.

oil

Now, drop in a tablespoon of batter. Cook several at a time, but do not overcrowd the wok or the temperature of the oil will be lowered. Flip the them after it turns slightly brown until it turns golden brown let it cook. Lower the heat and drain on kitchen paper.

Serve warm

Jacfruit Fritters

Jacfruit Fritters

Stay Healthy!

Read More

Spicy Chicken Recipe

This Spicy Chicken recipe uses a hot chili pepper called “chili padi” (bird’s eye chili) commonly used in the Malaysian Cuisine. It is also called as Kung Pao Chicken, a spicy stir-fry dish made with chicken, peanuts,vegetables and chili peppers.

Preparation: 10 minutes

Cooking time: 15 – 20 minutes

Ingredients

Chicken – 250 g, cut into 1 inch cubes or smaller

Egg white – 1

Ginger-Garlic paste – 1/2 tsp

Peanuts – 20 g

Garlic – 2 cloves, minced

Red chili padi- 2, chopped

Cucumber – 1, chopped into 1 inch size

Chili powder – 1 tsp

Sesame Oil – 1 tbsp (optional)


For the sauce

Chicken stock – 1/2 inch cube

Soya sauce – 3 tbsp

Sugar – 1/2 tbsp

Corn-starch powder – 1 tbsp

Water – 1/2 cup


Directions

1. Prepare the ingredients and the sauce. Marinate the chicken with egg white, ginger-garlic paste, mix and set side for 15-20 minutes.

chickeb, ginger-garlic paste

Heat the wok with 1 tbsp oil and fry the peanuts for 2-3 minutes. Set it aside on a plate.

peanuts


2. Using the same wok with oil. Add garlic and red chili. Fry for half a minute until you get the fragrant smell of garlic. 

garlic, chili padi

3. Add the chicken cubes, stir, then add the sauce. Stir fry until cooked. 

chicken

chicken, stock


4. Add the cucumber, 1 tsp chili powder, sesame oil and peanuts. Mix and cook for 1 minute.

cucumber, chili powder

chicken., peanuts

Can be served as a side.

Spicy Chicken


Note:

*The smaller the pieces of chicken the better.

*Step 4: I cooked the chicken for 15 minutes as I used a stainless steel wok. If you’re using a non-stick stir-fry pan, you just need to stir-fry until cooked.

*Red chili padi is very hot. If you want it mild hot or less, remove the seeds before frying.


Read More

Prawn Fried Rice Recipe

A quick and easy one pot rice recipe is the Fried Rice. I picked up this recipe from my sis-in-law back then when I used to visit them in a countryside. This is almost exactly her recipe.

It is a great way to use left over rice or prepare it quickly for many servings.

Preparation time: 15 minutes

Cooking time: 20 minutes (plus cooking rice 20 mins)

Ingredients

Oil – Vegetable/Olive

Vegetables:

Green bell pepper – 1

Red bell pepper – 1

Green beans – 1/2 cup

Carrots – 1/2 cup


For the rice:

Cooked rice – 1 cup, (I used freshly cooked rice, you can also use left-over rice)

Ground black pepper – 1 tsp

Sweet chili sauce – 2 tbsp

Chicken stock – 1 cube, mixed in warm water

Spring onion – 1/2 cup, chopped

Prawns – 1 cup, whole or halved (I cut them into halves)

pepper powder  – pinch (for prawn)

Red chili powder – pinch (for prawn)

Egg – 2, lightly beaten with addition of a pinch of salt

Salt


Directions

1. Cut the ingredients into uniform size for an easy stir-fry. Set them aside.

bell-pepper

green beans, carrots

prawns


2. Heat a wok or deep pan with 1 tsp of oil.Swirl the pan to coat the pan evenly. To determine the wok is hot enough flick droplets of water, they will evaporate in a matter of seconds (make sure not to overheat). Now, its ready to stir-fry the ingredients.


3. Stir Fry:

Add the beaten eggs, stir-fry and scramble using a wooden spatula for 1- 2 minutes. Transfer it on a large plate.

eggs

Then add the carrots and green beans. Fry till tender crisp, for couple of minutes (I fried this separately as it takes longer time to be crispy-tender). Transfer into the same plate containing eggs.

Then, stir-fry peppers until tender crisp. Transfer to the plate.

Do the same for prawns, add 1/4 tsp salt, pepper powder, red chili powder, stir-fry on high till it turns slightly brown. Set it aside in the plate.

prawn stir-fry

Prawn stir-fry

prawn, bell-pepper, green beans, carrots, egg

Stir-fry mixture

4. Heat the wok with 1 tbsp oil, set it on low heat. Add a little portion of the above stir-fry mixture and a slight portion of  cooked rice,  1 tbsp sweet chili sauce,  add half of  the stock . Mix lightly.

.white rice

Chicken stock


Then with rest of stir-fried mixture, rest of the rice add remaining stock . Mix to combine everything. 

Fried Rice

Garnish with spring onion.

fig5_img_2501


5. Serve hot. Can be served with sweet chili sauce.

Fried Rice


Note:

*For left over cold rice, add 1 tbsp oil, stir through to split the rice grains for a couple of minutes until heated. Add the stir-fried mixture and follow the steps as mentioned ion step 4.

*If you do not have let over rice. Prepare an hour in advance and spread it over a pan or refrigerate to cool faster.


Stay Healthy!

Read More