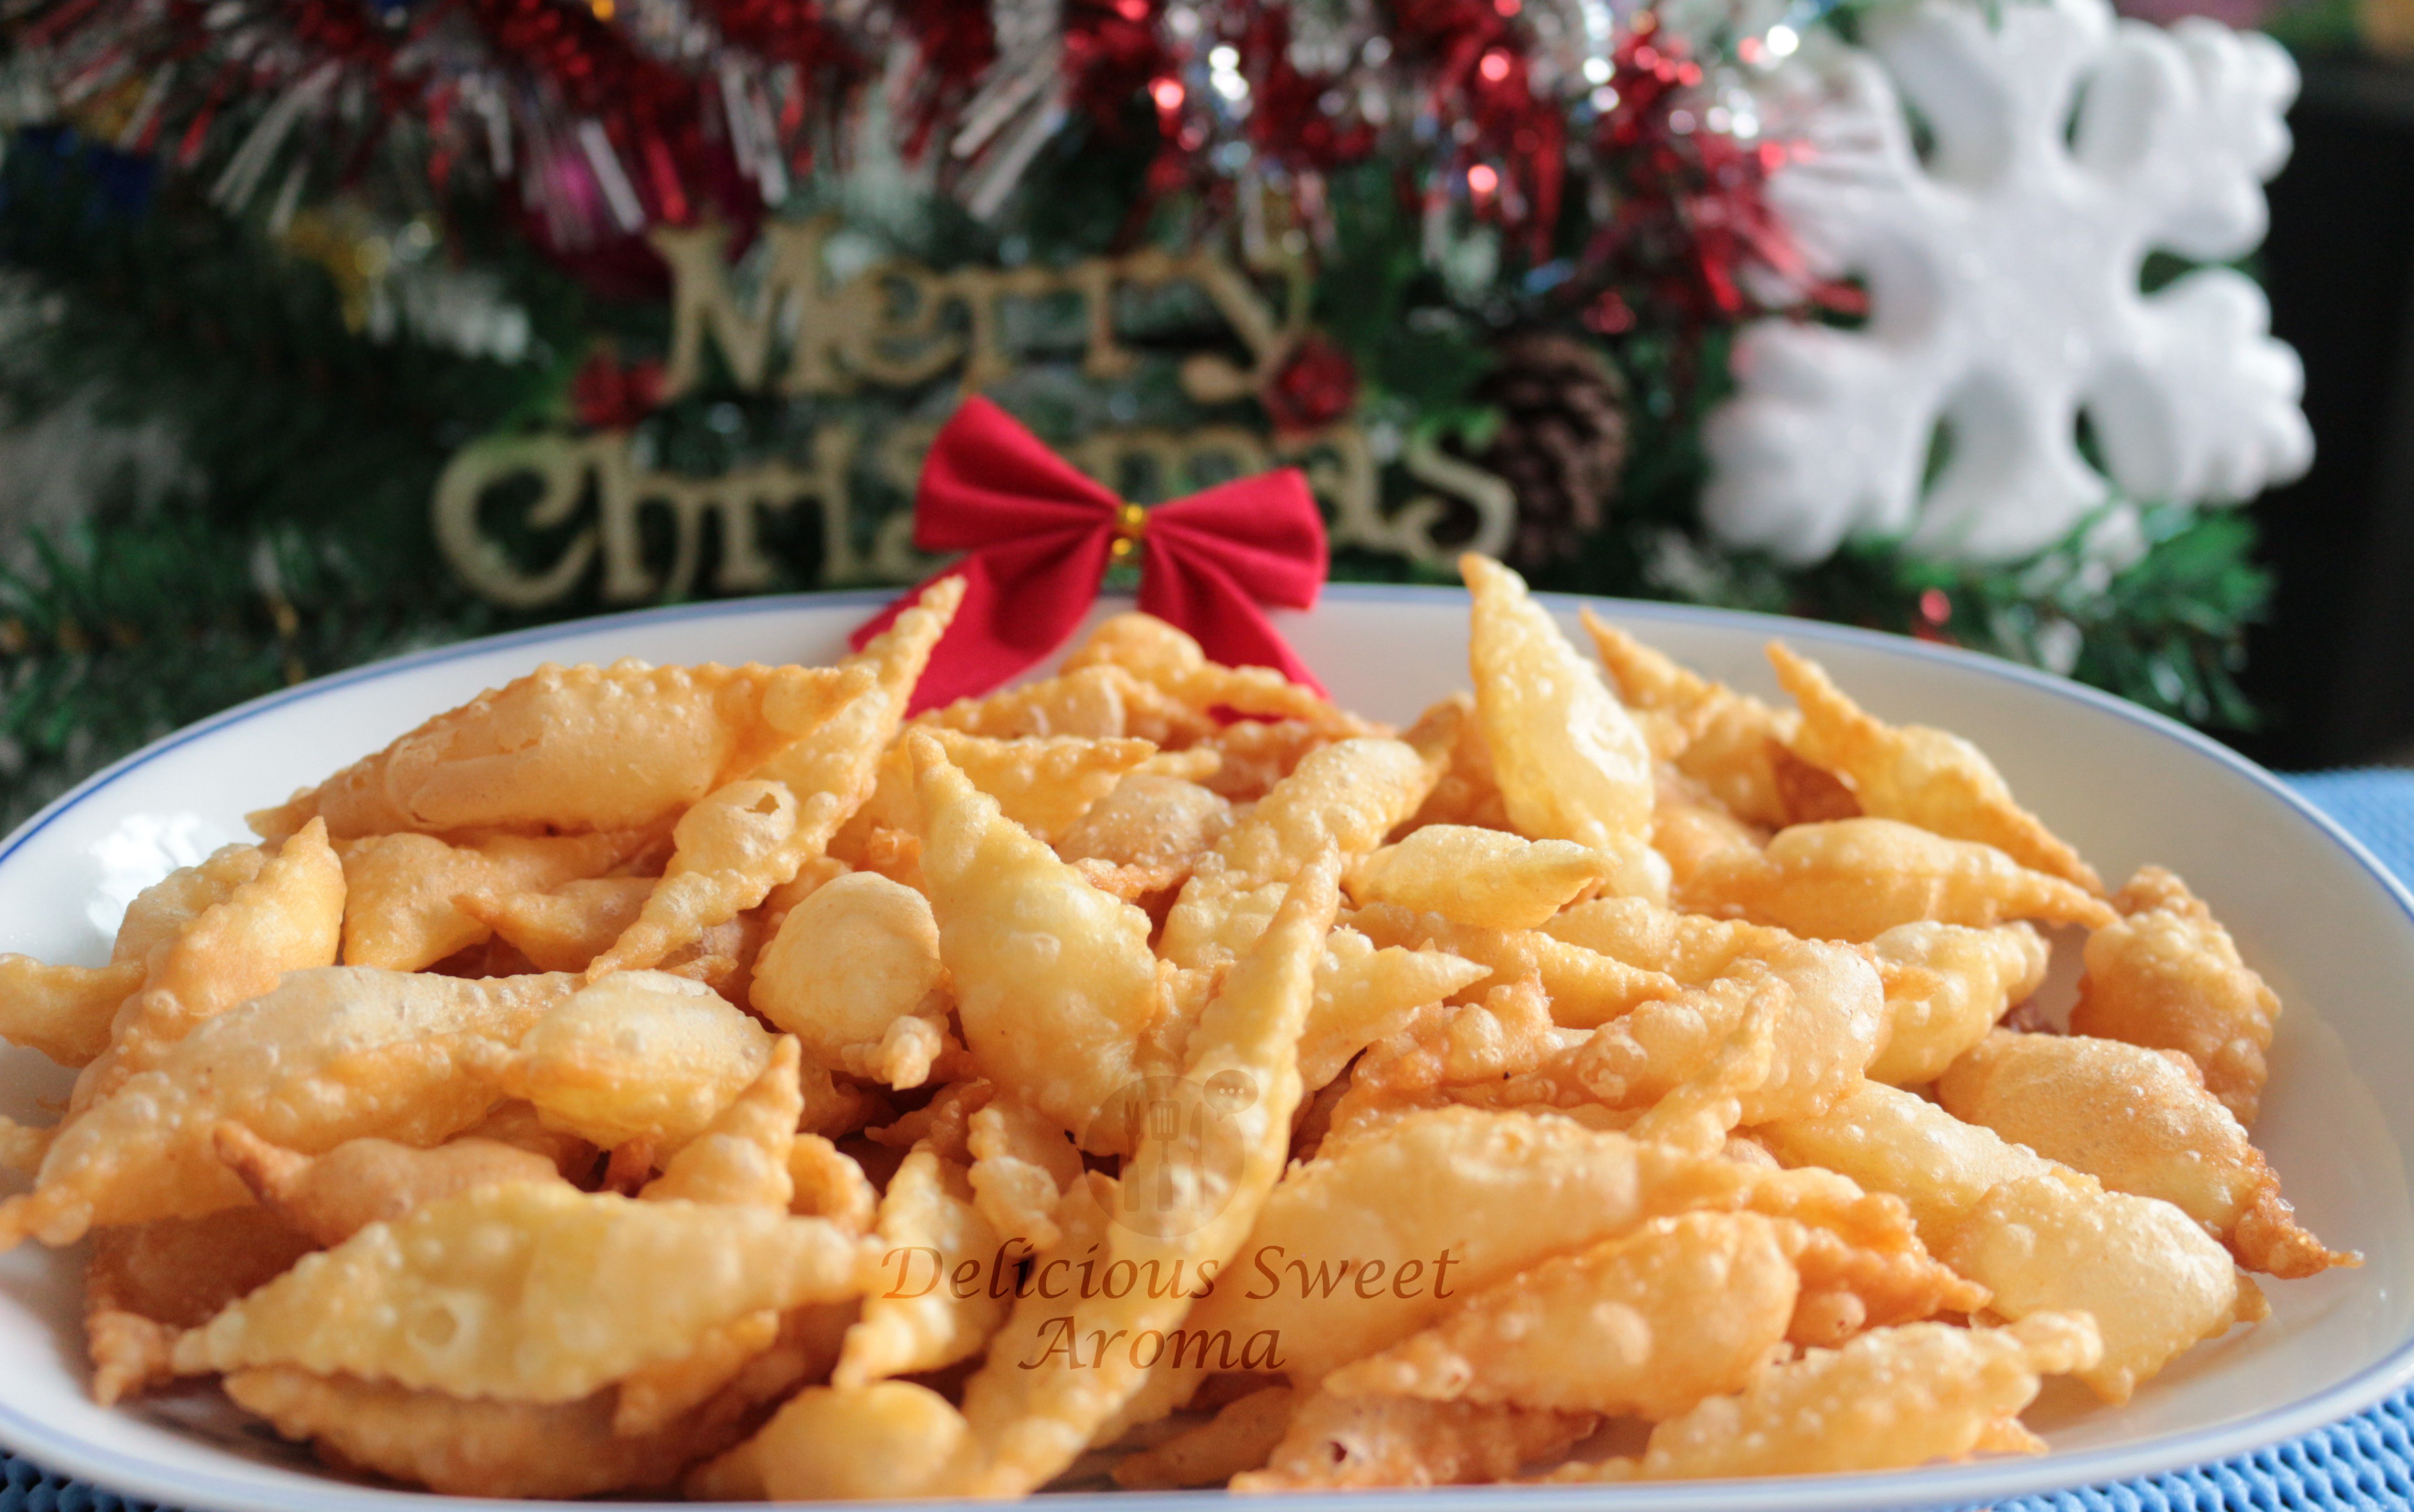
Tag: Snacks

Rose Cookies – Mangalorean Kokkisan

Crispy treat of rose cookies are traditionally prepared before new year in South-Indian Christian households are always available in Mangalore supermarkets during Christmas with varieties of other crispy and savory Christmas snacks.

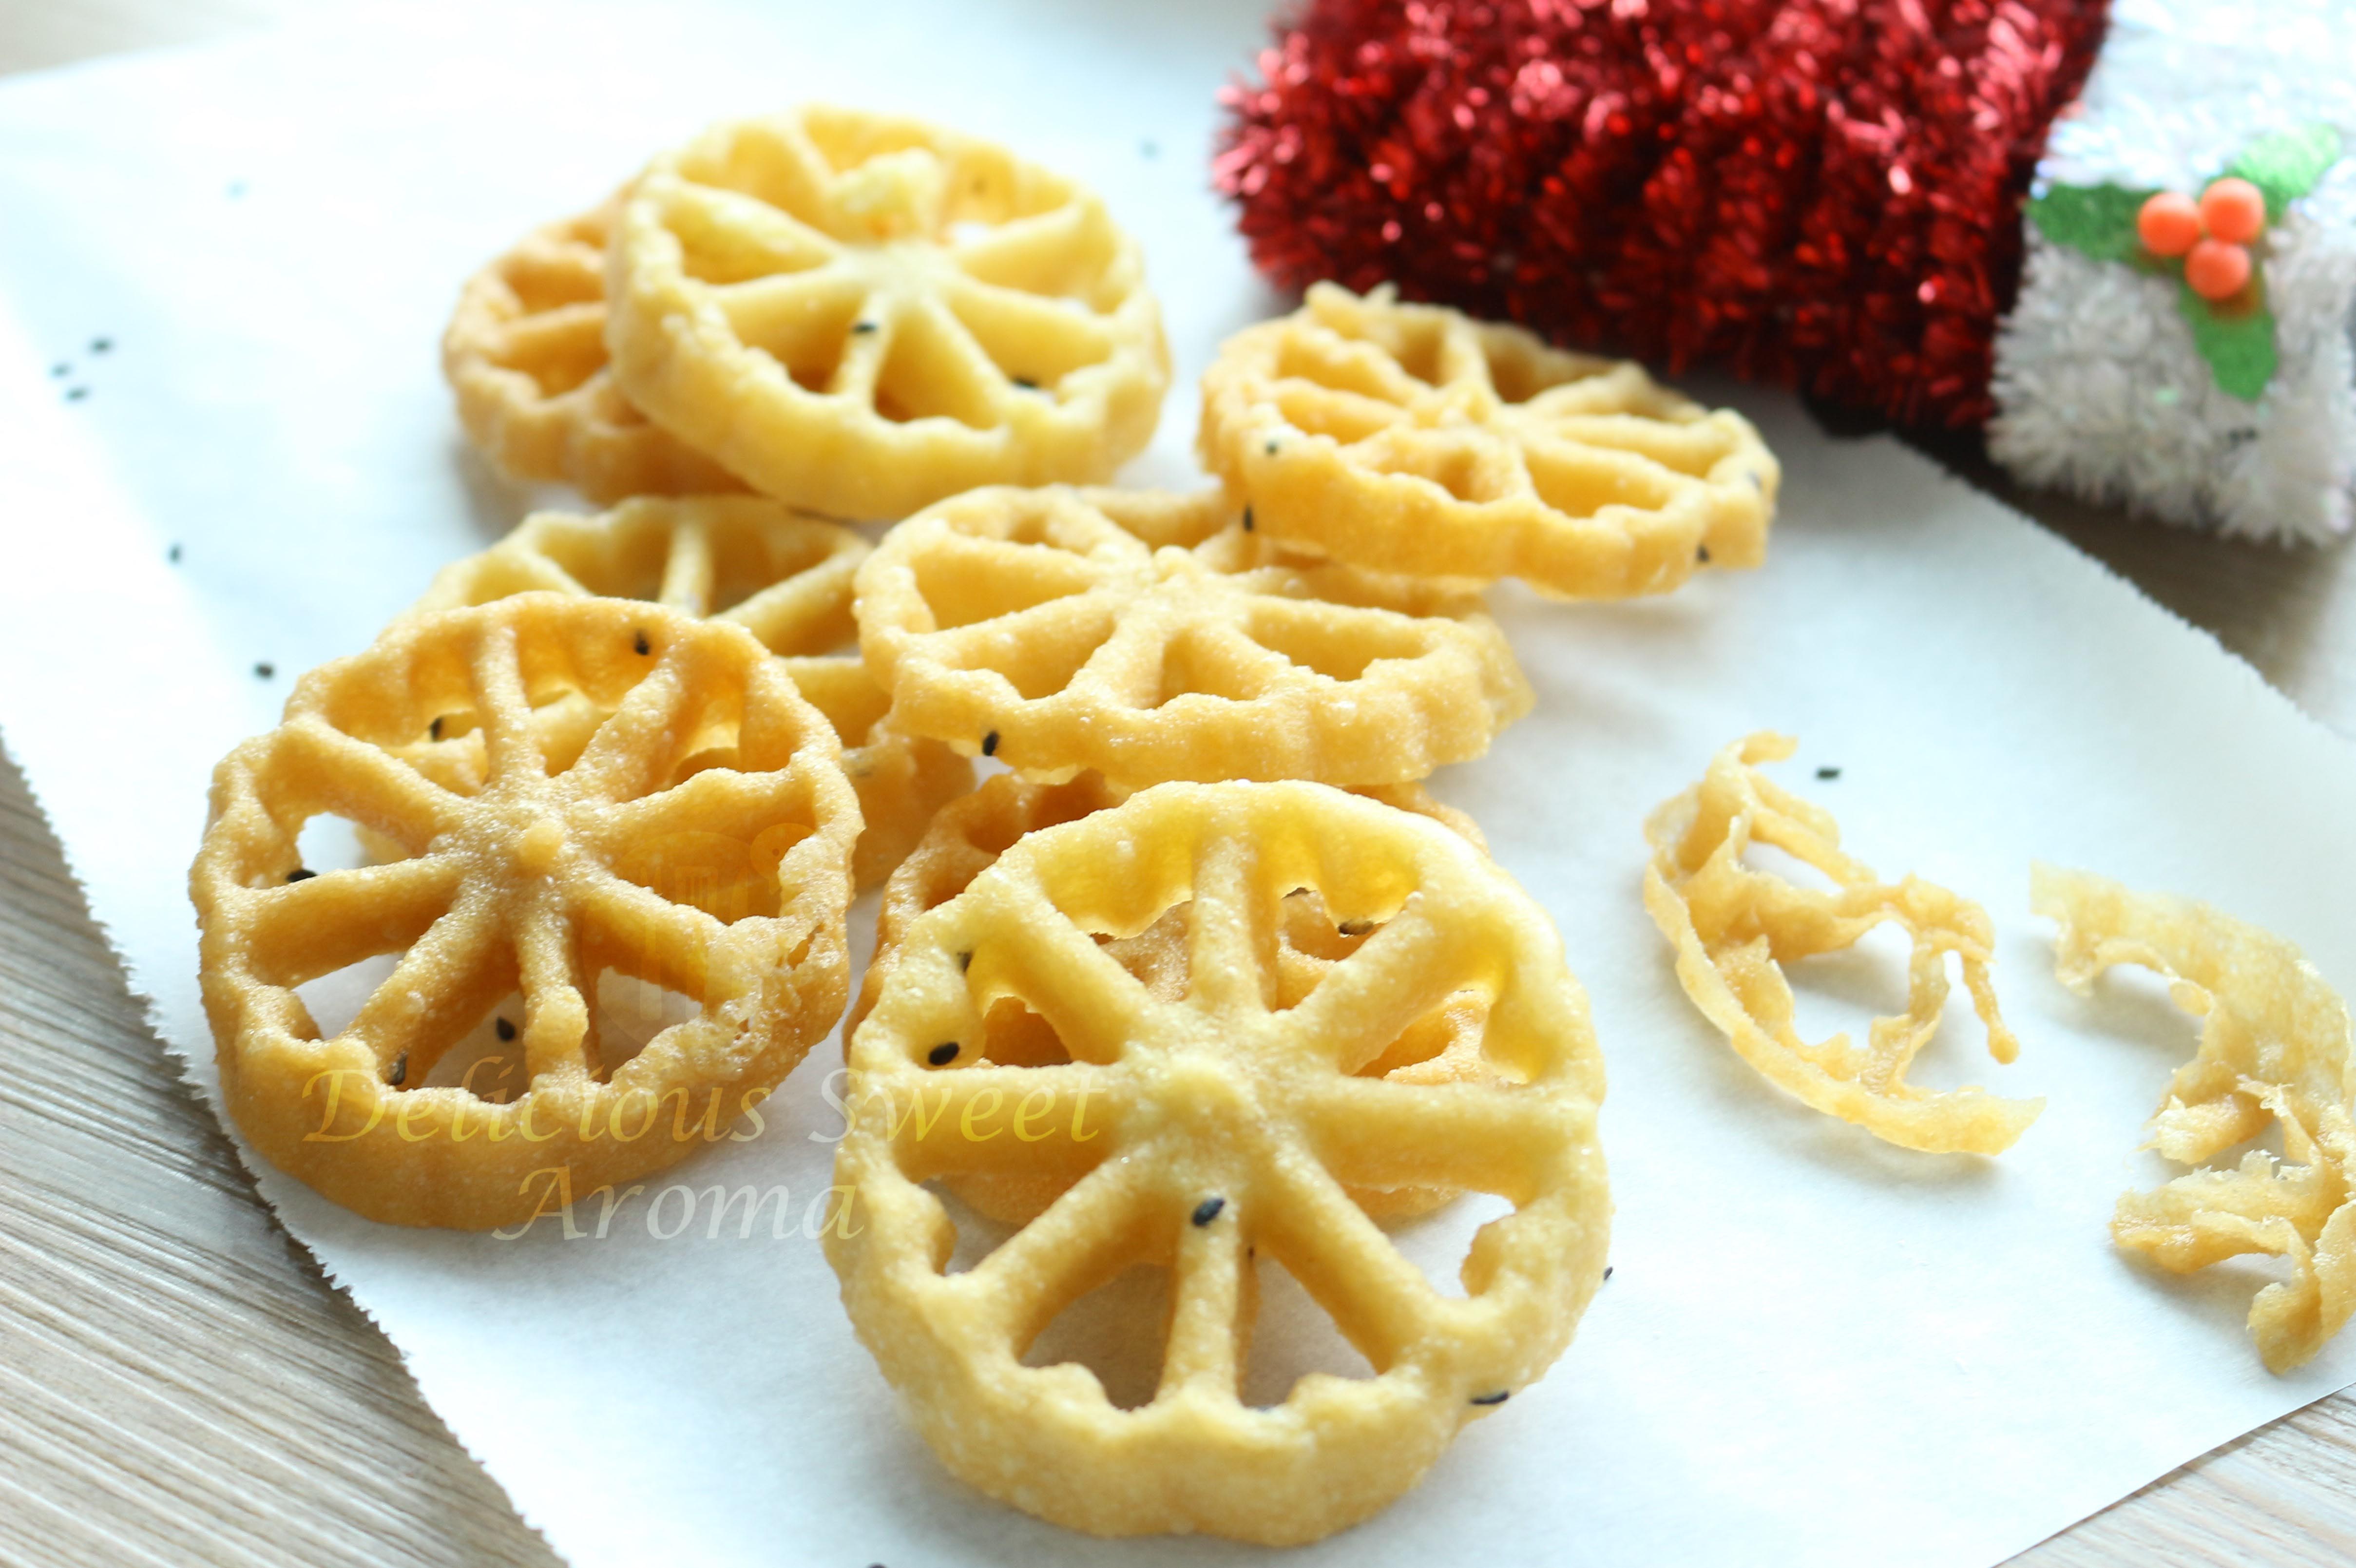
Kokis are made using a special round iron mould in the shape of a flower with a long handle to hold called as ‘kokis achchuwa’ that I bought from Mangalore the last time I visited home. I have also seen a few different designs of moulds here in Singapore which can also be used to make kokis. In Mangalore we call it Kokkisan (or kokis), Rose cookies  because of its rose-shape named in various regions,  in Scandinavia (Swedish or Norwegian) its called Rosette cookies, Achu murukku in Tamil and Achappam (Malayalam) in Kerala. Similar mould is also available on Amazon Rose cookie mould.
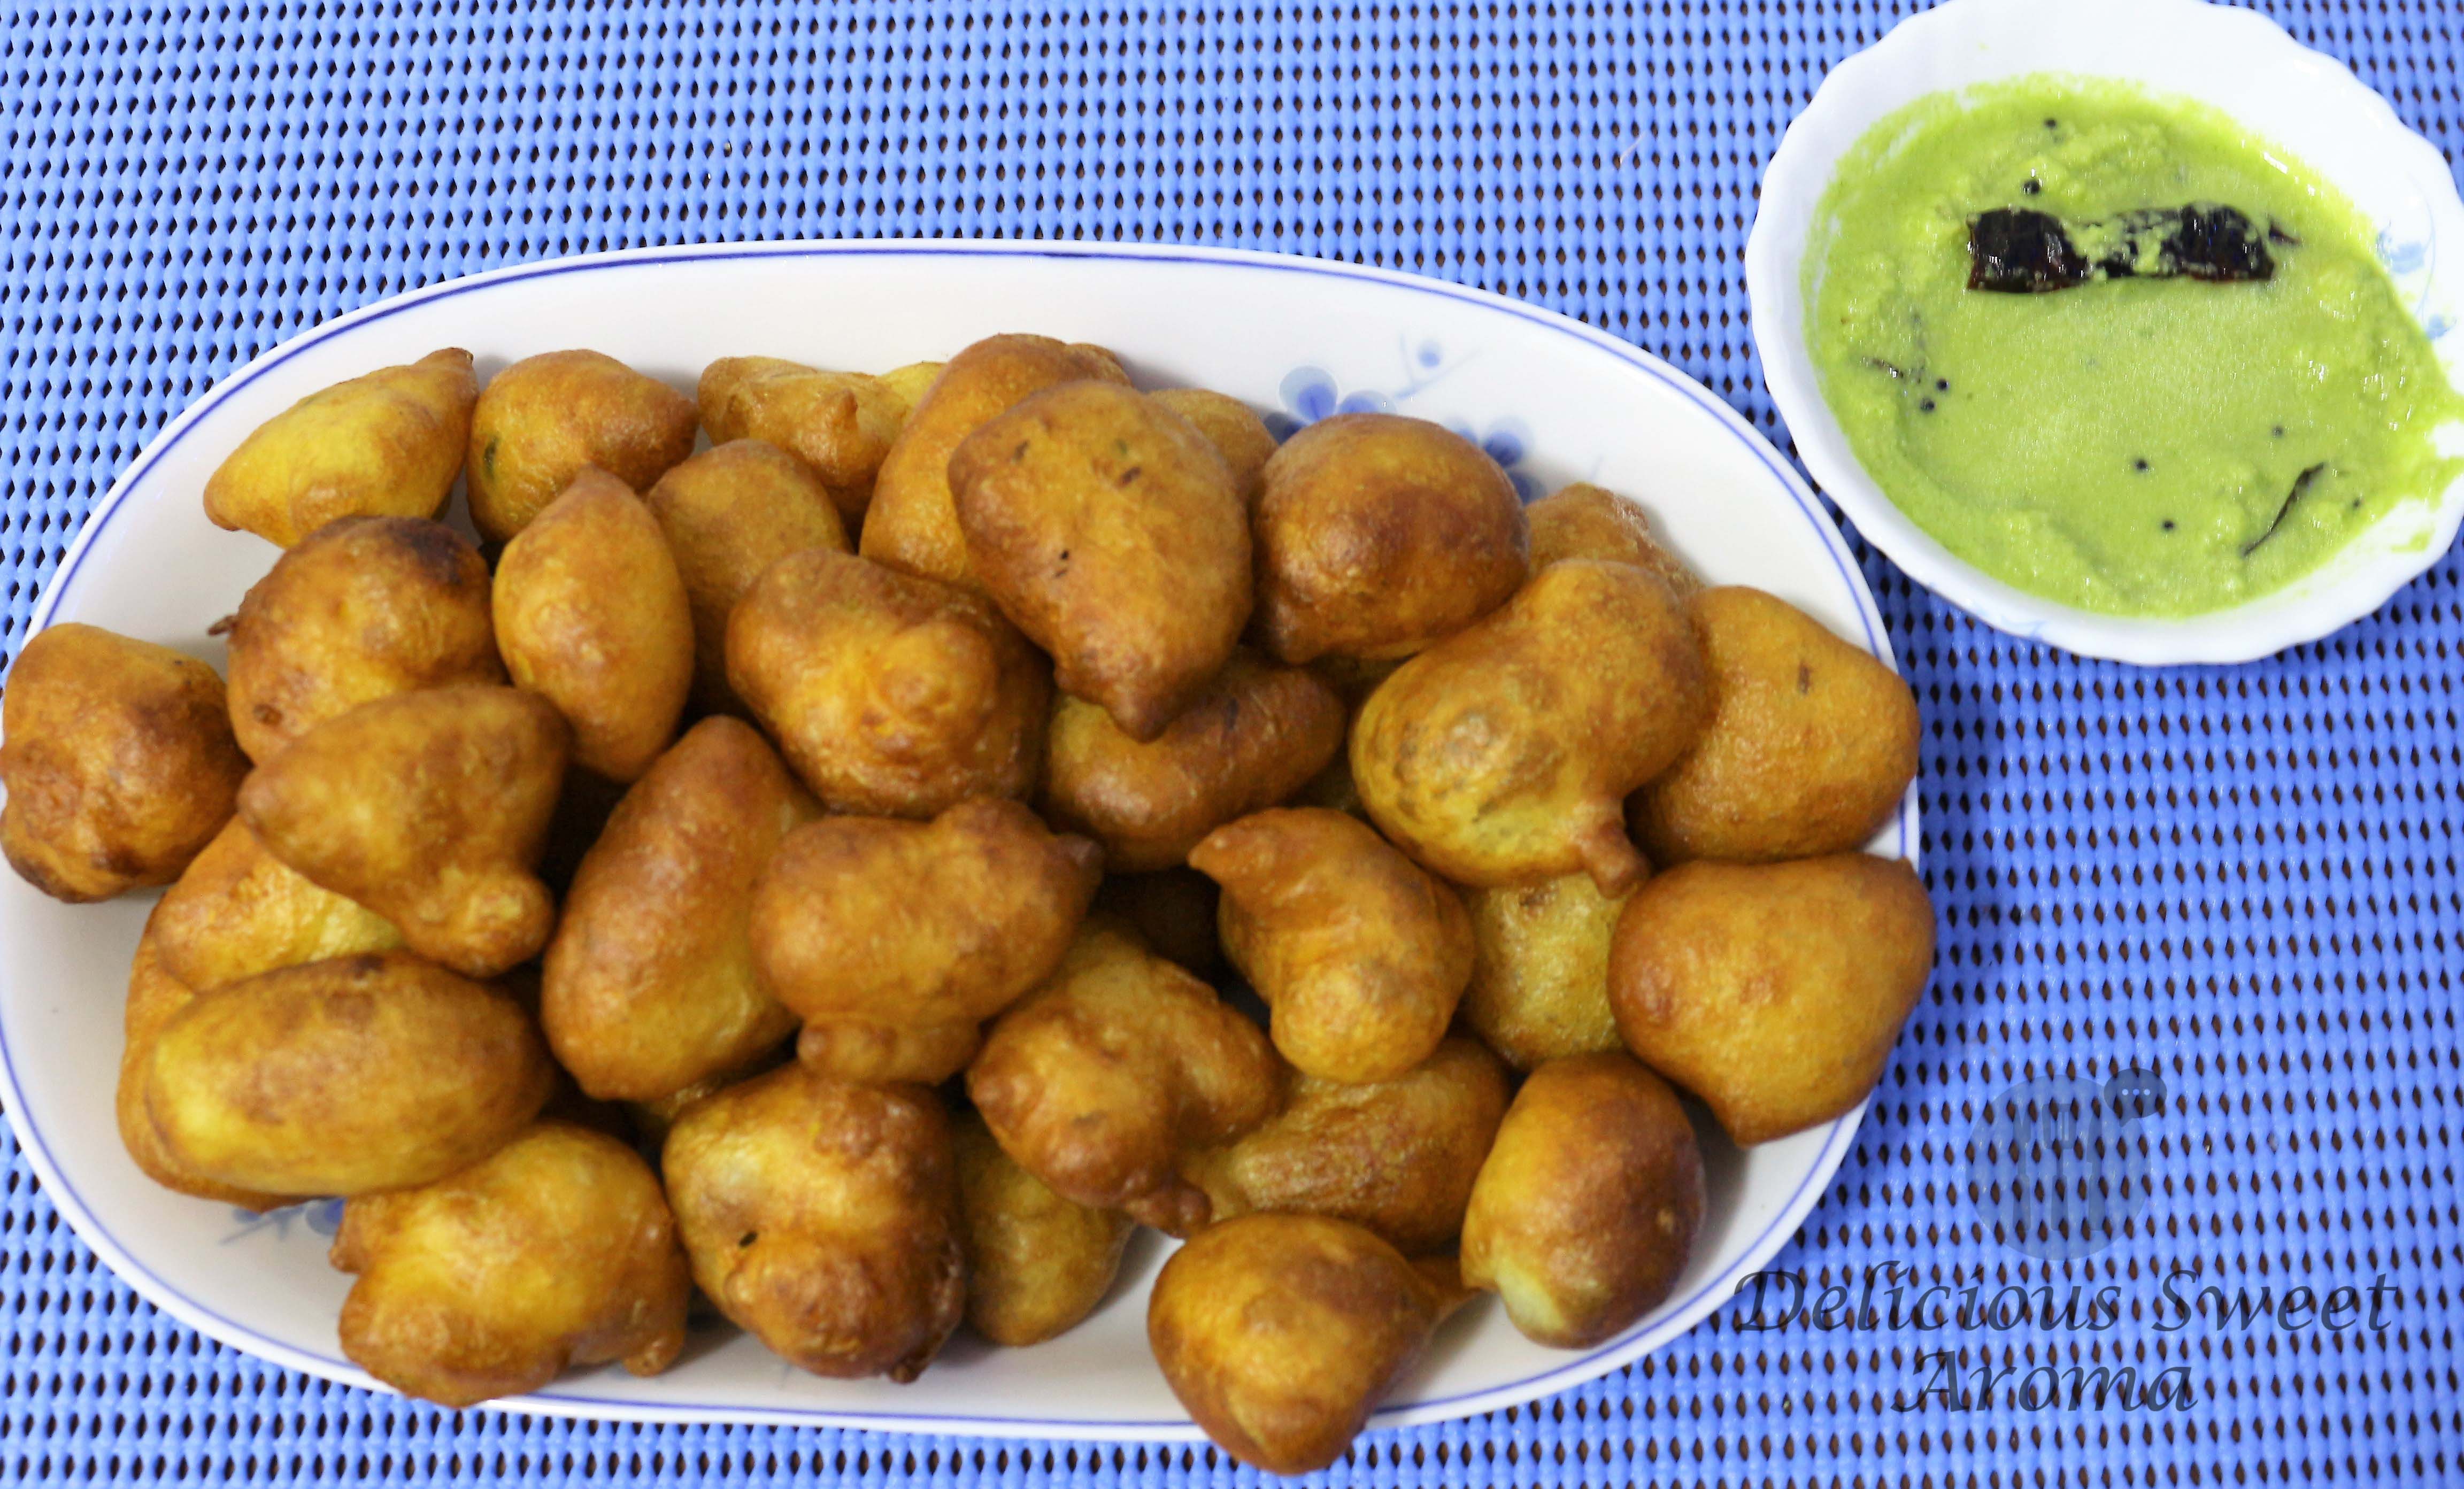
Rose cookies are not baked but deep-fried from either freshly ground rice grains or rice flour batter that contain coconut milk, sesame seeds and egg. Some recipes use other additional spices to make savory varieties. It might get a bit tricky at first but once you get a hold of how it works with the batter and the mould it is very easy. If you prepare with rice grains make sure to get the Kerala idli Rice which are usually available at Indian stores and make a thin batter with the other ingredients mentioned below.


How to use a new cookie mould?

Wash the cookie mould with soap and then, applied oil to the mould 2 hrs prior to doing the following :

  1. Drop the mould completely submerged in oil. Keep it dipped in oil until hot.
  2. Once the mould has heated in hot oil, remove and immediately dip the mould in a bowl of water at room temperature. You will hear it sizzle.
  3. Tap dry of any moisture on the cookie mould. Continue with step 3  (under step-by-step pictures) until it gets heated on medium-low heat.

Tips to prepare rice paste

  1. Soaking –  Rinse the rice with running water until the water runs clear. Transfer to a large bowl and add enough water to cover it. Cover with a lid and let it soak for 4.6 hours. The soaking process softens the rice and makes it easier to grind into a smooth batter.
  2. Grind the batter – After soaking, drain the water from the rice. Using a mixer jar or blender grind the rice into a smooth batter with some water (approx. 1/2 cup). The lesser the water the finer the paste. But make sure the blades keep moving.
  3. Consistency – The batter should have a thick yet pouring consistency. To achieve the right texture add water as needed.
Rice paste


How to make Rose Cookies with step-by-step pictures

1. Take the bowl containing rice paste, add salt, sugar, sesame seeds and mix. Pour coconut milk and the egg. Stir to combined together to make a thin batter of pouring consistency.

ingredients for kokisan

2. Add more coconut milk if the batter is very thick. The batter must be of pouring consistency (*see notes). Reserve until your ready with next step.

Rose cookie Batter made thin

3. Heat a heavy bottomed container with enough oil up to 3-inchs to submerge the mould. Place the mould in oil completely covering the whole mould till the top.

Rose cookies mould

4.When the mould is heated you will know when it radiates heat by placing you palm few inches away from it (careful not to touch it).

Heating the mould

Dip the mould in the batter making sure the sides are 3/4 covered in batter (see picture below). Hold steady in the batter for minimum 10 seconds and not less (it is important because otherwise it will form a shape in the batter itself and batter will not cling to the mould). Video clip here

Mould dipped in Batter

5. After 10 seconds immediately place the batter covered mould completely dipped in hot oil to deep-fry (induction #6). You will see the oil bubbling, hold it in oil for at least 10 seconds then gently shake the mould to release the cookies.

release the mould IMG_9417

If not, It should loosen up in 30 secs to 1 minute from the mould. You could also use a wooden skewer to release it from the sides.

6. Meantime, leave the mould in hot oil for few seconds until your ready for the next cookie and continue with step 4. Depending on the size of the container used you can fry more than one but just make sure you have enough space to dip the mould after each cookie (*see notes).

reheating the mould

7. Flip them with the wooden skewer to fry evenly until light brown color on both sides.

8. Remove the fried ones and place them on kitchen paper towels. Repeat from step 4 until all the batter is used.

kokisan IMG_9389

Leave them to cool completely before storing them in an airtight container or airtight storage bags.

Rose cookies
deep-fried Rose cookiesIMG_9443
mangalorean rose cookies IMG_9445
Rose cookies /Kokisan | Mangalorean kuswar | Delicious Sweet Aroma

Rose Cookies with rice | Mangalorean Kokisan | Achu Murukku

Indulge in the delightful world of South Indian sweets with Rose Cookies, also known as Kokisan. Perfectly balancing sweetness and sophistication, Rose Cookies are not just a snack; they are a cultural celebration that captivates both the palate and the heart.
Prep Time 15 minutes
Cook Time 1 hour 30 minutes
Soaking Time 4 hours
Total Time 1 hour 15 minutes
Course Snack
Cuisine Indian, Malaysian
Servings 50
Calories 98 kcal

Equipment

  • Rose Cookie Mould

Ingredients
  

  • ½ cup 250 g idli Rice / white small grain / Surai
  • 1 water for soaking
  • 3 tbsp caster sugar
  • 1 tsp sesame seeds black
  • 1 large egg, room temp
  • ½ tsp salt
  • ½ cup thick coconut milk
  • ¼ cup water, if required for batter consistency
  • 1 oil, for deep-frying

Instructions
 

  • Firstly, in a large bowl take 1/2 cup idli rice.
  • Soak in water for 6 hours.
  • Drain the water and transfer it to mixer grinder jar.
  • Grind to a smooth batter adding some water as required.
  • Transfer the batter to a large bowl.
  • Add salt, sugar and sesame seeds and mix. Pour 1/2 cup coconut milk and 1 egg. Stir to combine together.
  • Add some water if required if its thick to make it pouring consistency.
  • Heat a heavy bottomed container with enough oil upto 3-inchs to submerge the mould. Place the mould in oil completely covering the whole mould till the top.
  • When the mould is heated you will know when it radiates heat by placing you palm few inches away from it (careful not to touch it)
  • Dip the mould in the batter making sure the sides are 3/4 covered in batter (see picture below). Hold steady in the batter for minimum 10 seconds and not less (it is important because otherwise it will form a shape in the batter itself and batter will not cling to the mould). 
  • After 10 seconds immediately place the batter covered mould completely dipped in hot oil to deep-fry (induction #6). You will see the oil bubbling, hold it in oil for at-least 10 seconds then gently shake the mould to release the cookies.
    Use a wooden skewer to release it from the sides.
  • Meantime, leave the mould in hot oil for few seconds until your ready for the next cookie and continue with step 4. Depending on the size of the container used you can fry more than one but just make sure you have enough space to dip the mould after each cookie.
  •  Flip them with the wooden skewer to fry evenly until light brown color on both sides.
  • Remove the fried ones and place them on kitchen paper towels. Repeat from step 4 until all the batter is used.
  • Leave them to cool completely before storing them in an airtight container or airtight storage bags.

Video

Notes

  1. Make sure not to overheat the oil. You can keep the oil  on medium-low heat (induction 5 or medium-low) if your preparing it for the first time . It might be hard to release the batter from the mould if overheated.
  2. If the batter is too thin you will know it once you prepare the first two cookies, since it tends to be very fragile and breaks off easily. And, the hot mould will need to be immersed in the batter for longer than 10 seconds for thinner batter.
  3. For deep-frying I used a flat deep-bottomed 7.5-inch / 19 cm wide container that could fry 3 cookies at a time.
  4. While dipping the mould in batter, tilt the bowl for even coating.
  5. If its too much batter to make at one-time. You can separate and use half the batter and keep the rest in fridge. I used half the rice paste for one-time which made 25 cookies, while the rest of the rice paste I stored it in the fridge for next day.
Keyword Achu Murukku, Crispy Rose Cookies, Indian Festival treats, Kokisan, Moulded Cookies, Rose Cookies, Traditional Indian Snacks

Read More

Egg Puffs with Easy filling

On the occasion of Easter weekend, I baked Egg Puffs wondering if something similar like these that are made in bakeries can be re-created at home.

Delicious Easy recipe of Egg puffs
Egg Puff

I never thought Egg puffs were this easy to be made at home, especially when you feel confounded by making a dough and your not too sure if the pastry would turn out puffy with crispy golden flaky crust after baking. To make it more easier I used the ready-to-use puff pastry which you must definitely try unless you’re good at it.

Tips of Puff Pastry

Using store-bought puff pastry is a convenient way to create delicious pastries without the effort of making it from scratch. Here’s how you can use ready-made puff pastry without hassle

  1. Thaw the Pastry:
    • If your puff pastry is frozen, allow it to thaw in the refrigerator for 1 hour or follow the package instructions for quick thawing.
    • You want the pastry to be pliable but still cold.
  2. Roll It Out:
    • Lightly flour your work surface and roll out the thawed puff pastry to your desired thickness.
    • You can make it thinner for delicate pastries or keep it slightly thicker for more substantial treats.
  3. Cut and Shape:
    • Use a sharp knife or pastry cutter to create shapes. Common shapes include rectangles, squares, or circles.
    • For turnovers, cut the pastry into squares or rectangles.
  4. Add Fillings:
    • Place your desired spiced fillings on one half of the pastry shape.
  5. Fold and Seal:
    • Fold the pastry over the filling to create a pocket.
    • Press the edges together to seal the pastry. You can use a fork to crimp the edges.
  6. Egg Wash:
    • Brush the top of the pastry with beaten egg for a shiny finish.
  7. Bake:
    • Preheat your oven according to the puff pastry package instructions (usually around 400°F or 200°C).
    • Place the prepared pastries on a baking sheet lined with parchment paper.
    • Bake until golden brown and puffed up (usually 15-20 minutes).
  8. Cool and Enjoy:
    • Let the pastries cool slightly before serving.

Directions

1. In a saucepan, fry onions till slightly brown. Add garam masala, chicken powder, coriander powder (if your using) ,green chilies, chili powder. Mix. Add turmeric and pepper powder. Fry for a 1-2 mins. Transfer to a small container to cool.

Ingredients for masala puffs

2. Peel the eggs and cut them lengthwise with a very sharp knife. Lightly wet the knife for cleanest cut. Season with pepper powder, salt and chaat masala.

Cooked Egg | Recipe for Egg puffs

3. Thaw the puff pastry as per instructions given in the package.

Puff Pastry | Delicious Sweet Aroma

Using half of this puff pastry. Flatten it into desired thickness into a square. Cut out the uneven sides and use this left-over in the end. Divide the pastry into required square size to make different shapes.

Making of Egg Puffs | Recipe for Egg puffs
cutting into squares based on the size of the egg

Preheat oven to 200 degrees Celsius or 400 deg F (convection with fan) until it reaches the desired temperature.

Fill in 1 tsp of the filling and top with egg halves facing down and to the corners lengthwise. Brush with egg wash, stretch the 2 corners towards the center.  If required use a fork to seal them (Mine didn’t seal too well, but it looked delicious I believe ;)). For video

Making of Egg Puffs | Recipe for Egg puffs

4. Line the puffs in a baking sheet and bake at 200 degrees Celsius for approximately 15 minutes or until the pastry top becomes golden brown and crisp.

Making of Egg Puffs | Recipe for Egg puffs

Serve them with ketchup or enjoy them on its own. I would recommend without ketchup to to enjoy the spice filling.

Egg Puffs Rrecipe | Delicious Sweet Aroma
Egg Puff Recipe
Egg puffs | Easy recipe by Delicious Sweet Aroma

You can also look at more recipes with Egg and a printable version below :

Potato Cutlets with Egg

Moist Scrambled Eggs


Egg puffs | Easy recipe by Delicious Sweet Aroma

Egg Puffs

Sherryl Andria
Unravel the secrets behind crafting the ultimate Egg puff – a symphony of golden layers, savory fillings, and an irresistible aroma that elevates comfort food to an art form.
Prep Time 20 minutes
Cook Time 10 minutes
Baking 15 minutes
Total Time 45 minutes
Course Breakfast, Snack
Cuisine Indian
Servings 2
Calories 581 kcal

Equipment

  • Oven

Ingredients
  

  • Puff pastry / Blätterteig 8 squares (store-bought)
  • 1 egg wash for glazing

Pastry filling

  • 4 hard-boiled eggs
  • 2 tbsp Oil / ghee
  • 1 medium onion finely chopped into 0.5cm thickness
  • ¼ tsp garam masala
  • ¼ tsp turmeric powder
  • ½ tsp pepper powder
  • ½ tsp red chilli powder
  • ½ tsp cumin powder
  • ½ tsp coriander powder
  • 1 tsp ginger-garlic paste
  • 1 green chilli finely chopped
  • salt as required
  • ¾ tsp chicken masala powder optional
  • ¼ tsp chaat masala optional

Instructions
 

Puff Pastry filing

  • Take a pan, fry 1 chopped onion till slightly brown.
  • Add 1/4 tsp garam masala, 1/4 tsp turmeric, 1/2 tsp pepper , 1/2 tsp red chili powder, 1/2 tsp cumin and 1/2 tsp coriander, 3/4 tsp chicken masala powder along with 1 tsp ginger-garlic paste and green chilli.
  • Season with salt, mix together and fry for a 1-2 mins.
  • Transfer to a medium sized bowl.

Puff Pastry

  • Preheat oven to 200 degrees Celsius (400 deg F) convection with fan for 10 minutes.
  • If the pastry is thick, flatten it into desired thickness into a square.
    Cut out the uneven sides and use this left-over in the end. Divide the pastry into required square size to make different shapes.
  • Fill in 1 tsp of the spice filling and top with egg halves facing down and to the corners lengthwise.
  • Brush with egg wash, stretch the 2 corners towards the center.  If required use a fork to seal them.
  • Line the puffs in a baking sheet and bake at 200 degrees Celsius for approximately 15 minutes or until the pastry top becomes golden brown and crisp.
  • Serve them with ketchup or enjoy them on its own.
Keyword Easy Puff Pastry Appetizers, Egg Puffs, Indian egg puffs, puff pastry recipes, Puff Pastry snacks, Quick puff pastry, South Indian Egg puff

Read More

Patholi (Mangalorean Recipe) or Sweet Rice Dumplings Steamed with Turmeric Leaves

They say:”The key to everything is patience”. That defines my recipe today which I prepared last weekend. A typical Mangalorean sweet dish, Sweet Rice Dumplings with turmeric leaves also commonly known as Haldikolyache Patholi in konkani language (mother-tongue in south-west coast of India). Its made with rice filled with Jaggery-coconut mixture, wrapped in turmeric leaves which makes it a special dish.

Patholi as we call it, was usually made at home when a patch of turmeric leaves were available in my grannies backyard during the monsoon season. In Singapore, I came across turmeric leaves in the supermarket and had this intense craving to eat them. The reason why these turmeric leaves are used is because the leaves have a distinct flavor with a lovely aroma.  So, if you happen to have turmeric leaves in local supermarket I can assure you this recipe won’t disappoint you.

Let me tell you a little about this popular “superfood sweetener” commonly used in India. Our elders always prepared sweet dishes with a sweetener called ‘Jaggery‘, Gur in hindi, Bella in Kannada. Jaggery vary in colors ranging from golden brown, brown, dark brown which is known to have the ability to cleanse your body. Although jaggery and sugar both are obtained from the same source of sugarcane juice, jaggery is unrefined sugar where the sugarcane juice undergoes a boiling process. The syrup is boiled continuously until it forms a thick paste, which is then poured into molds to form solid blocks.

Why is jaggery a “healthy” replacement for sugar? Unlike sugar which is absorbed by the body quickly with a sudden burst of energy, jaggery is absorbed slowly and releases energy over an extended period of time.Now, this is just one form of jaggery. The others are jaggery from palm sugar and so on..which I haven’t used in my recipes yet.

Soaking time: 2.5 hrs

Preparation time: 30- 45 minutes

Cooking time: 12 minutes

Ingredients

Raw rice / Boiled Rice / Surai or Ponni rice – 3/4 cup or 180 g (preferably boiled rice ) (*EDIT)

White small grain / Idli rice – 3/4 cup or 180 g (‘mutambo’ rice in Konkani)

Salt

Medium size turmeric leaves / Haldi leaves – 15 to 17, stemmed, rinsed and wiped dry (*see notes)

For the filling:

Pounded jaggery – 150 g or 3/4 cup (as per sweetness)

Grated fresh coconut – 120 g (*see notes)

Cardamom – 4 pods, seeds powdered

Directions

First 2 steps are made a day in advance to divide the work.

1. First step soaking : Mix and wash the boiled/ponni rice and white small grain rice with water in a bowl once. Soak with enough water covered for 2.5 hours minimum.

patholi ingredients

2. Next is making a smooth batter: Using a blender, add the rice and 1/2 tsp of salt. With very less amount of water as possible make a thick smooth paste. I divided the rice into 2 batches to make it easier in grinding, to get a nice smooth paste and less grainy.

step2a_IMG_6999

Transfer the batter into a bowl (If you make this in the evening, let the batter rest on the kitchen counter overnight or store it in the fridge to use anytime).

step2b_IMG_7003

3. Preparing the filling: In a small bowl add powdered jaggery, coconut and cardamom powder. Mix well to combine together until no lumps are found.

step31a_IMG_7008

step 31_IMG_7016

4. Prepare the turmeric leaves (*see notes). Place tablespoon of batter or using your fingers just scoop the batter and spread it evenly (not too thick, not too thin) over the shiny part of the turmeric leaf, leaving 1-inch gap along the edges.

step4_IMG_7019

5. Using a teaspoon, add the jaggery-coconut mixture along the center-line of the leaf.

filling

Fold the leaf in half starting from one end, gently pressing the edges along its length. Repeat the process of step 4 with the remaining leaves and place them on a  plate.

step4c_IMG_7023

6. Using a steamer or a wok. Pour 1 1/2 cup of water and place a small plate over steamer plate with holes that is at least an inch or two above the water level. Bring the water to a boil.

Steaming patholi using a wok

Place the leaves over the steamer plate in random angles (can be placed one over another). Cover with the lid and cook on high (induction 8) for 12 minutes.

Patholi (Mangalorean recipe)

7. The rice dumplings are ready when a toothpick inserted into it comes clean. Remove the leaves from the steamer using tongs and place it on a plate.

Peel the leaves from one end and discard. It tastes best when its piping hot. Hope you like it. Happy cooking.

final4_IMG_7032

final1_IMG_7040

Patholi, Mangalorean recipe

Note:

*If your using fresh coconut that has been in the freezer. Place it out on the kitchen counter an hour in advance to thaw and soften.

*If the turmeric leaves are too long you can cut them into half first and then place the batter.

*Since I made this recipe for 2 servings, I used just half the batter and made 8 leaves one day and the rest another day. The coconut-jaggery filling can be stored in the fridge for a day or two to reuse later. Do not keep the filling stored too long as it will go bad.

EDIT2:

In case your wondering how to pound jaggery, place the jaggery cubes in a ziplock bag and pound them with any object. Do the same with cardamom if you do not use a mortar and pestle.

Thank you for visiting delicious sweet aroma. Stay healthy!

EDIT1:

For any updates on this page or website please follow my Facebook page >> Delicious Sweet Aroma << or if you have trouble viewing certain pages or recipes comment here or drop a message on Facebook.

I’m also available on INSTAGRAM here 📲 👉👉  delicioussweetaroma

See you there!! 😘

Read More

Spicy Banana Pepper Fritters

These Hot Chili Peppers which are commonly known as ‘Banana Peppers’ is named because it resembles the shape of a banana. It is 6-inch-long pepper, mild hot because of its seeds.

These banana pepper fritters are easy to make in less than 30 minutes. My husband wanted it spicy so I haven’t removed the seeds in my recipe. If you cannot take the spice, I recommend slicing the pepper vertically through the center and removing the seeds before coating with the chickpea flour.

Preparation time: 5 minutes

Cooking time: 20 minutes


Ingredients

Vegetable oil for deep frying

Banana peppers – 7 (spicy)

Chickpea / Gram flour (Besan) – 1 1/2 cup

Kashmiri Red chili powder – 1 tbsp

Salt – 3/4 tsp

Turmeric powder – 1/4 tsp

Water – 3/4 cup


Directions

1. Prepare a paste by adding all the ingredients: flour, chili powder, salt, turmeric. Add 3/4 cup water and mix to form a thick paste. Add more water if necessary, the batter must be thick.

chili powder & besan/chickpea flour for banana

saltturmeric for hot pepper fritter


2. Coat the peppers with the above chickpea mixture. Place it separately on a plate.

chili pepper fritter coating

3. Heat a deep-wide-bottomed container with 2 inch vegetable oil set at medium for deep frying.

Once its hot enough. Carefully place the peppers in hot oil. I fried 2 at a time in batches.

deep frying banana pepper

4. Fry on each side for 2 mins until they turn brown. Transfer and drain into paper towels.

5. Serve with coriander chutney, ketchup or can just be enjoyed plain with an evening cup of tea.

pepper fritter, hot pepper fritter

inside of Banana pepper


Notes:

*If you want to have a dip of coriander chutney, refer my previous post of goli baje recipe for instructions.


Hope you have a lovely Monday! Stay healthy!


Read More

Potato Cutlets with Egg

Vegetarian food has never appealed to me, until now, that I realized how much important it is to have greens and veggies in a diet. I cannot go without meat and I’m trying to add some vegetarian food from now on. Hopefully!!

Starting from here I wanted to learn some vegetarian recipes so I intended on going with potatoes. Potato cutlets are my first try at home apart from making a non-veg cutlet, this turned out surprisingly delicious.” Yumm!” was what my husband exclaimed as he took a bite of it.

It could also be great to have for breakfast or a quick snack or on the menu of kid’s classics.


Preparation time: 10 minutes

Cooking time: 30 – 45 minutes

Makes: 12

Ingredients

Potatoes – 350 g / 4 small size or  boiled & peeled potatoes

Spring onion – 6, finely chopped

Eggs – 2

Garlic cloves – 2, finely chopped

Salt – 1/2 tsp

Vegetable oil / olive oil for shallow frying


How to cook potatoes?

+Add potatoes (with skin) into a heavy-bottomed pan of cold, salted water and bring it to a boil. Cover and cook for 15 – 20 minutes until tender. To do this insert a skewer, it must get through easily.

+ If it is still firm, let it simmer for a couple of minutes. Then, leave it to stand in hot water for 10 minutes.

+ Drain them thoroughly. Peel the potato skin.


Directions

1. Mash the cooked potatoes with your fingers (or any other way most preferred) until no large lumps of potatoes remain.

2. To the mashed potatoes, add spring onions, garlic, eggs, salt. Using your fingers combine evenly.

vegetarian snacks

mashed potatoe

3. Heat a non-stick frying pan over medium-high heat. Drizzle oil, tilt to spread the base. Pour a tablespoon spoonful of the mixture in the pan of 5-7 cm (2 – 2.8 inch). Fry for 3-4 minutes on each side.

cutlet


4.Transfer to a plate. Repeat with the remaining oil and mixture of potato and egg.

Potato cutlet with Eggs

Serve with tomato ketchup or as side with pulav.

potato cutlet, vegetarian


Hope to serve you more with vegetarian recipes. Stay healthy!


Read More

Goli Baje Recipe

Hubby loves Goli baje’s, sounds funny, haha..Well, I came to know more of his tastes after getting married to him. And I love making them occasionally.

Goli baje (in Tulu, Indian cuisine) is a deep-fried tea-time snack popular in Mangalore-Udupi region. It is also known as Mangalore bajji or Mangalore bonda. Yes, my posts are often from Mangalore, being a Mangalorean myself they are served locally in restaurants for breakfast or evening tea along with a dip called chutney made of Coconut, coriander or others. Goli Baje’s have a unique taste with a smooth exterior and a spongy interior that suits well during the monsoon season. After few trials and errors I learnt the precise measurements to obtain a good texture. The texture also depends on the fermentation time and thickness of batter before frying. I have provided the precise quantity of all ingredients. The coconut-coriander chutney was just a perfect dip to enjoy it.

Preparation time: 10 minutes, plus 2 hrs fermenting time

Cooking time : 20 minutes

Makes: 25 – 30


Ingredients

Vegetable oil for deep-frying

Plain Flour / Maida – 1 cup / 150 g

Gram flour/Chickpea flour/Besan – 4 tbsp / 25 g

Yogurt – 1/2 cup / 160 g (thick)

Water -1/2 cup

After fermentation:

Ginger paste / fresh ginger – 1 tsp, chopped

Cumin seeds – 1/2 tsp

Green chili – 1 tsp / 1 small, chopped

Grated coconut – 2 tbsp

Caster sugar – 1 tbsp

Salt – 1/4 tsp

Baking soda – 1/2 tsp

Coriander (optional) – 1 tbsp, chopped

Warm water – 4 tbsp


For Coriander Chutney / Coriander Sauce (A dip that goes well with Goli Baje)

Fresh coriander/ Cilantro/ Chinese parsley- 25 g to 40 g, washed and roots removed (depending on quantity required)

Fresh grated coconut – 1/2 cup or as required (also, depending on quantity)

Salt – 1/4 tsp

Fresh ginger – 1 inch thick, small

Green chili – 3 small

Seasoning:

Vegetable oil – 2 tbsp

Red dried chili – 1 (if available)

Mustard seeds – 1 tsp

Curry leaves – 1 medium strip, washed & dried using towel (can use frozen)

Water as required for thickness


Directions

1. In a large bowl, to the the sifted plain flour, add chickpea flour, yogurt. Mix. Then add 1/2 cup water until well combined with no lumps in the batter.

chickpea flour, gram flour, besan added to maida, plain flour

curd added to Goli baje


2. Cover and set aside the batter in a warm place at room temperature for minimum 1 1/2 – 2  hours (I kept it for precisely  2 hrs). Even if it’s a little longer the better.

Goli baje batter of gram flour, plain flour, yogurt & little water


3. After 2 hrs: Add ginger, cumin, green chili, coconut, sugar, salt, baking soda (you can add coriander now if your using). Mix and add water to form a thick batter until there are no lumps (not too runny). Set aside for 5 minutes.

cumin seeds, grated coconut, ginger paste, salt, green chili, sugar, baking soda

4. Heat a container with oil on medium-high. Drop a pinch of batter, if oil is hot enough it will form bubbles around the batter and sizzle.

browning on one side of Goli baje

5. Take tablespoon of the batter, scoop it in your fingers and drop it in small amount into the hot oil. Do not overcrowd. In a few seconds flip to brown on the other side. Fry in batches.

Goli baje, Mangalorean bonda, Indian

Once they have turned brown, drain them on paper towels using a stainless steel slotted spoon (reduce heat to low while removing to prevent over browning). Serve hot with fresh coriander chutney.

goli baje with coriander chutney


Coriander chutney: Preparation time – 7 mins to 10 mins

1. In a blender add coriander leaves, coconut, ginger, salt, green chili and a little water. Blend until smooth paste.

2. Heat oil in a small deep bottomed, stainless steel container on medium. Add mustard seeds, it’ll start splitting. 

Coriander chutney, mustard seeds sputter

3. As the mustard seeds sputter add red-dried-chili and curry leaves. Reduce heat and toss for 5 seconds. Make sure not to burn.

mustard seeds, red dried chili, curry leaves

4. Now, add the coriander paste from the blender. Mix and let it boil over low heat. Add water depending on your choice of consistency for thickness.

Coriander chutney for Goli baje

Goli Baje with coconut-coriander chutney

Storage of Chutney:

+Store in an airtight container in the fridge or can also be frozen. Must be used within 2-3 days if stored in the fridge.


Note:

*I haven’t used coriander in the Goli Baje batter.

*If you do not have coriander for the chutney, substitute it with additional coconut to prepare a coconut chutney.

*While removing the goli baje from oil after it has turned brown, reduce heat to prevent burning.

*If the batter is too water you can add more plain flour/maida.


I would love to know how it turns out for you. Thank you for visiting 🙂


Stay healthy!

Read More

Diamond cuts (Tukdi)

I’m quiet surprised that I’m making another snack for Christmas. After my Sweet curls recipe this is my second recipe on Christmas goodies. I prepared this yesterday and I loved the way they turned out.

Diamond cuts or Tukdi (we call it in konkani at home) is a traditional snack. It’s still a favorite snack to munch on while at home. They are crunchy, fluffy and hollow. It is made in different varieties, sweet or biscuit flavored. I made a small batch of it and the recipe is very easy.

Have a joyous Christmas 🎄🎅

Preparation time: 1 hour

Cooking time: 30 mins

Utensil : Pizza cutter/biscuit cutter

Roller pin


Ingredients

Vegetable oil for deep frying

Unbleached All-purpose flour/Maida + extra for dusting – 250 g

Unsalted butter (soft)- 2 tbsp

Chickpea flour – 25 g

Salt – 1/3 tsp

Water – 1/2 cup or as required for the dough ( *EDIT), room temp


Directions

1. In a medium bowl, add all-purpose flour,  chickpea flour, salt, butter. Mix together with your hand. Add water in parts and knead until you get a soft elastic dough. It’ll tend to be sticky at the beginning, keep kneading until it becomes smooth.

ingred_IMG_5908

Step1_IMG_5912

2. Prepare a rolling surface, dust the surface with flour. Take a small portion of the dough and form a ball. Place it on rolling surface and sprinkle some flour again. This will help prevent sticking.

Step22_IMG_5941

Now, using a rolling pin, roll the dough thin (not too thin or thick).


3. Using a small biscuit roller/pizza cutter, cut the flour vertically with 1.5 cm spacing between each line. Then, cut them in horizontal direction that shape it into a diamond form.

vertical cut of doughhorizontal cuts

diamond cuts from dough

Carefully transfer them, by using a knife edge to slide them onto a flat plate without disrupting it’s shape.


4. After your done making diamond cuts. Heat a container with oil on medium-high heat (If your using induction, keep it on 7).

5. Drop a piece to check if the oil is hot. It’l start sizzling and bubbling. Slide the diamond cuts in oil in batches, not to over-crowd them. It will start puffing up. Stir them gently so they get separated. Let it fry for a minute or two, until golden brown.

tukdiyo, tukdi, diamond cuts


6. Strain them into paper towel. Pour the next batch until all are done deep-frying.

diamond cuts, snack


Mangaloran snack, christmas snack

Storage:

* Keep them in airtight container to retain the crispiness once they have completely cooled down.


For updates on posts and recipes to come please follow the Fb page >> Delicious Sweet Aroma


Note:

*While kneading the dough, if it tends to be sticky add some flour.

*Dust generous amount of all-purpose flour before running the biscuit roller otherwise they stick to the plate which will tend to loose its shape while sliding into hot oil.


More on Christmas Recipes:

Sweet Curls /Kidyo or Kulkuls

Rose Cookies – Mangalorean Kokisan (NEW)

Traditional Christmas Cake – Fruit Cake (NEW)


Stay healthy!


Read More