Author: Sherryl Andria

Creamy Chickpea Curry

For decades, my secret weapon for a quick, delicious vegetarian meal has been chickpea curry. Chickpeas, also known as garbanzo beans, are a type of legume that is widely cultivated for its edible seeds. They are one of the most popular and nutritious plant-based foods, commonly used in various cuisines worldwide. It’s perfect when I’m short on time but craving something hearty and flavorful.

Chickpea curry comes together with just a handful of basic spices and a splash of whipping cream for a luxuriously creamy texture, making it absolutely perfect to enjoy with fresh bread. You can either cook the chickpeas yourself or pick up a jar of ready- cooked chickpeas (known as Kichererbsen in German) or bought from the bigger supermarkets.

I always keep a stash of uncooked chickpeas ready to go. When I’m planning meals for the week, I soak them for a few hours and then use my amazing mini pressure cooker to have them perfectly cooked in under 10 minutes.

Cooking Chickpeas

How to cook Chickpeas?

  1. Rinse and Soak:
    • In a large bowl, rinse the chickpeas in cold water.
    • Cover them with plenty of water. Ensure the water level is about 2-3 inches above the chickpeas as they will expand.
    • Soak for at least 8 hours or overnight
    • For quick method: bring chickpeas and water to a boil for 1-2 minutes. Remove from heat, and let it sit for 1 hour.
  2. Drain:
    • Drain the soaked chickpeas
  3. Cook:
    • Place the chickpeas in a large pot or a pressure cooker.
    • Add water until it’s 2 inches above the level of chickpeas. Also, add 1 teaspoon of salt.
    • Cover the pressure cooker with the lid and pressure regulator.
    • Cook on high until you hear 3 whistling sounds.
    • Turn off the heat and set aside the pressure cooker until all the pressure has dissipated on its own.
    • If using a pot: Once boiling reduce heat to low, cover the pot and let the chickpeas simmer for about 1 hour, or until tender. Check them periodically and add more water if needed to keep the chickpeas submerged.
  4. Check for Doneness:
    • Taste for tenderness. They should be soft but not mushy. IF they are not done, continue simmering for 10-15 minutes.

Tips:

  • Storage:
    • After cooking, chickpeas can be refrigerated for up to 5 days or frozen for up to 3 months.

For more vegetarian recipes

Paneer Dry with Nando’s Sauce

Beetroot Veg Puffs

Baingan Barta – Eggplant recipe

Tomato Rice – Aromatic Rice

chickpea recipe

Creamy Chickpea Curry

Sherryl Andria
Discover the rich and creamy chickpea curry, infused with whipped cream, tender chickpeas with a touch of spice. A must-try for quick, delicious meals on busy days.
Prep Time 10 minutes
Cook Time 20 minutes
Soaking Time 8 hours
Total Time 30 minutes
Course Dinner, Lunch, Main Course, Side Dish
Cuisine Indian, south-indian
Servings 4
Calories 1063 kcal

Equipment

  • 1 Pressure cooker optional

Ingredients
  

  • 1 cup chickpeas or cooked chickpeas or garbanzo beans
  • 2 tbsp Olive Oil
  • 1 medium onion thinly diced
  • 3 cloves garlic minced
  • 1 tsp garam masala
  • 1 tsp turmeric powder
  • 1 tsp coriander powder
  • 1 tsp chili powder as required
  • 1 tsp vegetable powder optional
  • 100 ml tomato paste or 2 large fresh tomatoes, chopped
  • 2 tbsp lime
  • salt as per taste
  • 150 ml whipping cream / Schlag sahne (as required)
  • 2 tbsp light soya sauce
  • 1 tsp brown sugar /maple syrup
  • Fresh coriander for garnish

Instructions
 

  • Heat the 2 tbsp olive oil in a large pan over medium hear
  • Add the onions and saute until they are golden brown.
  • Add minced garlic and saute for a minute.

Add Spices

  • Add 1 tsp of garam masala, turmeric, coriander, chili powder and vegetable powder (if available) to the pan.
  • Stir well to combine and cook for 1-2 minutes, allowing the spices to release their flavors.

Add Tomato paste

  • Add the tomato paste and 2 tbsp lime juice for a touch of acidity. Stir and mix together.
  • If using fresh tomatoes, add it to the pan and cook for 5 minutes till they break down.
  • Pour in whipping cream and stir well.

Add Chickpeas

  • Add the cooked chickpeas to the pan and stir in to coat with the spice mixture.
  • Pour in soya sauce. Add sugar or maple syrup and salt to taste.
  • Bring the curry to a gentle simmer and let it cook till it comes to a boil. Stir occasionally.
  • Garnish the chickpea curry with fresh coriander.
  • Serve hot with your favorite flatbread, rice or naan.

Video

Keyword 30-Minute, Healthy, Quick, Vegetarian, Winter Recipe

Read More

Beetroot Veg Puffs – Simple

Here is a simple crunchy savory Beetroot Veg Puffs made extra easy with ready-to-use frozen puff pastry.

They can always be made with left-over beets. You can also add any veggies that you would like into your puff filling. One can even pack these for lunch as take-away for picnics, outings or when going for a trek.

Puff Pastry – 1 pack ready-to-use, thaw it as per instructions on package (*see notes)

Beet Veg Puff

They look super delicious with a lovely golden color on top.

beet puff filling
beet veg puff

Crispy Veg Puffs | Dinner, lunch, Snacks

Beetroot Vegetarian Puffs

Beetroot Puffs with ready-to-use frozen puff pastry. Add desired veggies and pack them for picnics, lunch or outings during summer.
Prep Time 10 minutes
Cook Time 20 minutes
Baking Time 25 minutes
Total Time 55 minutes
Course Breakfast, Snack
Cuisine Indian, Mediterranean
Servings 2 people
Calories 323 kcal

Equipment

  • Oven

Ingredients
  

  • 500 g puff pastry
  • 1 egg (egg wash)

Filling

  • 1 tbsp veg oil / ghee
  • 1 small onion chopped
  • 2 small potatoes
  • ¼ cup water
  • 2 cloves garlic chopped
  • 1 small tomato
  • ½ green bell pepper / red bell pepper
  • 1 medium beetroot
  • ½ tbsp coriander powder
  • 1 tsp garam masala powder
  • Salt to taste
  • cup green peas
  • 1 tsp red chili powder (optional)

Instructions
 

Pastry Filling

  • Peel and Chop the onion and the potatoes. Heat a pan with 1 tbsp veg oil / ghee, fry the 1 small onion till translucent, add 2 small potatoes sprinkle some salt. Fry for 1-2 minutes, add 1/4 cup water.
    Cover and cook on medium-low until potatoes are soft by piercing it with fork. We do not want the gravy to be runny so make sure not to add too much water. Meantime, while the potatoes cook prepare the rest of the ingredients
    1 tbsp veg oil / ghee, 1 small onion, 2 small potatoes
    Cooking potatoes for puff filling | Puffs
  • Add chopped 2 cloves garlic and 1 small tomato. Fry for a minute then add green peppers and 1 medium beetroot, salt. You can now add 1/8 cup green peas. Fry for 2-3 minutes
    2 cloves garlic, 1 small tomato, 1/2 green bell pepper / red bell pepper, 1 medium beetroot, Salt to taste, 1/8 cup green peas
    Vegetable Mixture for Puff filling
  • Mix the spices such as 1 tsp garam masala powder and 1/2 tbsp coriander powder. We prefer non-spicy so haven’t added any chili powder.
    Cook for another 3-4 minutes, check for salt. Turn off heat and set aside while you get the puff pastry ready.
    1/2 tbsp coriander powder, 1 tsp garam masala powder, 1 tsp red chili powder (optional)
    Spiced Puffs | Red filling of Beetroot

Pastry puff

  • I used the whole pack of 500 g puff pastry.  If it is sticky, powder the work surface and the pastry with All-purpose flour. Flatten the pastry using a roller pin to get a rectangular shape, it doesn’t matter if its thick. Cut out the uneven edges. I divided this into 4 equal parts.
    Meantime, pre-heat the oven to 200 degrees Celsius.
    Puff Pastry | Delicious Sweet Aroma
  • Deciding on how you want to fold it, fill one side of each pastry with the veg mixture leaving some gap on the edge to seal it.
    Ready-to-Make Puff Pastry fillings | Beetroot filling
  • Once you are done with filling brush the edges with egg wash by painting with egg mixture using a brush. Fold them and press to seal, you can also use a fork. Roll the left over pastry, fill it, brush the egg wash and bring the edges together to seal it.
    Veg puffs with Beet filling | Ready to Bake | Vegetarian Simple Bakes
  • They look super delicious with a lovely golden color on top.
    Beet Veg Puff

Notes

The puff pastry is usually stored in the freezer. The package that I used says it needs to be kept outside for 10 minutes before flattening it in order to make it easier to handle. I had almost forgotten that I had kept the pastry out on the kitchen counter for too long for about 45 minutes and when I opened, it was slightly sticky and less manageable. I used flour while flattening it making it more easier to roll. So make sure to read the package instructions before using it.
  1. Go for second round of baking for left over pastry puffs.
  2. if your wondering what to do with left over unpeeled beets, wrap it in cling wrap to store and use it next time to prepare beetroot rice
Keyword Easy vegetarian recipe, Savory pastry, vegetarian puff recipe, Vegetarian snack

Read More

Mutton Curry in Pressure Cooker

The easy way I cook my mutton is using a pressure cooker. Its fast and time efficient.

Mutton curry recipe I prepared here is very basic and all you need to do is just grab a few Indian spices. I liked the idea of having a thick gravy as a dip so I prepared a paste of onions and tomatoes to increase the quantity of gravy.


More recipes on Mutton:

Soup of Mutton Bone-Marrow

Mutton Ghee Roast


Preparation time: 10 minutes (includes cooking)

Cooking time: 45 minutes

Serves: 2 – 4

Appliance used: Steam pressure cooker (see notes*)


Ingredients

Mutton meat – 500 g, add bones if you prefer

Onions – 1 large roughly chopped + 1 small thinly sliced (separated)

Garlic cloves – 2 large

Tomatoes – 2, roughly chopped


Spice paste or Masala:

Grated Coconut or coconut milk – 1/2 cup,

Turmeric – 1 tsp

Red dry chilies – 4

Fennel seeds – 1/4 tsp

Coriander seeds – 1 tbsp

Ginger or paste – 1 1/2 inch / 1 tbsp

Black peppercorns – 5

Cinnamon stick – 2 inch long


Directions

1. In a pressure cooker, add the washed mutton pieces, finely chopped onions, a tsp salt. Cover and cook for 6 -7 whistles. Turn off heat.

The meat needs to be soft, tender and not chewy.

Mutton meat

2. In the meantime, make a fine paste of the following:

Using a medium jar make a paste of onions with garlic and tomatoes. Blend them separately and transfer them into separate bowls.

Make the spice paste using the same blender by adding all the ingredients such as coconut, turmeric, fennel seeds,red chilies, coriander seeds, peppercorns, cinnamon stick and ginger paste.

Set it aside. Now all you have to do is start cooking while all the prep work is done.

3. Heat a deep wide container with 2 tbsp ghee. Add onion paste and fry for 2 minutes until the raw smell goes away.

Onion paste

Then, add the spice paste. Fry for 2-3 minutes and then mix reserved 1/4 cup water from the spice jar.

Do not add too much water, you can adjust the consistency later after adding the mutton.

Onion paste and masala

4. Pour the tomato puree with salt. Cook and simmer till it boils, check for salt.

mutton gravy

5. Once it has come to a boil add the mutton pieces along with its juices and left over mixture. Mix and adjust the consistency of thickness as required by adding water now if necessary.

Curry of Mutton

Cook for another 5-10 minutes on medium heat for the mutton to soak in the flavor of spices. Check salt. Turn off heat.

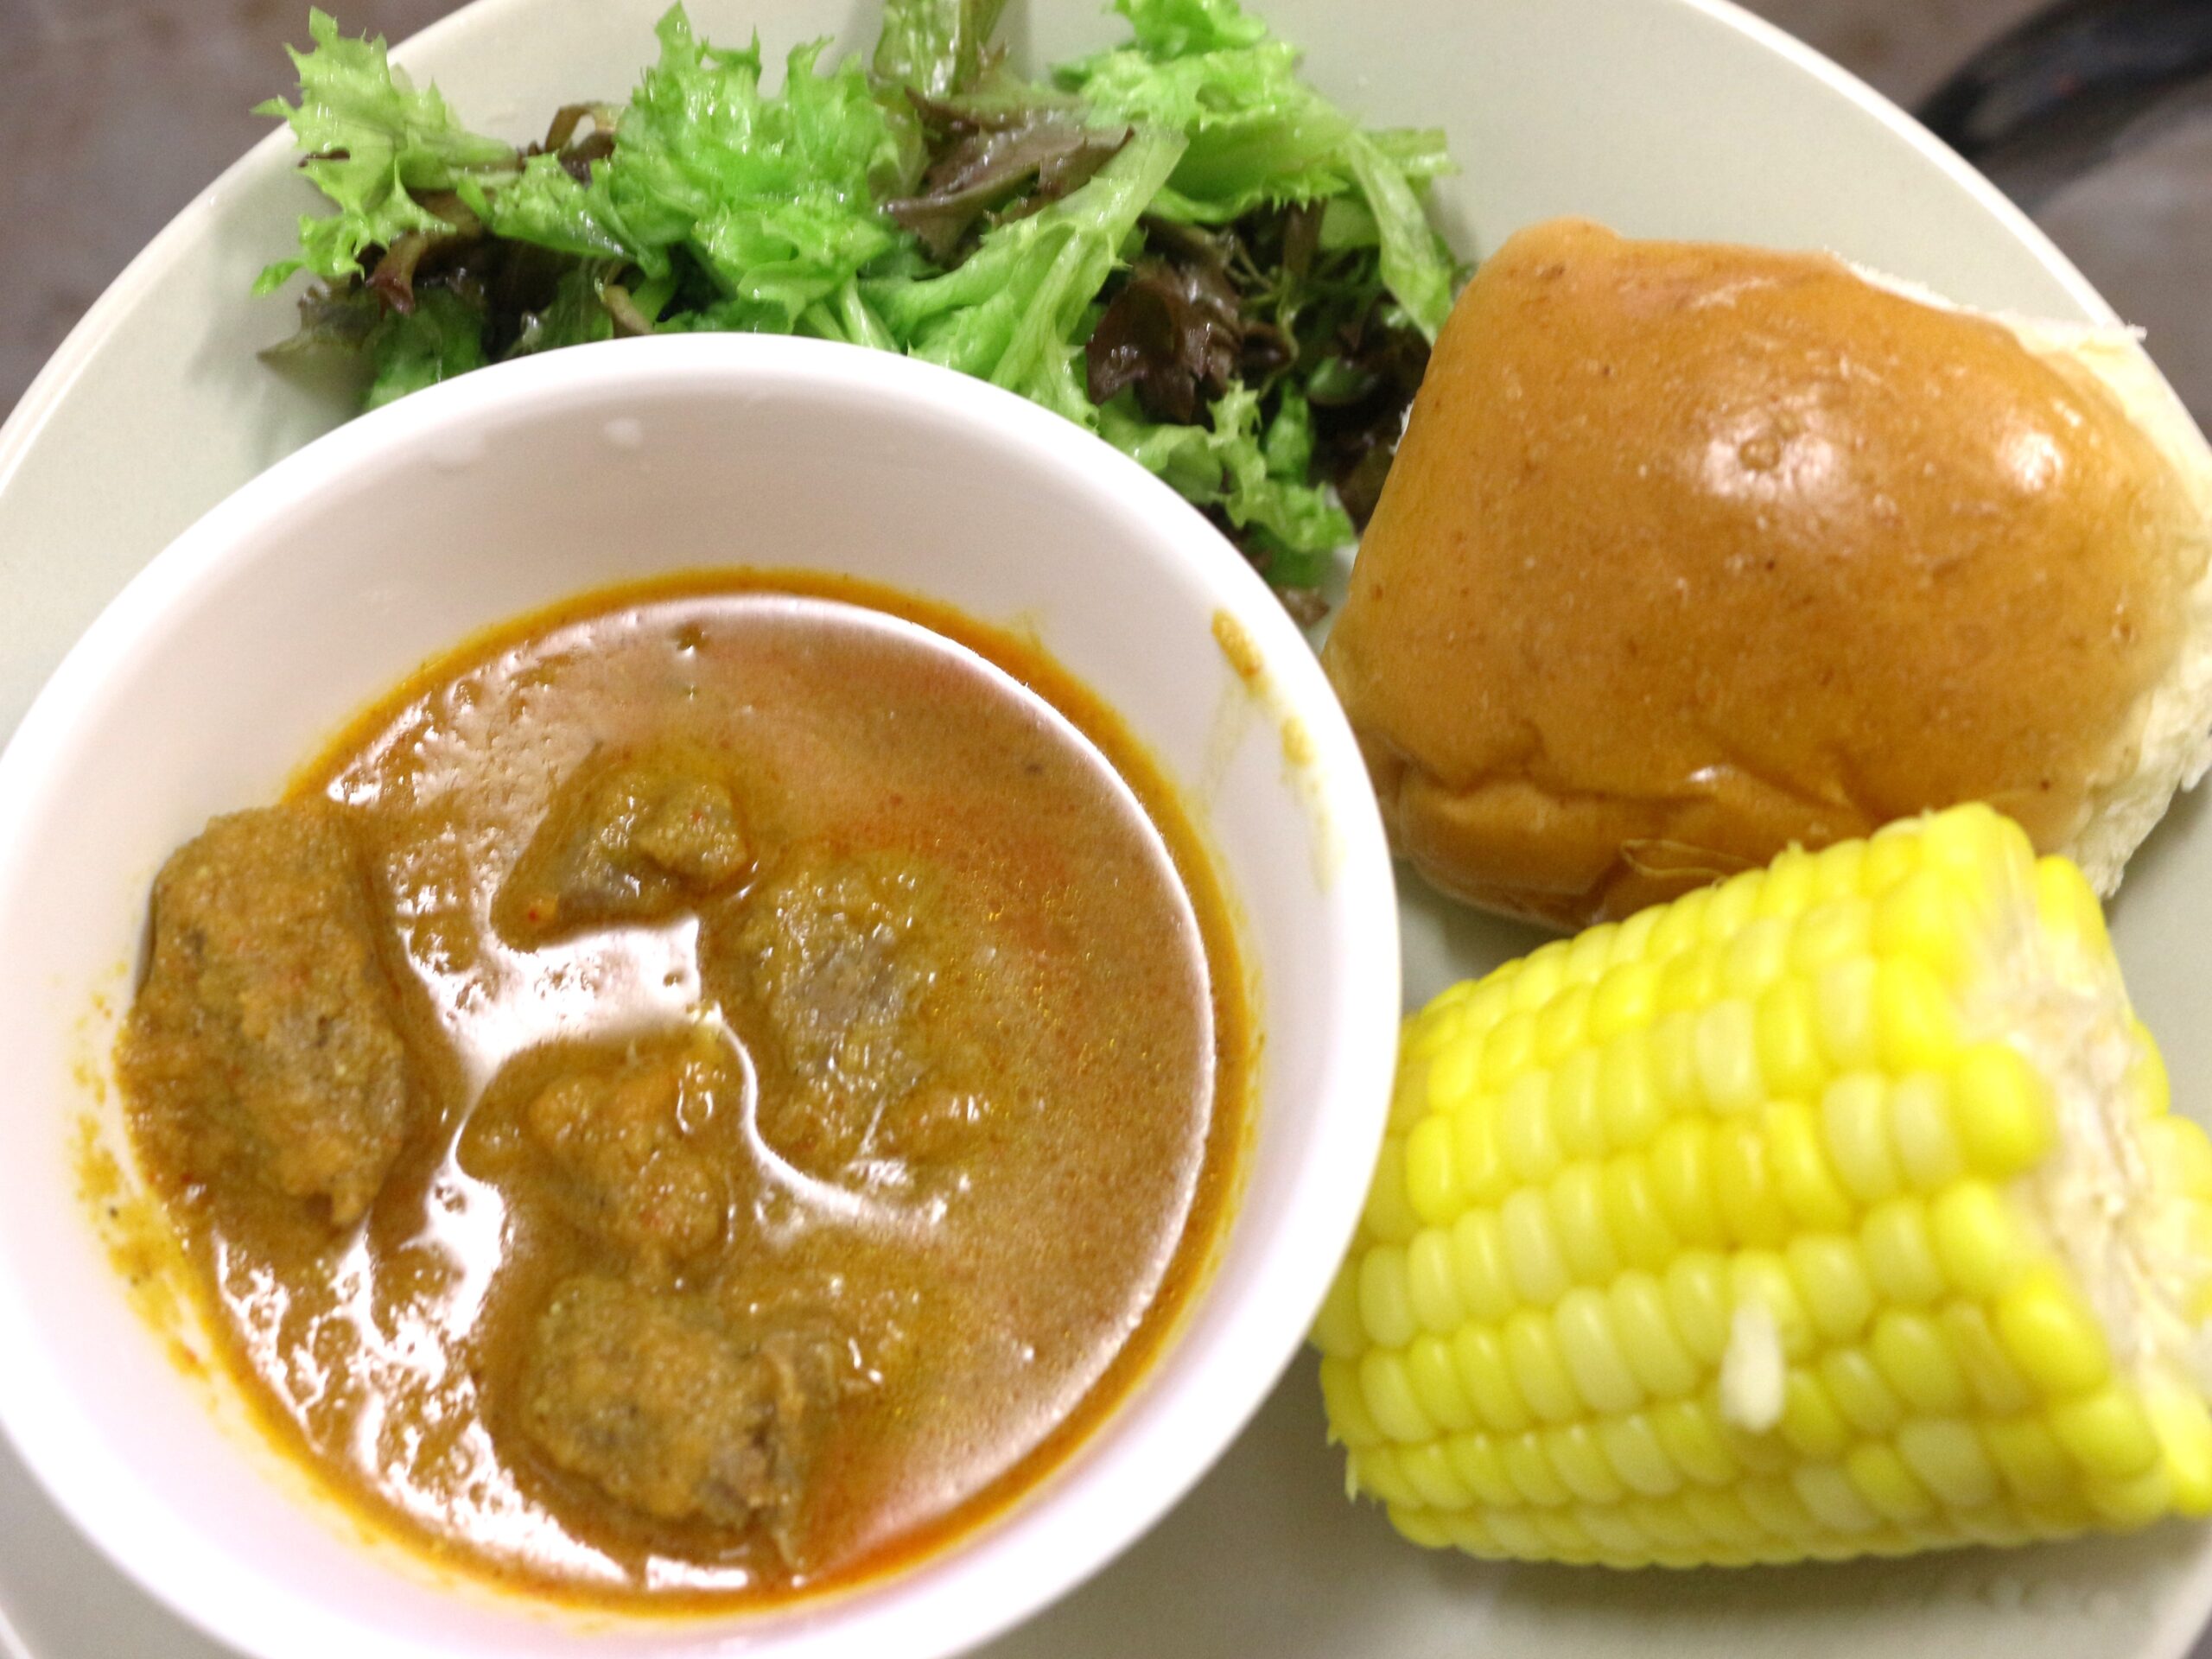
Serve it with plain bread or rice. You can accompany it with greens.

Mutton curry -bread-corn


Note:

* Pressure cooker I use for the last 3 years with specification:

Prestige Deluxe Plus Mini Induction Base Hard Anodized Pressure Handis, 4 Litres

Designed for both induction & gas stove cooking

Material: Hard anodised Aluminium

Colour: black

The link above is just for reference on its specifications and looks.Previously, I have used a mini pressure cooker similar to this one and have never had problems with it. Make sure you do not use it on very high heat without oil.


Stay Healthy!

Read More

Baingan Barta – Eggplant Recipe


Baigan (eggplant/aubergine/brinjal) Barta is named in Hindi language is Punjabi origin. In this recipe I have baked the aubergines to get a soft, tender pulp. They are peeled and mashed which is then mixed with onions and very few basic Indian spices. Traditionaly served with Indian Roti (bread).

Another fantastic way to use roasted Aubergines is preparing a Mediterranean dip called Baba Ganoush served with Middle Eastern flatbread. I have put up this recipe on my Facebook page if it interests you.

Preparation time: 5 minutes

Cooking time: 25 minutes + grilling

Serves: 4

Ingredients

Egg plant or Aubergine – 500 g, usually 2 (*see notes)

Olive oil – 1 tbsp

Garlic cloves – 5, finely chopped

Cumin seeds – 1 tsp

Onions – 1 large, chopped

Tomato – 1 large, chopped

Red chilli powder – 1 tsp

Coriander powder – 2 tbsp

Cumin powder – 1 tsp

Garam masala powder – 1/2 tbsp

Coriander leaves for garnish, small bunch

Salt as required

Directions

1. Preheat the oven at 200 degrees Celsius. Poke the aubergines (it wouldn’t make much of a difference without poking) with a fork all over and place them driectly on a low oven rack.

Egg plant

Roast it in convection mode for 35 to 50 minutes turning them frequently until they turn wrinkled and soft.

2. Use tongs to remove them from the oven. If you have the time let them cool completely. Peel, discard the skin and mash the flesh with a large spoon or you can cut them in half to scoop out the flesh.

How to use Aubergine/Baigan/Brinjal Flesh | Smoked or Grilled Eggplant

Set aside.

3. Meantime, prepare the rest of the ingredients.

4. Heat a deep-bottomed medium container with olive oil or ghee. Add cumin seeds, fry them for a minute. Then add onions and garlic. Fry until the onions turn translucent.

Cumin onion garlic

5. Add chopped tomatoes along with the rest of the spice powders such as red chili, cumin and garam masala powders. Mix and cook with some salt until soft.

Basic ingredients for Brinjal Recipe | Baingan Barta

6. Add Aubergine mash and cook for 7 -10 minutes on medium-low heat. Add more salt if needed. Garnish with coriander leaves.

Mashed Eggplant | Eggplant Recipe | Baingan Barta

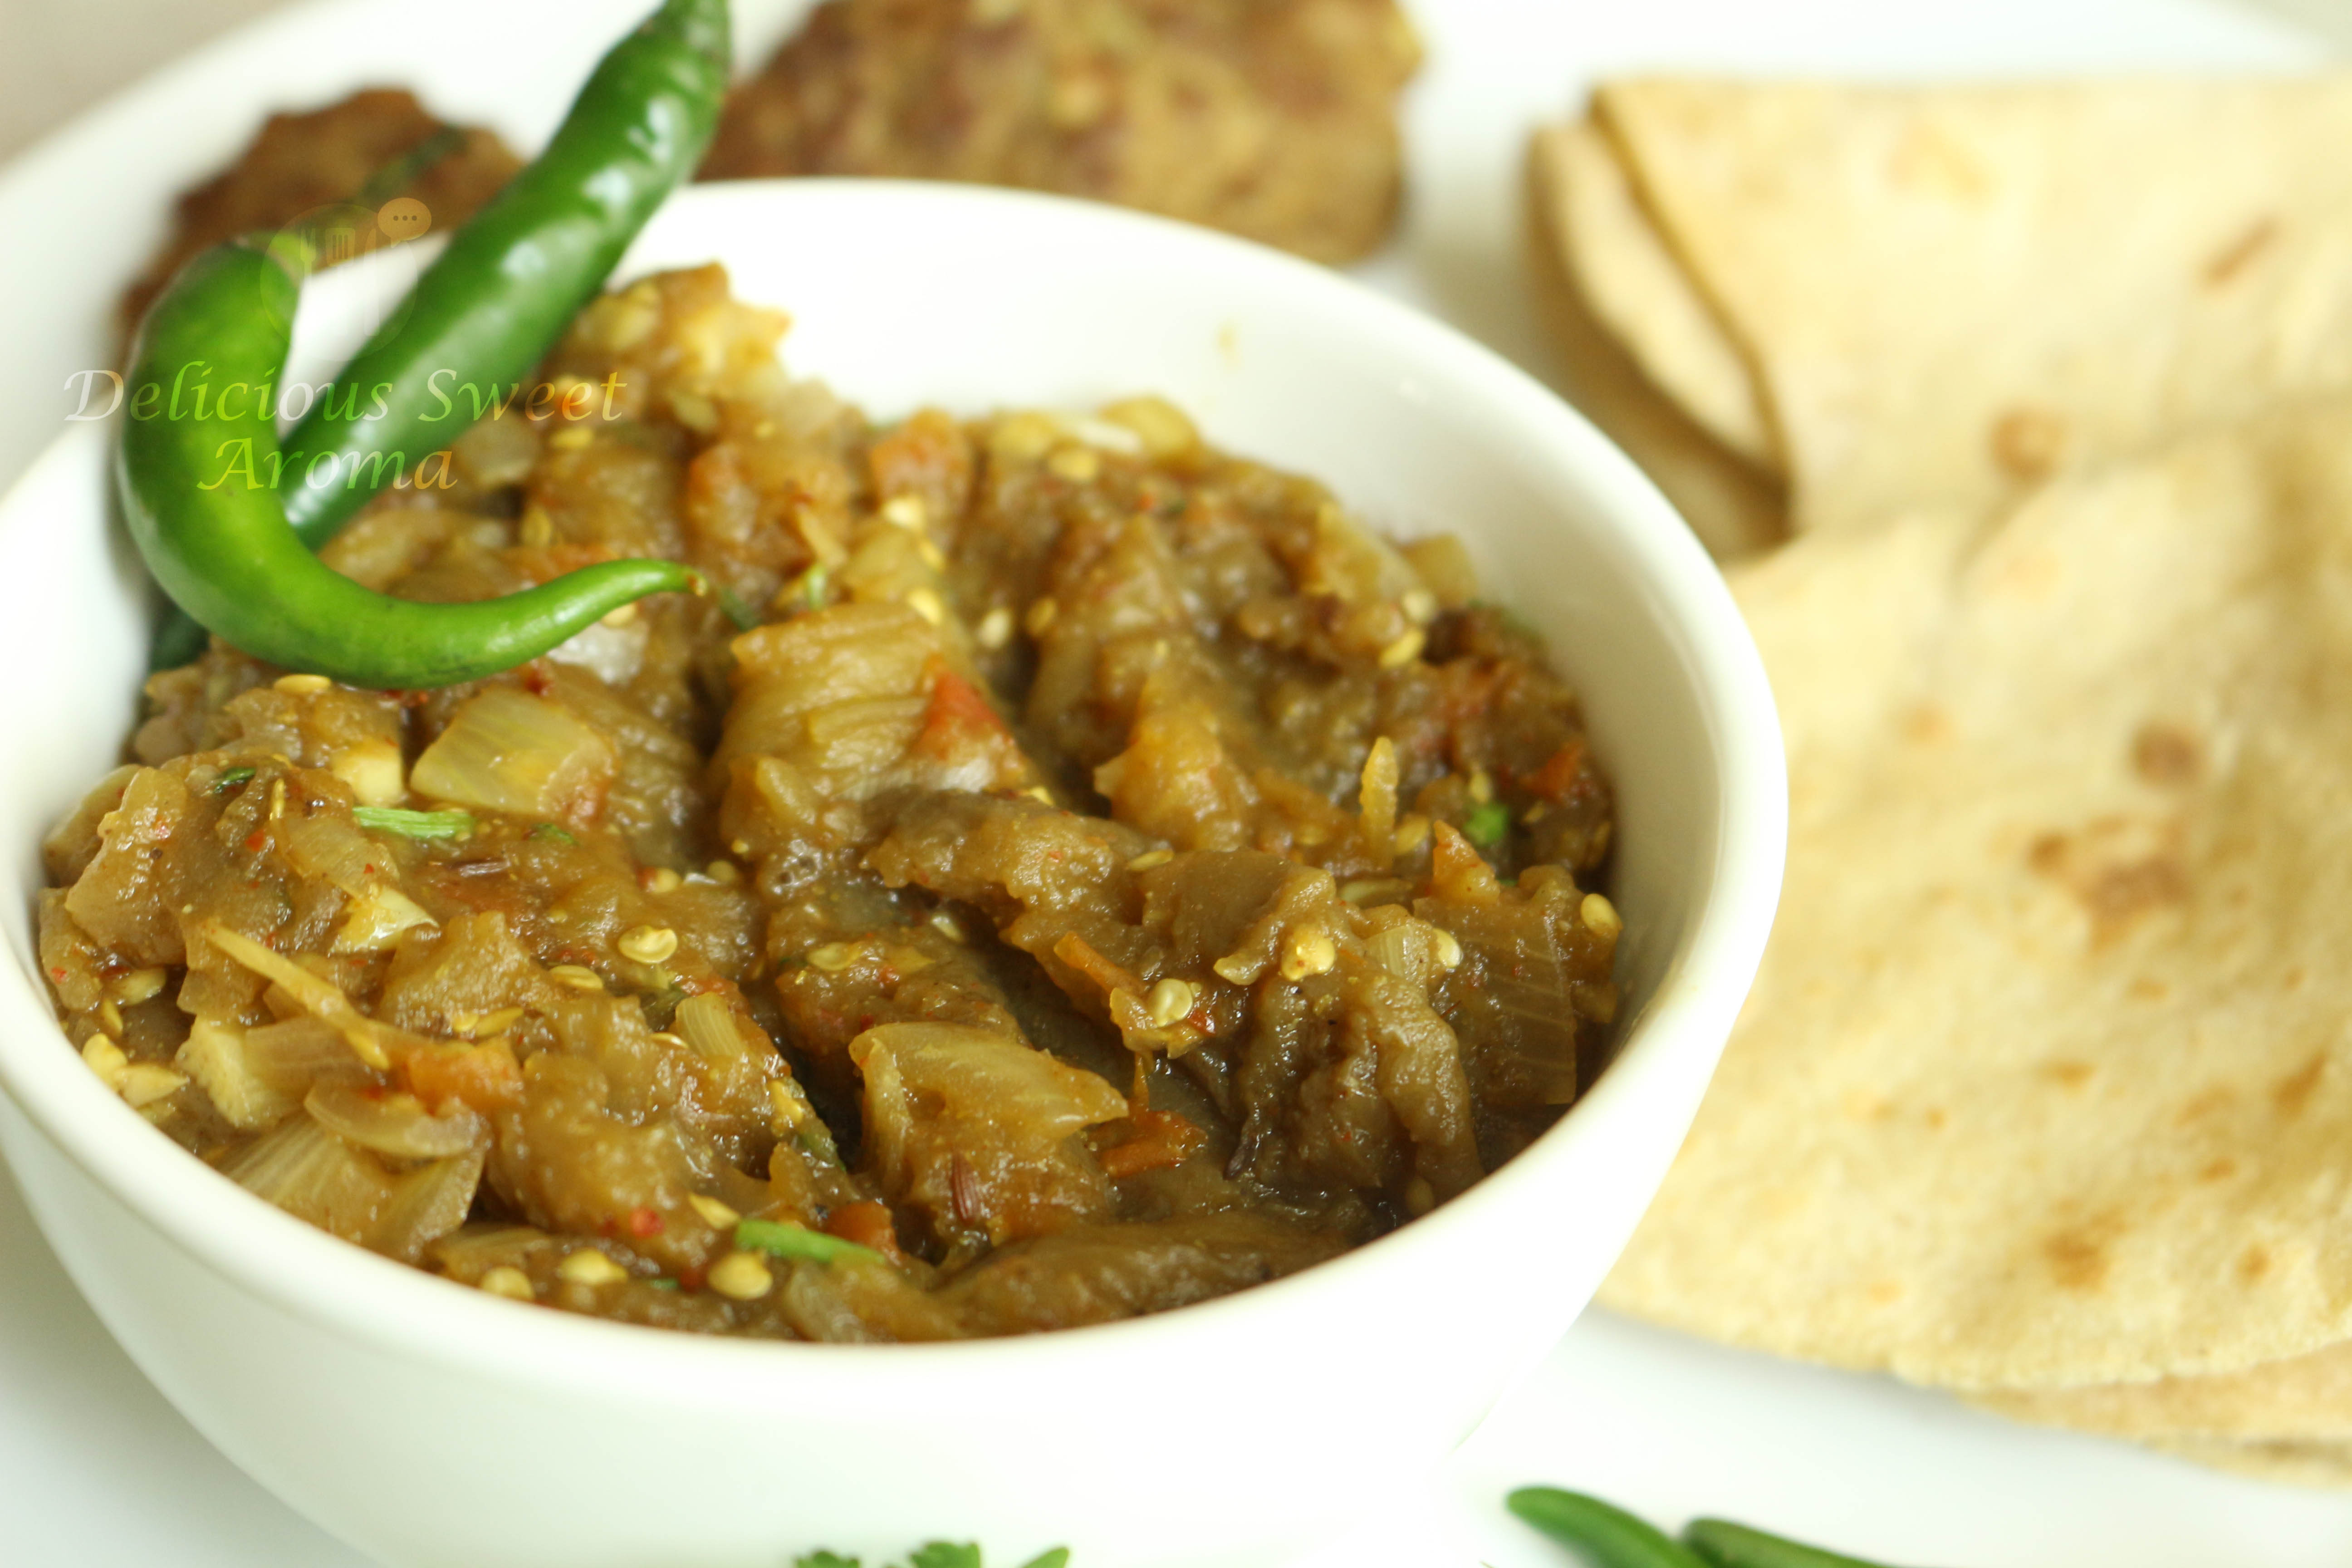
Serve them with french loaf, chapathi, roti of your liking. It is quiet filling as I had mine with Indian chapathis and Beef Cutlet. See notes on how you can make use of roasted aubergines other ways.

Eggplant or Aubergine Recipe | Vegetarian | Delicious Baingan Barta


Baingan Barta Recipe| How to make Easy Vegetarian Recipes


Notes:

* Baking time for aubergines sometimes depends on the size of the eggplant.

*Peeled and roasted eggplant can be stored in airtight container in the fridge for 3-4 days. They also taste great for dips by drizzling some olive oil, salt, pepper and some coriander powder.

*One could also grill the eggplant on fire directly until the skin blackens or chars and the flesh softens which is also another best way to roast it.


Stay Healthy!

Read More

Crispy Pork Wonton – Chinese

I have been wanting to try out the crispy version of Chinese deep-fried wontons ever since the time I have eaten these at a local food court in Singapore. They are crispy and delicious which makes it a perfect homemade appetizer for potluck parties.

One can just buy these store bought wonton wrappers or wonton pastries and store them in the freezer for long, remove when you want to use them as many as you need leaving the rest back in the freezer. The filling can be prawns, spinach, pork, chicken, tofu, cheese etc of your choice. Sometimes chopped fresh water chestnut is also used to mix with the fillings. For greens make sure to squeeze out any extra amount of water before using it for filling.

Related Wonton recipe:

Pork wonton soup recipe

Preparation time: 20 -25 minutes

Cooking time: 10 minutes

Serves: 2

Ingredients

Pork mince – 250 g

Wonton pastry or wrapper – 35 to 40

Oil for deep-frying

Soya sauce – 3 tbsp

Sesame sauce – 1 tbsp

Spring onions – 15 g, finely chopped

Water for sealing

Directions

1. Prepare the wonton filling.

Take a bowl, add soya sauce, sesame oil and spring onions. Mix together beef mince and toss to coat well.

beef mince with sauce

2. Place a teaspoon of the mince mixture in the centre of each wonton pastry. Keep a small bowl of water and apply water to seal them as shown below.

IMG_0516

IMG_0517

3. Heat a deep-bottomed container with 2-inch oil. Once heated, drop each wonton in hot oil and fry till light brown turning sides.

IMG_0524

4. Serve them with thai chili dip.

IMG_0567

IMG_0561

Stay Healthy!

Read More

Silken Tofu with Garlic and Crispy Onion

This Jiggly soyabean product of Silken tofu is one of the vast array of tofus that are commonly used in the Asian cuisine. Silken tofu is soft, delicate and just require a little bit of skill for careful handling before they fall apart. These cakes of soft silken tofu can be eaten raw pretty straightforward right out from the package, drain excess water or steamed for a couple of minutes and topped up with ingredients of choice.

One of the reasons I do not eat tofu so often is because its bland and so boring. However, a quick sauce with fried onions, garlic and green onions gave the tofu a very good flavor and the discovery of this quick go-to recipe in no time.

Preparation time: 5

Cooking time: 12 minutes

Serves – 2


Ingredients

Silken tofu – 1 pack

UNICURD Silken Tofu | Vegetarian recipe | Delicious Sweet Aroma

Sunflower / Vegetable oil for deep-fry

Onion – 1 small, thinly  sliced

Soya sauce – 3 tbsp

Sesame oil – 1 tbsp

Oyster sauce – 1/2 tbsp

Garlic cloves – 1 large, finely chopped

Spring onions for garnish


Directions

Steaming the tofu:

1. Prepare a steamer or broad container with 1 cup water and bring to a boil. Place a steamer stand.

2. Since the tofu is very delicate, place a flat plate over the opening and carefully invert or flip it over, tap gently until the tofu comes out.

Place the tofu plate on the steamer stand making sure it doesn’t slide. Cover and cook for 10 minutes on medium heat.

Steaming Tofu | Easy Vegan Recipe


Preparing the topping and sauce:

3. Meanwhile, heat a container with 1/2 cup oil. When it’s hot add the sliced onions and fry tossing frequently until they have all turn golden brown. This might take at least 5 minutes.

Strain on kitchen paper towels. Set aside.

4. Heat a small pan with the sauces such as soya, sesame and oyster. Add chopped garlic and fry for a minute or 2. Turn off heat and set aside.

Preparing the sauces for tofu

5. Remove the tofu plate carefully with a pair of tongs having a good grip. Drain any liquid that has accumulated as much as possible.

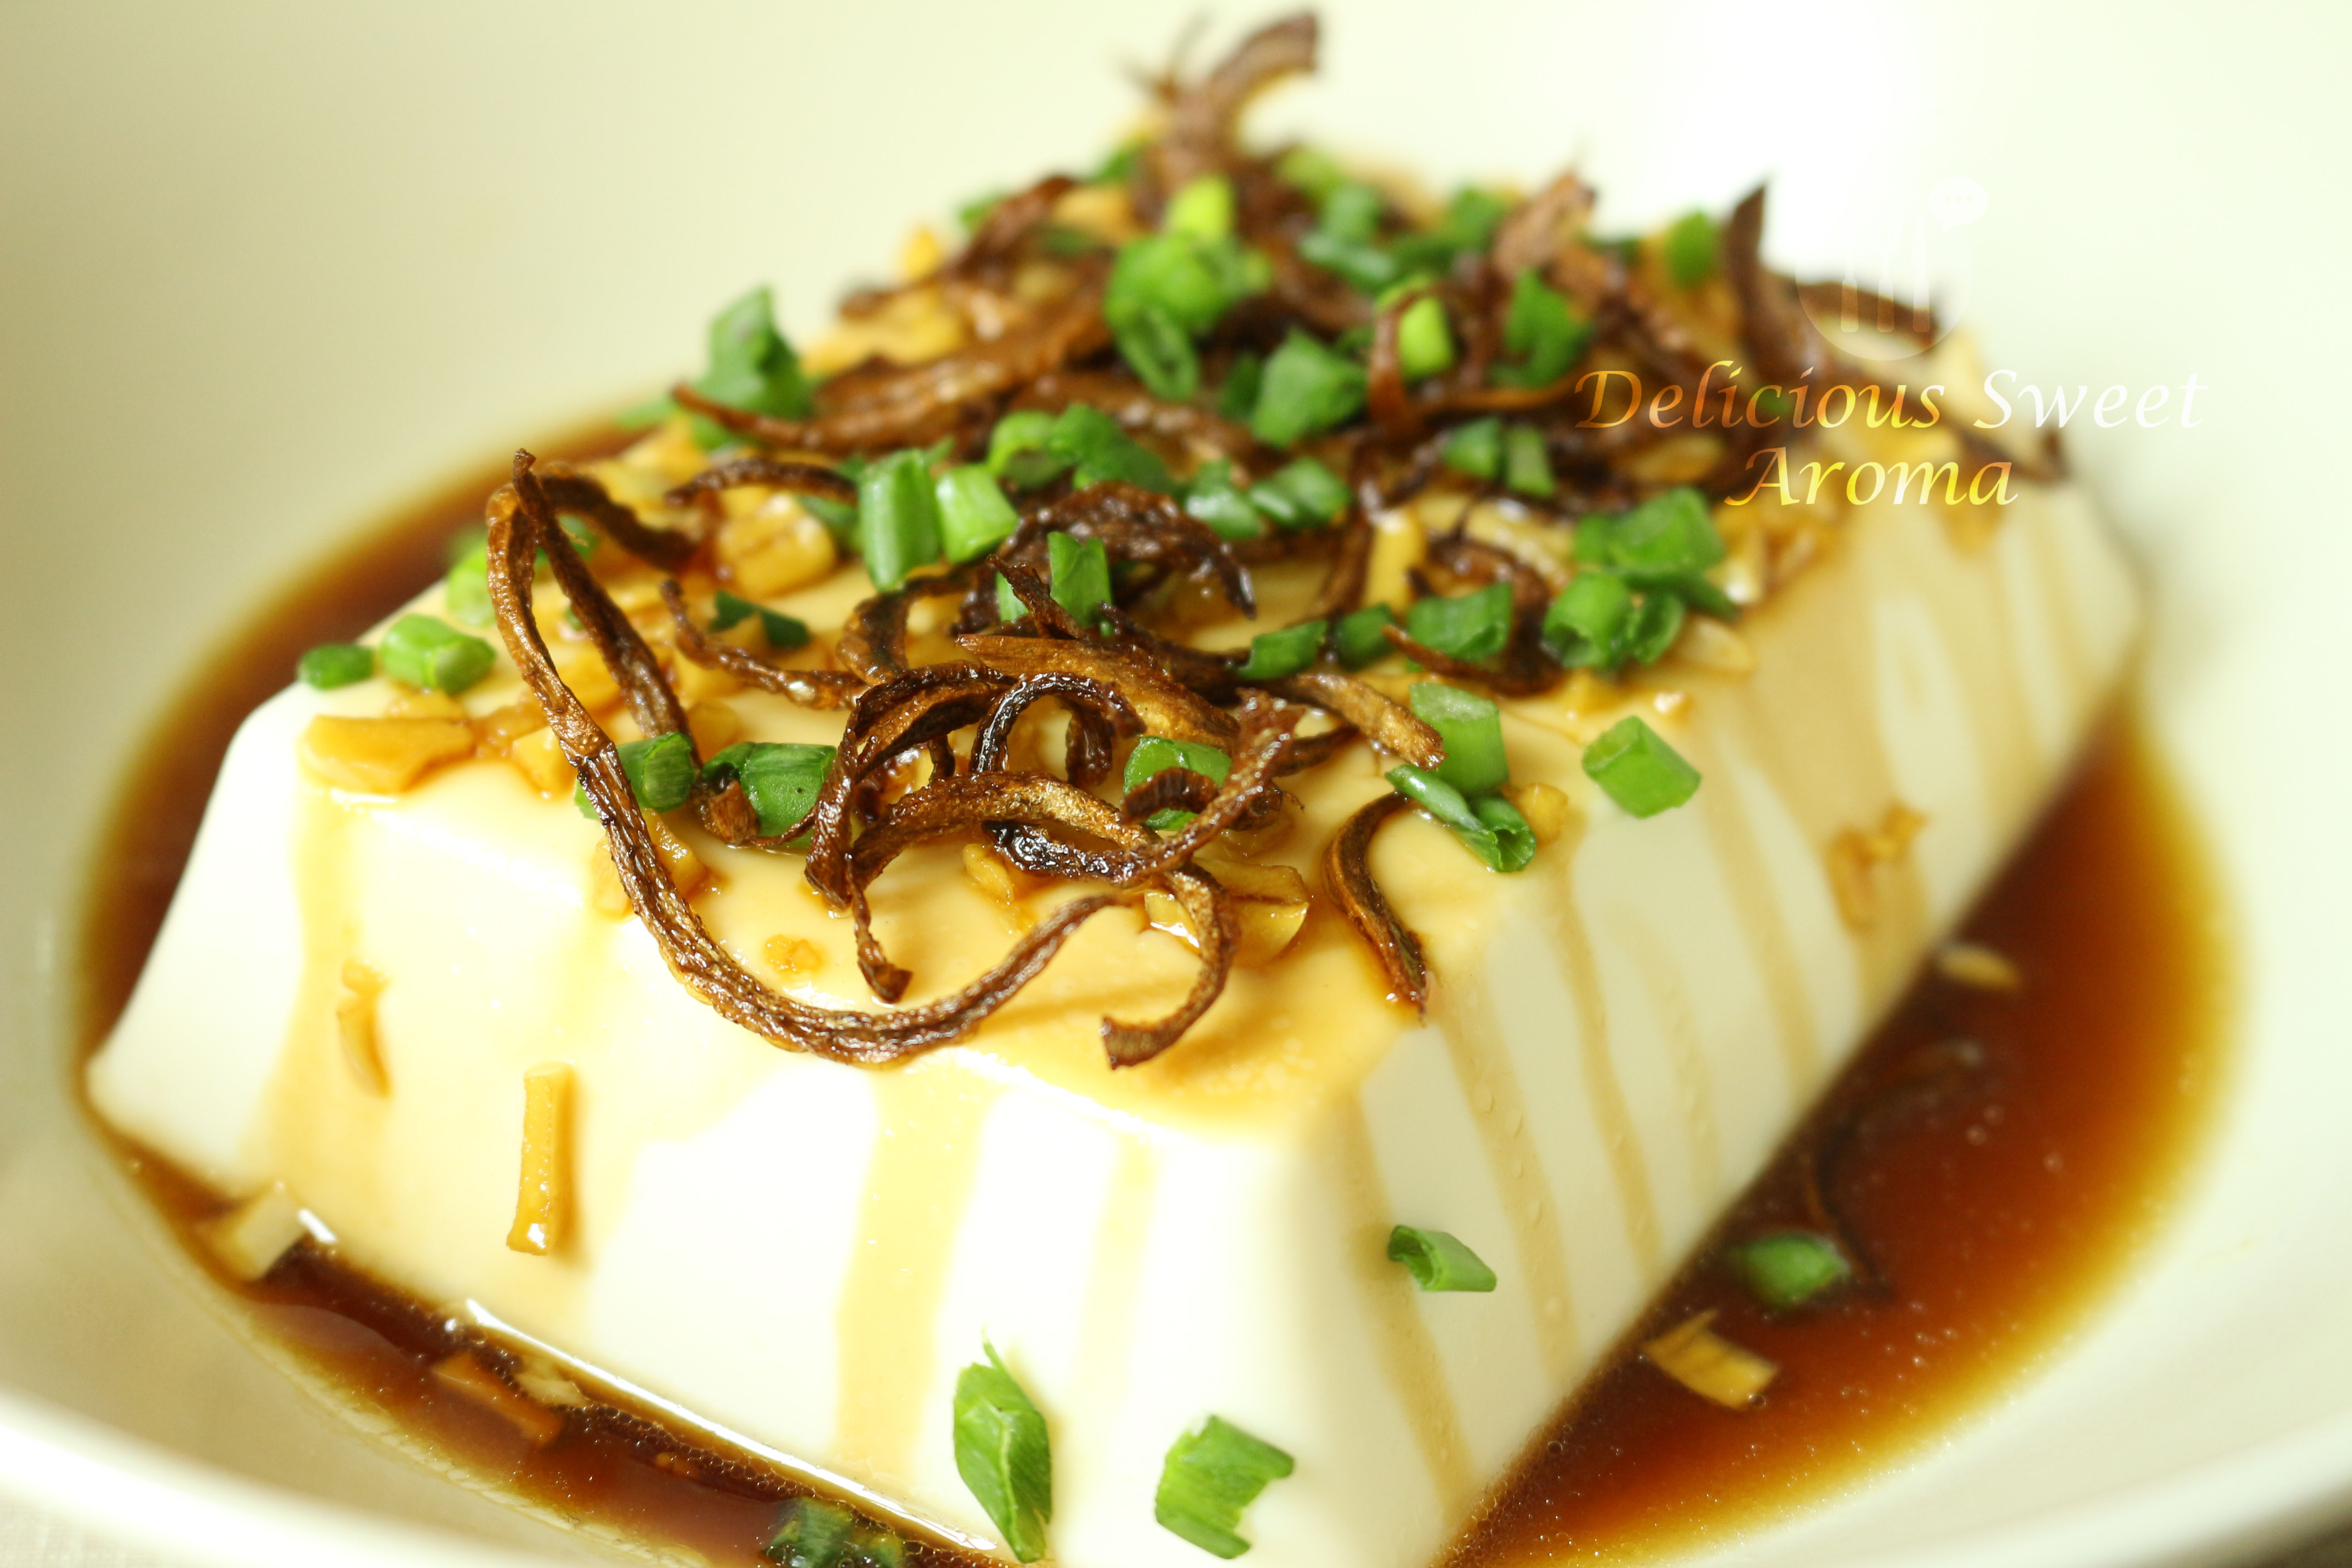
Slide it on a shallow bowl. Spoon the sauce mixture over the top, then sprinkle crispy fried onions and spring onions.

Topping for Silken Tofu | Easy Recipe

Silken Tofu with Garlic & Crispy Onion | Vegan 15-Minute Recipe | Delicious Sweet Aroma

Smooth Silken Tofu | Chinese Vegan Recipe | Delicious Sweet Aroma


Stay Healthy!

Read More

Orange Cake

Orange cake, a simple aromatic yellow cake has such an amazing fragrance that you will without a doubt prepare it again. One of my favorite evening snack.

One weekend we visited our old batchmates from college and before visiting we had couple of hours. So, I thought of taking something homemade. I decided to prepare this cake since my fruit basket was calling out for oranges to be eaten the end result turned out great as expected with simple last-minute ingredients. Two days ago I baked it again at my husband’s request to have the cake after meals and all I had to do was mix all the ingredients in one bowl and bake.


Preparation time: 20 minutes – 30 minutes

Cooking time: 55 – 60 minutes

Serves: 5 +


Ingredients

Orange – 1 large (unpeeled & washed), approx 195 g

Butter 125 g (room temperature)

All-Purpose flour / Top flour – 2 cups / 1 pint / 345 g

Caster sugar 185 g / 8 oz

Baking soda – 1 tsp

Pinch of salt

Vanilla essence – 2 tsp

Eggs 2 medium whole

Dates 100 g (pitted and chopped, weighed before pitting)

Water – 2 tbsp

Almonds – 100 g (optional)

Directions

1. Take the orange, cut roughly into quarters and remove any seeds. Add it into a blender or food processor (along with its peel) and 2 tbsp of water. Blend to combine together and form a paste. Set aside.

Orange paste

Preheat convection oven at 160 deg and line a baking tray base with butter and parchment paper, grease butter over the paper.

2. In a large bowl add flour, sugar, butter, baking soda, vanilla, salt. Mix with a wooden spoon initially for a minute or two so the flour gets combined together without making a mess. Add eggs, mix with a hand held mixer for approximate 2 – 3 minutes until smooth on medium – high speed.

Batter

Remove the stir paddle with any leftover cake batter.

3. Add the chopped dates and if you use almonds add them now or place them on the top. Mix with the wooden spoon till well combined.

Final Batter mix

4. Spoon the mixture into the prepared baking tray, pop it into the preheated oven on convection mode (fan). Bake for 45 minutes at 160 deg Celsius, reduce temperature to 150 degrees and bake for another 5-10 minutes or until a skewer inserted in the center comes clean.

Let it sit in the oven for 5 minutes. Remove from the oven, release the spring and serve it warm.

Phone_1

It’s best to leave it to cool partially or completely at room tremperature otherwise it might break apart. We loved the crispy top with soft texture on the inside, a flavor and aroma that is always best suited for big families or serve guests. You can use chocolate sauce as a good accompaniment.


Note:

*In case you’re wondering what kind of orange to use, here I have used Valencia Orange. Before using an orange I dipped it for 5 – 20 minutes in a bowl with 1 1/2 cup of water and 1 tbsp vinegar just to wash away any unwanted dirt or chemicals.

*If you wouldn’t have time to get the butter to room temperature, cut the desired quantity of butter into small cubes before preparing rest of the ingredients it gets softer faster by the time you are ready to combine the rest. On an additional note – if the eggs are lying in the fridge, place them out on the counter top.

Thank you everyone for your compliments and questions. It makes me try more recipes and also share them here. Please stay updated on Instagram #delicioussweetaroma for pictures and Facebook Delicious Sweet Aroma for food.


Stay Healthy!

Read More

Tomato Rice – Aromatic Flavor

Sometimes I run out of ingredients. I also do not have time to do last-minute grocery shopping. With less time to make lunch or dinner, that’s when tomato rice comes in my menu😋. You see, one of the main reasons why this recipe hasn’t been posted up until now.  I have been preparing this for a year. More than twice a month, I couldn’t find time to take pictures on every occasion.

It’s been a while since my last post and I believe my loyal visitors must be wondering why. I have been out of the away to spend some quality time with family. While being away, I have learnt few quick recipes. They always come in handy during busy days. I will be posting them here in the coming weeks. Tomato Rice, has been the most loved recipe in my family and I think this recipe is underrated. It’s easy to prepare, a quick lunch or dinner ready in 30 minutes. It’s easiest when prepared in a pressure cooker.

Tomato rice is perfect for a quick, last-minute decision on what to cook for lunch or dinner. After all, tomatoes are always available in the fridge, aren’t they? A great idea for lunch box or picnic party.

Preparation time: 5 minutes

Cooking time: 20 minutes

Serves: 4

Ingredients

Basmati /Ponni rice / Langkorn Parboiled rice (German) or Parboiled rice / Turkish Rice – 1 cup / 275 g (*see notes)

Olive oil / Ghee – 1 tbsp

Bay leaf – 2 small, (optional)

Cinnamon stick – 2 inch

Cardamom – 2

Cloves – 4

Peppercorns – 5 (optional)

Onions – 1 medium, finely chopped

Tomatoes – 3 or 4 large, chopped (depending on serving part)

Green Chili – 1 long, halved (if not, substitute red Chili powder)

Garam masala powder – 2 tsp

Coriander powder – 1 tbsp

Turmeric powder – 1/4 tsp

Chili powder – 1 tsp (optional)

Garlic paste – 1 tsp

Ginger paste – 1 tsp

Mint leaves – approx 20 leaves, washed (optional, but recommended for intense flavor)

Coriander – 3 stems or fist full, roots removed, washed & finely chopped

Water 2 cups

Salt as required

Directions

1. Rinse and soak basmati rice. I usually keep it for 5-10 minutes. Do this while preparing the first few ingredients, except coriander and mint. Not necessary to soak if you do not find time.

2. Heat olive oil or Ghee on medium heat, add cinnamon stick, cloves, cardamom, bay leaf and peppercorns. Stir fry for a minute or two then add onions, fry till slightly translucent.

Add tomatoes with 1/2 teaspoon salt. Cook and stir fry until it turns mushy and soft. Meantime prepare the mint leaves and coriander.

Initial stir-fry of spices

3. Add generous amount of spice powders. Use garam masala, coriander, turmeric, and chilli powders. Add them when the tomatoes are almost turning soft. Add ginger and garlic paste. Mix to combine.

Spice powders

4. Toss in coriander and mint leaves.

fresh herbs

5. Mix well and add rice with 2 cups of water (twice the amount of rice). Add salt and check if it needs more salt. Close with the lid along with the pressure whistle.

For basmati rice, it requires just one whistle pressure. Fatter rice (parboiled) needs more time to cook. It usually takes 3-5 whistles.

Masala mix with rice

Turn off heat right away. Let the pressure release on its own.

Tomato rice_quick recipe0397

We enjoyed our tomato rice with pan-fried fish 🐟 as a side 😍

Tomato rice_onepot_0406


Notes:

*For this particular recipe I used India Gate basmati rice. The German Ja brand of Langkorn parboiled reis complements this dish very well. It is great even without mint and bay leaf. Only a quick 4-5 whistles are required. Tat brand Turkish origin rice takes approx 3 whistles until nice and fluffy.

*If using non-pressure cooker method: Continue cooking until the first part of step 5 by adding water to the rice. Once it has come to a boil, and the level of water has reduced, turn down the heat. Keep a constant eye on it, so it doesn’t burn at the bottom. Cover with a lid and continue cooking for 3-4 minutes. If the water has completely dried up, check if the rice is almost done. If it is still hard, add 1/3 cup hot water. Turn off the heat and keep the lid covered. The rice will cook in its own steam.


Hoping to know some of my frequent visitors 😊. Thank you for dropping by Delicious Sweet Aroma. Also, do not forget to check for updates on my Facebook page here 👉 ‘Delicious Sweet Aroma‘.


Stay Healthy! Sherryl ✍

Read More

Fresh Clams in Coconut Milk

Coconut milk gives a rich flavor especially with a combination of seafood and spices. Fresh clams in coconut milk is one of the favorite recipes you will love from the Asian cuisine.

After my first try at cooking clams, I wanted to make a curry that would pair perfectly with rice. This time, we headed to the wet market earlier than usual, around 9 a.m. on Saturday, to pick up fresh clams. I was amazed by the wide variety of shellfish available! They were selling out quickly, and most were already gone. The fishmonger, who only sold shellfish, mentioned that I should have come even earlier. Apparently, arriving earlier would have given me the chance to see an even greater variety of fresh sea shells. I was still late to catch all the varieties—what a surprise! I haven’t seen these shells being sold even in my hometown. Although I lived all my childhood near the sea, I was stunned and excited at the same time.


But I was not too late to grab my fresh clams after all. Lucky us! This time I found clams with a size slightly bigger in size than the ones I bought the last time.


Preparation time: 5 minutes

Cooking time: 30 minutes

Serves: 3-4

Ingredients

Fresh clams – 1 kg, cleaned (*see here)

Olive oil / Butter – 1 tbsp

Shallots – 2, finely chopped

Tomatoes – 2, finely chopped

Fish curry powder / Fish powder – 3 tbsp

Turmeric powder – 1/4 tsp

Coconut milk – 200 ml

Water – 1 to 2 cups, depending on consistency

Salt

Coriander leaves for garnish (finely chopped)

Directions

1. Heat a heavy-bottomed container with oil or butter on medium-high. Fry onion till translucent for a few minutes. Add in chopped garlic and ginger. I used ginger paste as fresh ginger was out of stock.

Ingredients1- clam curry

2. Fry the garlic and ginger for a few seconds then add tomatoes. Cook the tomatoes until slightly mushy or saute for 2-3 minutes. Add the seafood powder or fish powder and mix.

Ing2

3. Pour the coconut milk, turmeric powder and salt. Add 1 cup water depending on the thickness consistency for the curry.

coconut milk-turmeric

Simmer for few minutes and check for salt. Add more if necessary.


4. Add the clams and cover with a tight-fitting lid. Cook for 5 – 8 minutes covered on medium heat.

raw clams

Check to see if all the clams have opened. All of the clams will open by this time. Check for salt.

cooked clams

Garnish with chopped coriander and serve hot with rice or bread.


Clam curry_9676


Spicy Clam Recipe – Mangalorean Style (DRY)

Flower Crab – Curry (Mangalorean Recipe)


Stay Healthy!

Read More

Pork Lettuce Wraps

Pork mince can be used for different types of meals such as preparing meatballs, fillings for wonton soup, patties etc. Hence its versatile.

This recipe of adding greens in your everyday diet is a healthier choice. Pork mince goes very well with lettuce with a juicy intense flavor of sweetness, spiciness and tanginess. I would definitely make my lettuce wraps often as it is less time-consuming and also a great idea to make use of greens.


Preparation time – 15 minutes

Cooking time – 35 to 40 minutes

Serves: 4+

Ingredients

Pork Mince – 500 g

Lettuce – big bunch

Cumin / jeera seeds – 1 tsp

Onion – 1 large, finely chopped

Garlic cloves – 4 large, finely chopped

Ginger – 1 inc long, finely chopped, same quantity as garlic

Tomatoes – 2 medium, finely chopped 


Cumin powder – 1/4 tsp

Coriander powder – 1 tbsp

Garam masala powder – 1 tsp

Pepper powder – 1 tsp

Chilli powder – 1 tbsp

Carrot – 70 g , medium size peeled and grated

Green / Red bell pepper (paprika) – small, finely chopped 

Nandos Peri-Peri chili Sauce (mild) – 3 tbsp, choice of spice level

Tomato ketchup – 1 or 2 tbsp depending on sweetness

1 large Lime for garnish (RECOMMENDED), cut into quarter slices


Directions

Initially prepare the first 6 ingredients and leave the rest for later to save time.

1. Heat a large wide saucepan with olive oil on medium-high heat and toss in the cumin seeds. Fry for a minute then add onion and fry till translucent.

cumin_onion

Meanwhile you can start preparing the carrot and peppers while the onions cook.

2. Add chopped garlic and ginger. Fry for a few seconds on medium-high until the raw smell goes away. Add chopped tomatoes and pinch of salt. Stir fry until the tomatoes get cooked and slightly mushy (adding salt makes  the process of cooking tomatoes slightly faster).

garlic_tomatoes

3. Add mince pork and all the spices such as cumin, coriander, garam masala, pepper and chilli powder. Mix and stir-fry for 3 – 4 minutes on high heat turning them slightly brown.

Spices into pork mince

4.  Add nandos sauce, Mix. Toss in bell peppers and shredded carrots. Mix and Cook for another few minutes.

Lastly, drizzle some tomato ketchup. Mix well and let it soak in the juices for another 2 minutes. Turn off heat.

Sauces


5. Clean and wash the lettuce leaves 5 to 7 large leaves or if the leaves are small combine 2 leaves. Dry them with a kitchen towel and spread the pork mince over the leaves.

Pork Lettuce Wraps

Drizzle generous amount of lime over the minced pork and enjoy. Garnishing with lime gives it a distinct tangy, spicy and sweet flavor which I really enjoyed.

lettuce wraps

Serve it as a side with rice or have it as an appetizer.


Stay Healthy!


Read More