Tag: Vegetarian

Mushroom Soup

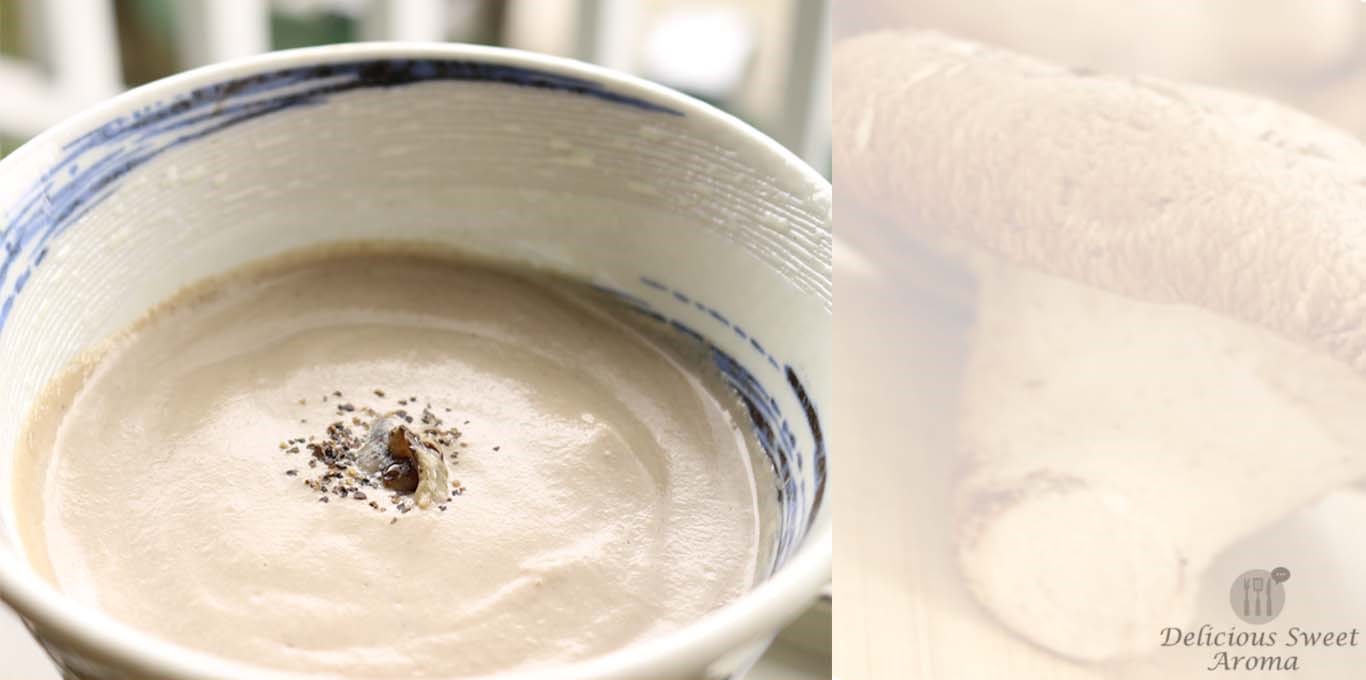
Even in this sweltering heat, one weekend evening, we went to a small local restaurant to have something very light and ordered steaming hot mushroom soup served in a paper cup. It was thick, delicious and satisfying. Since then, I wanted to try it and I finally made it.

Mushrooms | Soups | Delicious Sweet Aroma

I bought these fresh huge mushrooms and I believe they are called as Shiitake Mushrooms which were so pretty and beautiful that couldn’t help taking pictures of it.

Mushrooms | Recipes | Delicious Sweet Aroma

Brown Mushrooms | Shiitake | Delicious Sweet Aroma

Mushroom soup is easy to make and is warm, creamy, and comforting. This soup can be incredibly filling and can be easily eaten as a stand-alone meal or with a piece of crusty bread. It is also a healthy replacement of meat.


Preparation time: 10 minutes

Cooking time: 25 minutes

Appliance Required: Blender/food processor


Ingredients

Butter – 2 tbsp

Mushrooms – 12, thinly sliced

Onions – 1 medium, thinly diced

Salt as required

Cream  – 3 tbsp , or veg stock 

Water for consistency or veg stock


Directions

1. Melt butter in a medium pot on medium-low heat. Add onions, fry for 2 – 3 minutes till translucent.

Onions for flavor, Mushroom soup

2. Add the mushrooms and mix. Cover and cook on medium for at least 7- 10 minutes.

Mushroom ready for cooking | How to cook by Delicious Sweet Aroma

It must be soft. Turn off heat and let it cool for a while.

Cooking Mushrooms for Soup | by Delicious Sweet Aroma

3. Put the contents in a food processor or blender with 1/2 cup of water. Process on medium speed until smooth.

Mushroom puree | Soup | by Delicious Sweet Aroma

4. Add the pureed mushroom into the same pot with cream or  1 1/2 cup vegetable stock along with some salt. It will have a slight change in color from dark to light color.

Cream for mushroom soup | Delicious

Bring to a boil by reducing heat and simmering uncovered for 3-4 minutes. Serve hot

Mushroom Soup | Easy creamy soup | Delicious Sweet Aroma


Note:

*I haven’t added any veg stock as I ran out of it. Hence I replaced it with water and a bit of cream for creamy flavor.


Do share your views on my posts or similar recipes you have tried. Love to hear from you. Have a relaxing weekend!


Stay Healthy!

Read More

Curry of Drumsticks – Vegetarian

Drumsticks are not the easiest vegetable to find, and once you find it the next question is what do you do with it. They are long, rod shaped veggies that hang of drumstick trees called Moringa tree.

Drumstick on tree | Delicious Sweet Aroma Recipes

The flesh of these drumsticks impart a great flavor to the dish. They are commonly used in curries or sambar (veg-based stew) in South-India. The leaves of tender drumsticks are used for garnish as well.

Before you start preparing this recipe make sure you have all the ingredients for the vegetable curry paste. You can also prepare without the split pigeon peas like my other recipe here >> Curry with Green Bean.

Preparation time: 10 minutes

Cooking time: 40 minutes


Ingredients

Drumsticks – 2 or 3

Toor daal /Tuvar dhal / Split pigeon peas – 1/4 cup

Water

Salt

Vegetable curry paste: Anti-clockwise

Kashmiri red chilies – 3

Small Onion – 1, roughly chopped

Garlic cloves – 2

Grated coconut – 1 cup

Turmeric powder – 1/4 tsp

Mustard seeds – 1/4 tsp

Fenugreek seeds/Methi – 1/4 tsp

Cumin seeds/jeera – 1 tsp


ingredients veg curry_IMG_7283


Directions

How to peel/cut the drumsticks?

+ Cut the drumsticks into sections of  2 inch length

+ Scrape some portions of the skin with a small knife but remember not to remove all skin. Some prefer not peeling them as it gets a bit messy if overcooked.

+Rinse in water. Now its ready to cook.


1. Add the toor daal in a slow cooker or pressure cooker with 1 cup of water and 1/4 tsp salt. If your using a pressure cooker take 2 whistles and turn off heat.

toor daal or tuvar dhal for veg curry | Vegan recipe

Meantime prepare the vegetable curry paste. Note that the more grated coconut you add the more masala paste you get to make a thicker gravy.

Veg Masala Curry Paste | Delicious Sweet Aroma

2. You can either use the same vessel or transfer the contents of the cooker into a medium container along with its liquid. To this, add the prepared curry paste  with salt and 1. 5 cups of water depending on you required consistency of thickness. Bring it to a boil.

Check for salt. Add the drumsticks

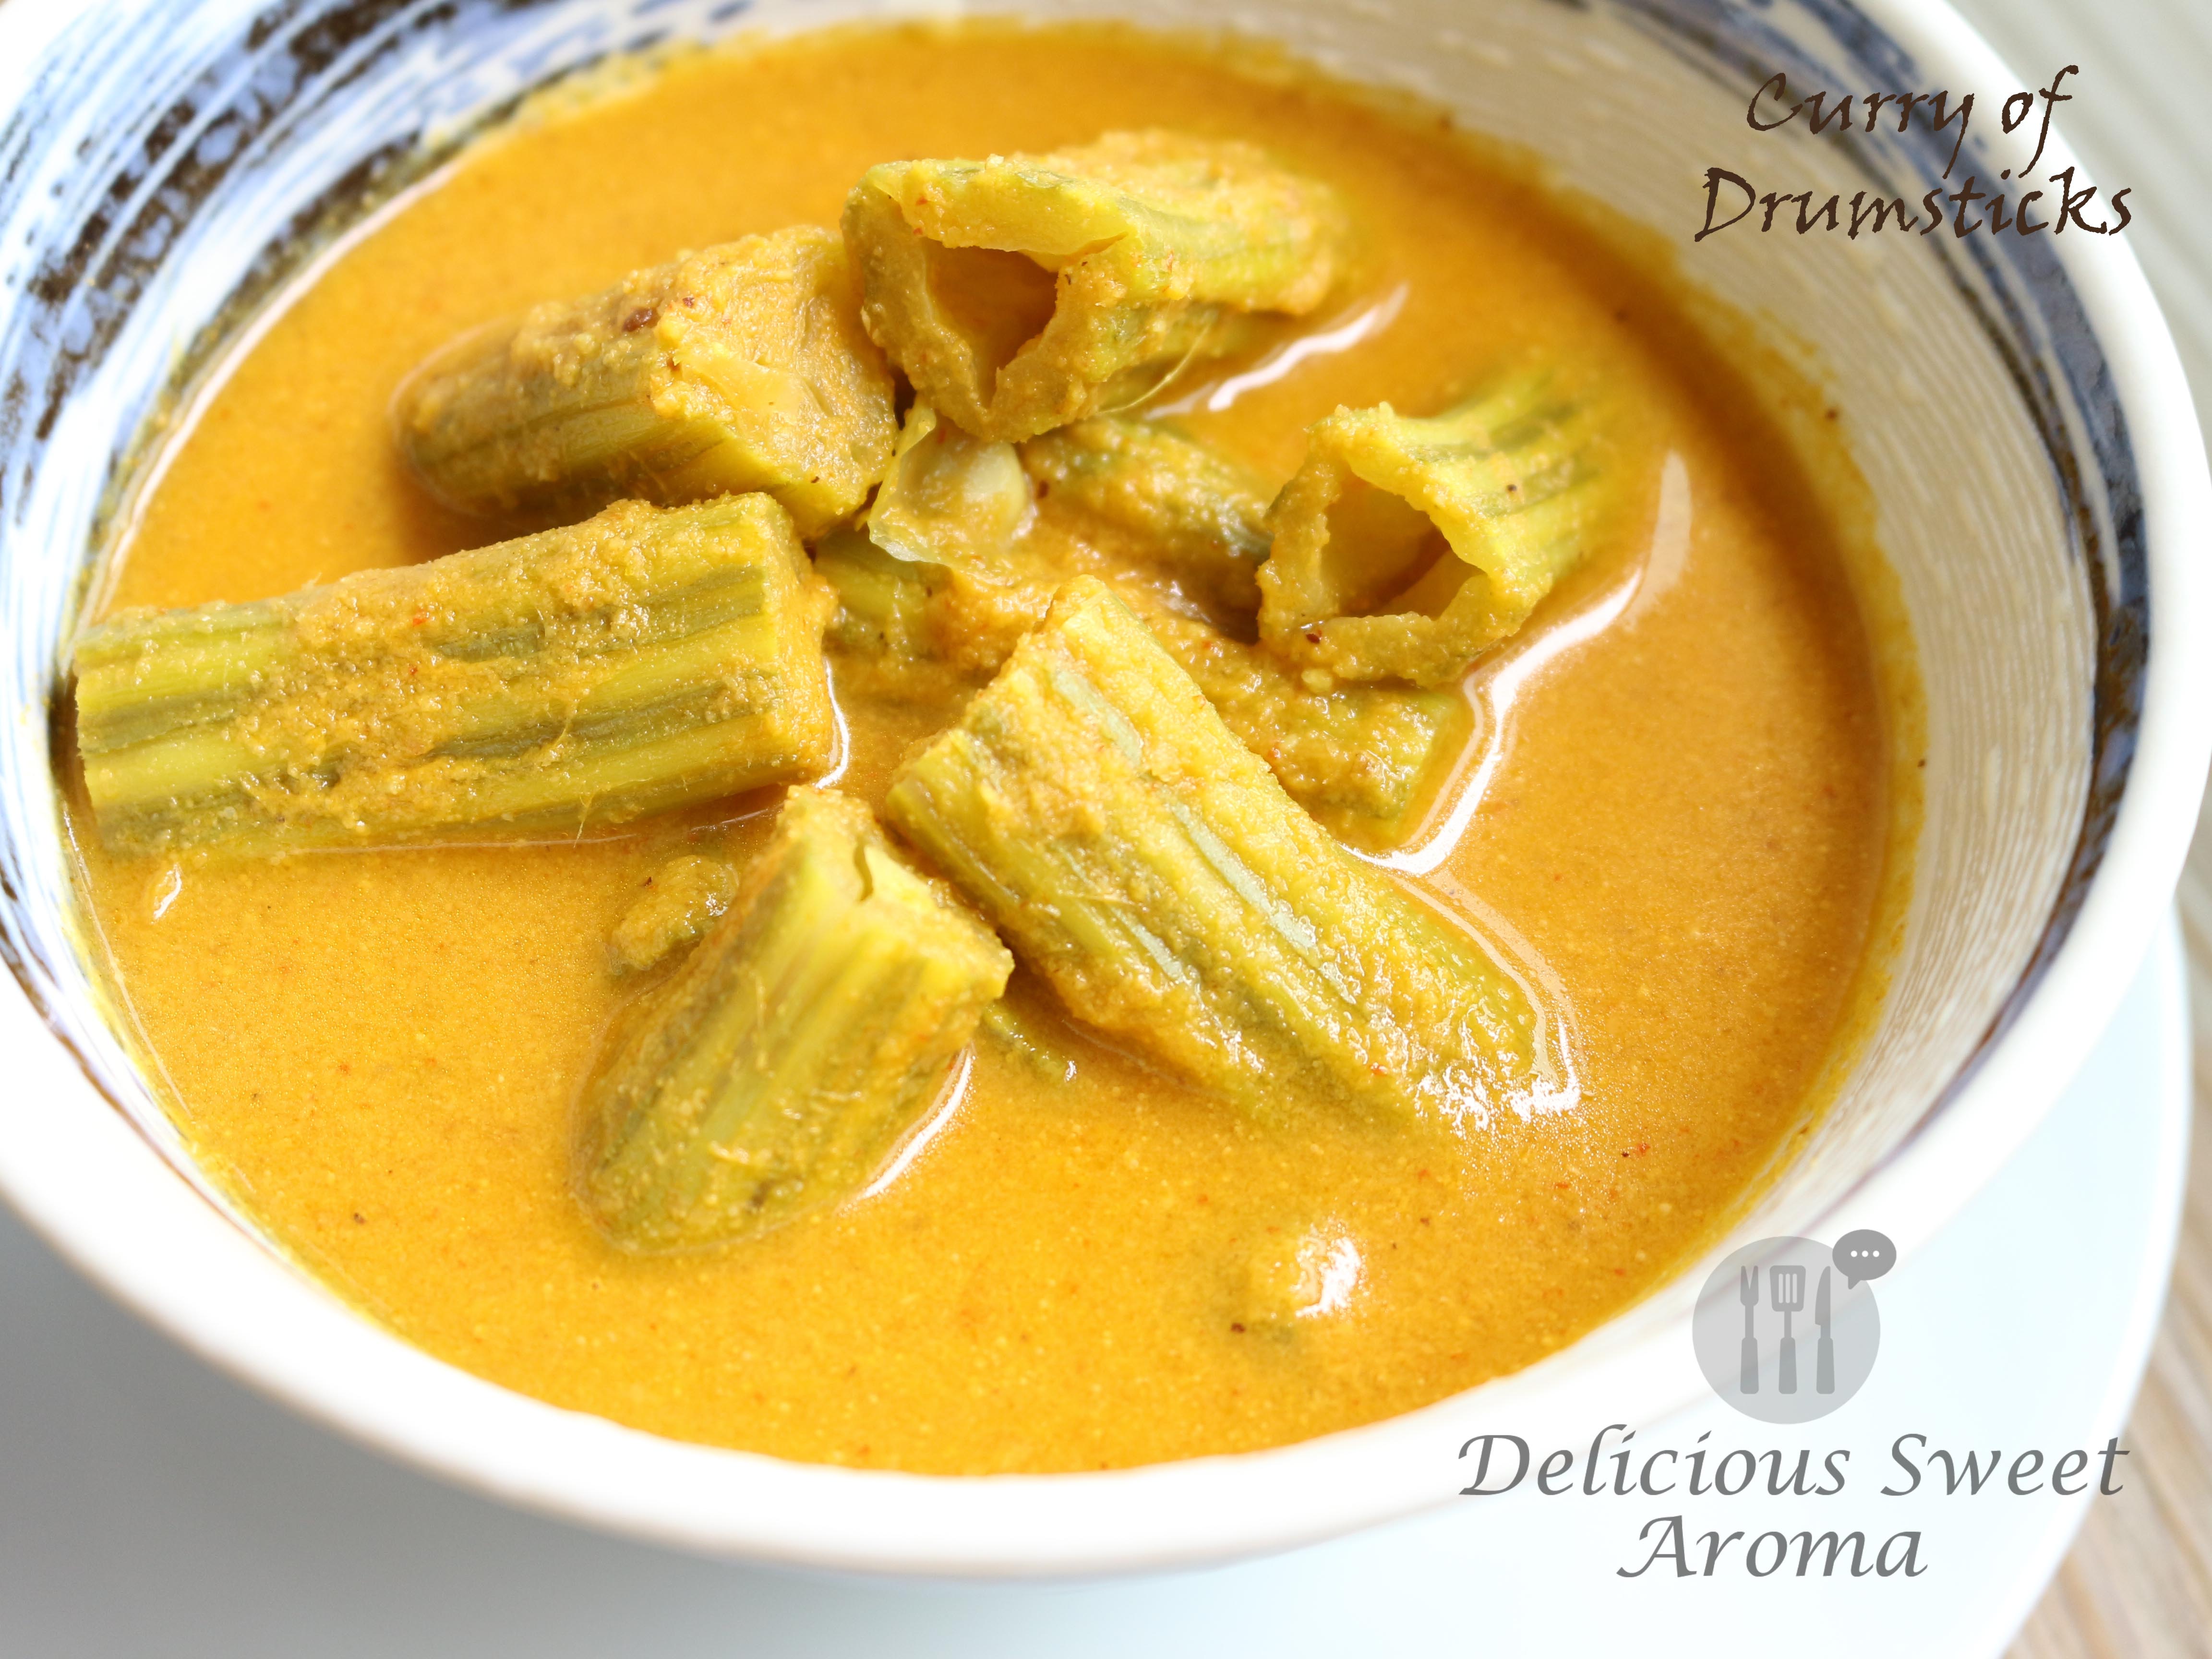
Curry Recipe | Drumstick | Delicious Sweet Aroma, Vegan

3. Cook for 15 minutes on medium-high. One of the simplest and easiest curry one can prepare.

Curry of drumstick_IMG_7598


Storage tips:

Additional paste can be stored in a sealed container in the freezer. Stick a label to identify and its ready for next time.


Enjoy! Thanks for stopping by Delicious Sweet Aroma.


Stay Healthy!

Read More

Vegetable Chili Paste

Vegetable Chili Paste or Vegetable Curry Paste is a staple at our home for curries. My mom commonly prepares it to give a good flavor and aroma to the dish. It’s also known as meet-mirsang masala (chili paste) to us Mangaloreans living in the coastal region.

We grind the ingredients to a fine thick paste and store it in a small bottled container in the fridge. When preparing vegetarian dishes, just add the required amount of the chili paste needed based on your spice level.

Veggies that can be prepared with this chili paste for dry gavy dishes:

  • Yam- Elephant foot / Soorn (konkani)
  • Chickpea (any chickpea) / Bengal gram / Garbanzo : soaked in water overnight before cooking
  • Raw banana plantains

Ingredients

Red dry Kashmiri Chilies – 15 

Coriander Seeds – 1 tbsp

Cumin / Jeera seeds – 1/2 tbsp

Mustard seeds – 1/2 tbsp

Garlic cloves – 4 large

Black Peppercorn seeds – 12

Pinch of turmeric powder

EDIT:

Ingredients veg dishes_IMG_8373

1. Grind all the ingredients with a small amount of water into a fine paste using a blender. Use a smaller container for a finer paste. The paste must be thick and not watery.

Blending Ingredients for Paste | Veg or Vegan dishes | Delicious Sweet Aroma

Chilli paste for Veg dishes | Vegan | Easy DIY

2. Store in a sealed container in the fridge and use some amount when preparing dry vegetable dishes.

Paste for vegetarian dishes | Easy recipe | Delicious Sweet Aroma

Note:

*Make sure to use the paste withing a few weeks. You can also divide them in small zip-lock bags with name tag and freeze. When you plan on making it thaw or defrost them few hours before preparing the dish.

>>How to prepare vegetable dishes with this paste?

Click link below:

Raw Jackfruit Dry in Claypot

Clay-pot Recipe, Kadgi Sukhi (Mangalorean food)

Related Chili paste recipe that can be stored in a bottled container:

Fish Fry Chili Paste (Meet – Mirsang)

Vegetable Curry paste (for dips)

Stay Healthy!

Read More

Curry with Green Bean – Vegetarian

When you need to feed a group of people, this vegetarian curry recipe is easy to make. It is also quite suitable for a crowd.

It’s tempting to use store-bought ready-made spices. But, nothing compares to the taste of homemade veg-spice-paste with fresh and pure ingredients. Even if you prepare an extra batch you can store it and use it on your other vegetables.

Preparation time: 10 minutes

Cooking time : 15 to 20 minutes

Serves: 4

Ingredients

Green bean – 120 g, chopped into 1 cm thickness

Olive oil / Veg oil – 2 tbsp

Water

For the veg curry masala paste:

Grated coconut – 1 cup, depending on the quantity required

Onion – 1 small, roughly chopped

Garlic cloves – 2 

Coriander seeds –  1 tbsp

Cumin seeds / Jeera – 1/2 tsp

Fenugreek / Methi seeds – 1/4 tsp

Mustard seeds – 1/4 tsp

Dry red kashmiri red chili – 3 to 4

Turmeric – 1/4 tsp

Water 


Directions

1. Prepared the ingredients and the curry masala.

IMG_4014

Put the above masala ingredients into a mixer or blender. Add 1/2 cup water and grind into a smooth paste. Set it aside.

IMG_7527

2. Warm oil in a large saucepan over medium heat. Add the paste and fry for 2 – 3 minutes until it starts leaving the sides of the container.

IMG_7532

3. Add 2 cups of water or more based on the consistency of curry thickness you need. Thicker the more flavor. Add 1/2 tsp salt and bring it to a boil.

IMG_7533

4. Now, add the chopped green beans. Mix, you can some more water now if the curry is very thick. Cover and bring it to boil again.

IMG_7540

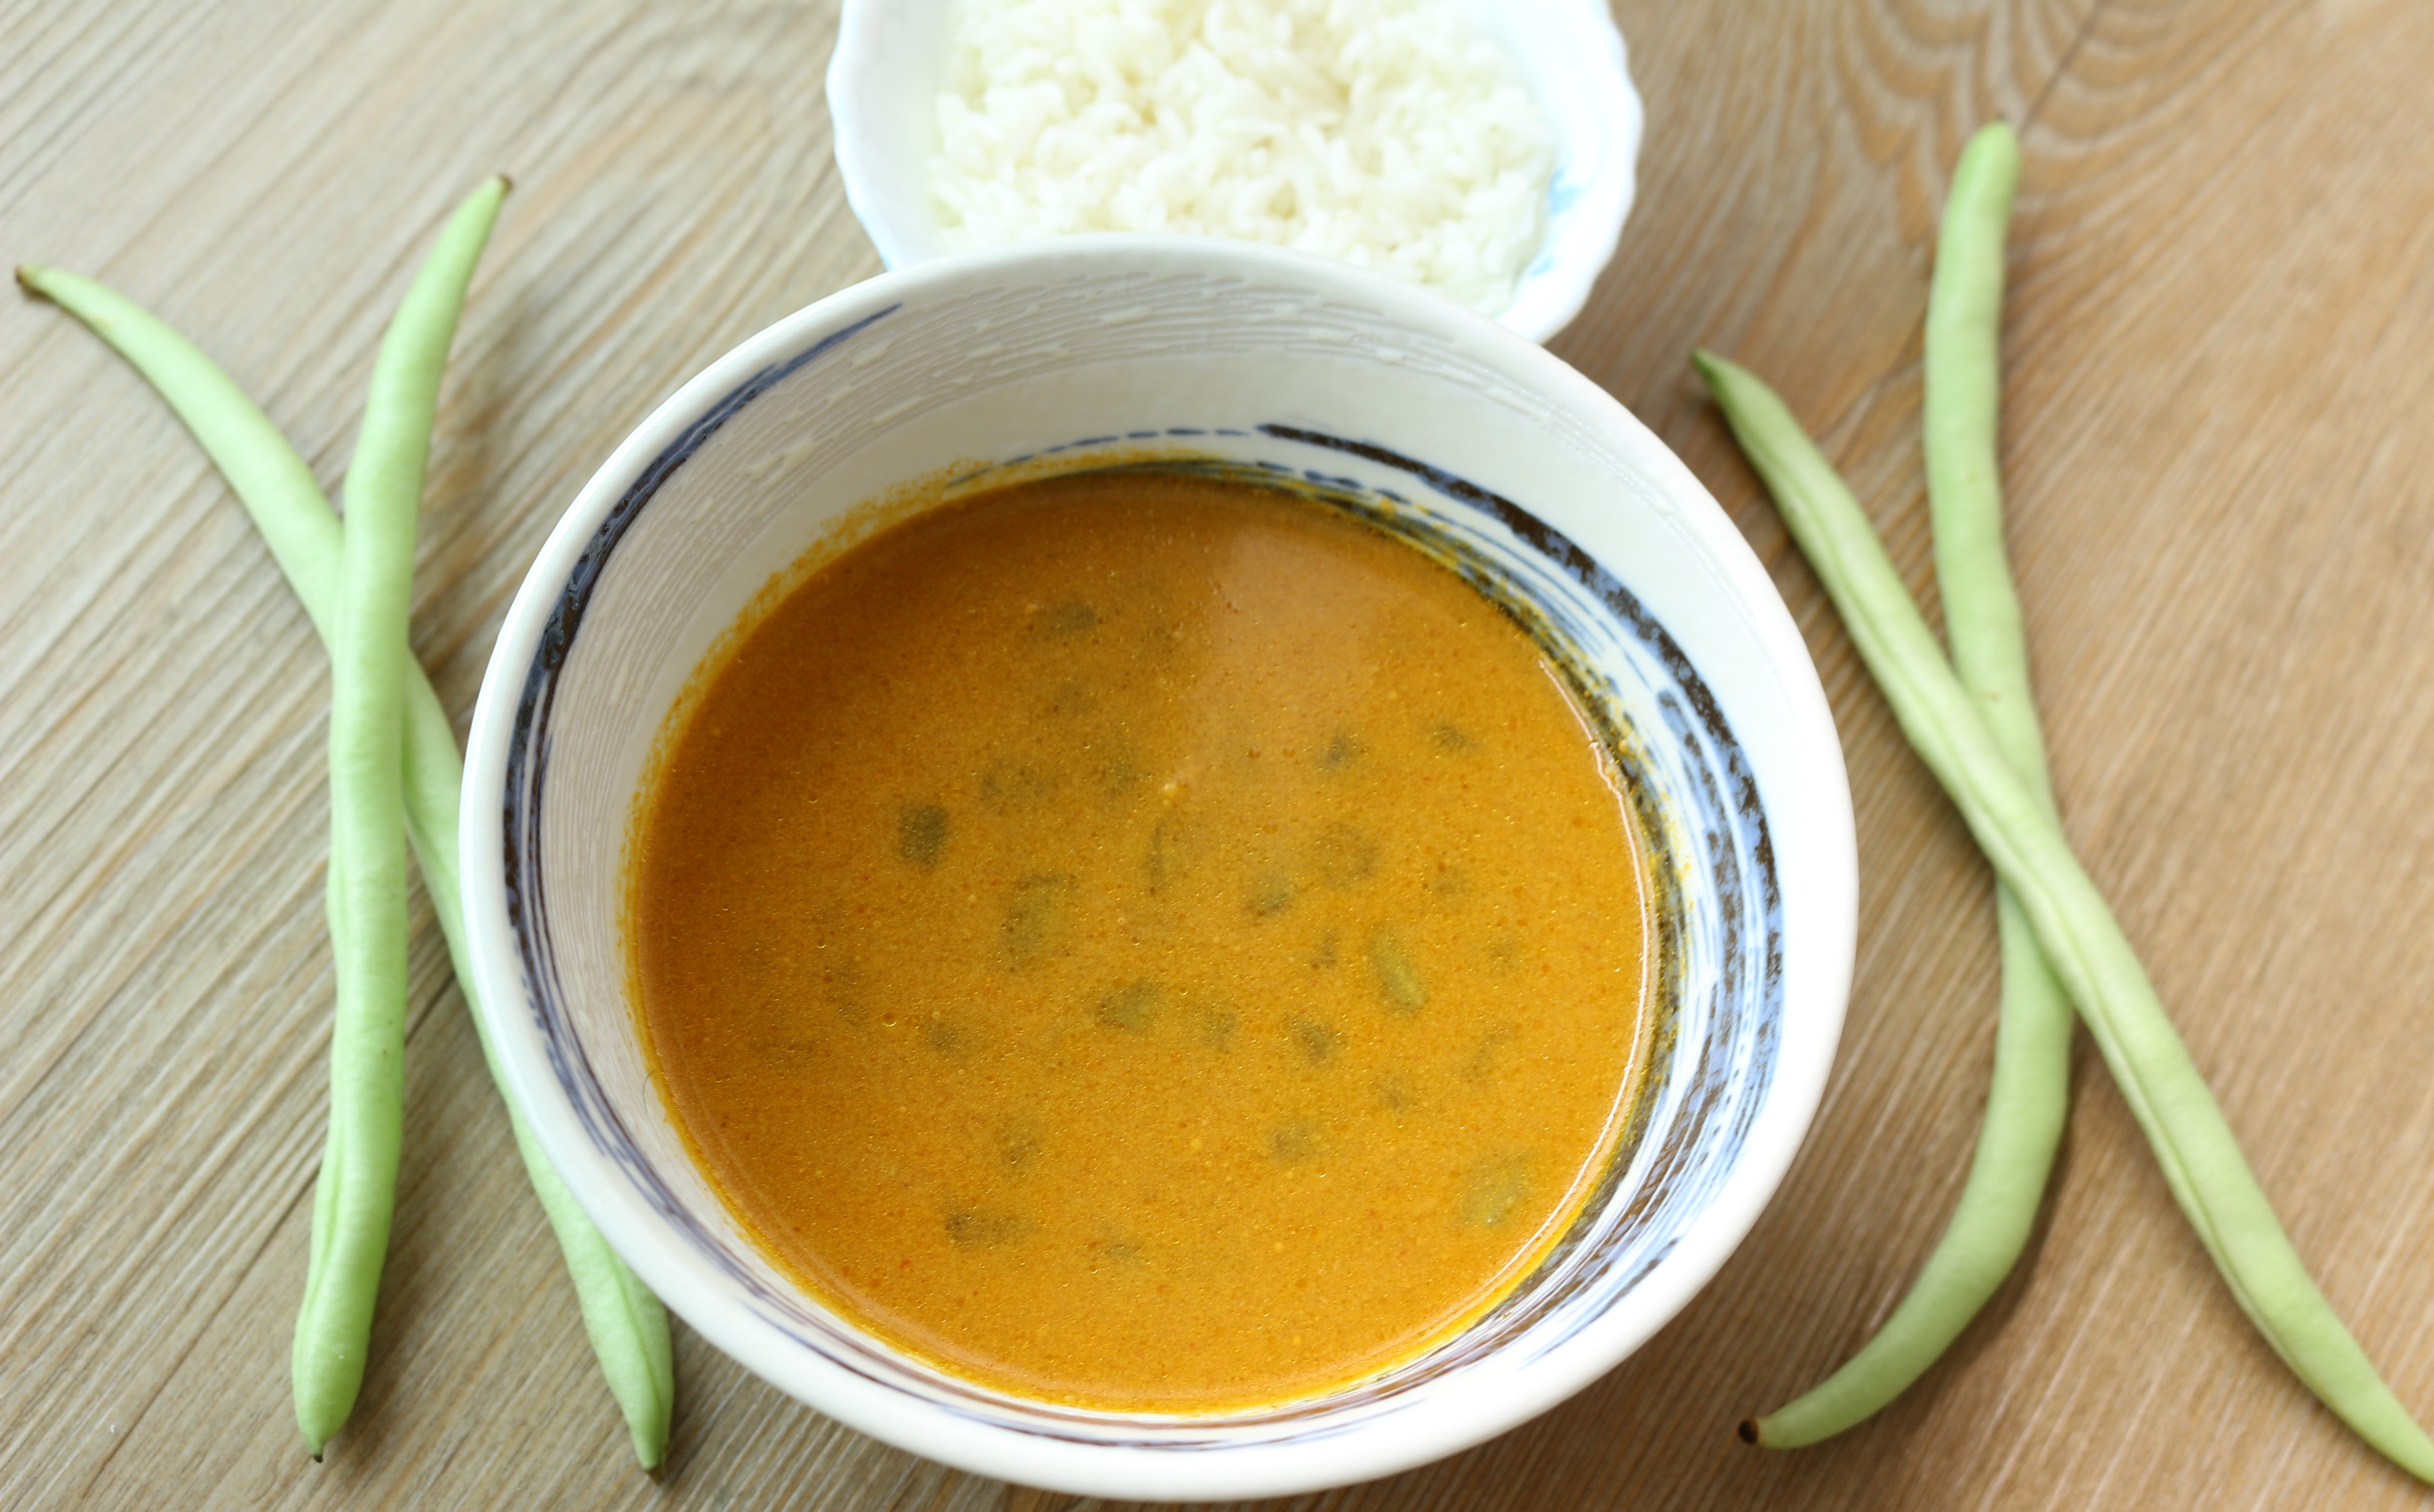
Check for salt. Add more if required. Most suitably it can be served with bread and rice. Serve warm or hot.

IMG_7550

IMG_7546


Cook’s tip: This post with dry red chili has a slightly extra heat. I  recommend using kashmiri chili for less intense heat if you do not like it hot.


To help you with more vegetarian recipes, here are a list of few that I tried

Curry of Drumsticks (with tuvar daal/pigeon pea lentils)

Curry of Drumstick | Vegan | Delicious Sweet Aroma

Easy Beetroot Rice

Carrot soup

Pan-Fried Breadfruit Recipe

Spicy Banana Pepper Fritter

Paneer Butter Masala


Stay Healthy!

Read More

Pan-Fried Breadfruit Recipe


While Breadfruit is still unknown to many, they are commonly found in tropical areas where good amount of sunlight and rain is required.

We have a tree in our backyard in my hometown and quiet often my family used to prepare this recipe to accompany with anything as a side dish. During my last visit home in March – when it’s the season for breadfruits, the tree stopped fruiting a lot with few breadfruits falling off before even they turn ripe. So, before leaving, I bought a ripe one at the open market and when I got back to Singapore, stored it in the fridge for a few days.

Breadfruit is considered to alleviate hunger and feed the world. It is large, green with a prickly skin when unripe. When buying look for a mature one with a greenish-yellow skin, a smooth surface which is not prickly, a brownish cracking between the surface segments. Avoid buying immature “Green” Breadfruit. In order to delay ripening, store it in the fridge for few days and then freeze it for later use. It tastes more like a roasted potato when ripe. Sweet with an aromatic fragrance.

Pan-Fried Breadfruit Recipe is easy to be made once you learn how to cut it. Do share your views on this recipe. Following are a few names of Breadfruit :

Deeviso gujo / Jeev Kadgi / Dee Gujje (Konkani), Ber / Beru (Kannada), Neer Phanas (Marathi), Brot Frucht (German), Panas (Puerto Rico)

Preparation time : 10 minutes

Cooking time: 7 -10 minutes

Ingredients

Breadfruit – 500 g

Red chili powder – 1 tbsp

Turmeric powder – 1/4 tsp

Paprika powder – 1 tsp

Vinegar – 1/2 tsp

Salt – 3/4 tsp

Directions

1. How to cut breadfruit >>

Cut into halves. Peel it as it were a potato.

Raw Breadfruit | Vegetarian

Breadfruit, gujo recipe | Raw Breadfruit

Cut them into thin slices of less than 0.5 cm thickness, remove and dispose the core. Season with salt and let it rest for 15 minutes (refer notes for storing extra quantity).

Sliced Raw Breadfruit | Vegetarian


2. Apply some salt and set it aside for 15 mins. After a while you will notice some water settling at the bottom. Discard the water and apply the chili paste (or homemade paste) with your hands.

chili paste, breadfruit

Breadfruit coated with chili coating | Vegetarian

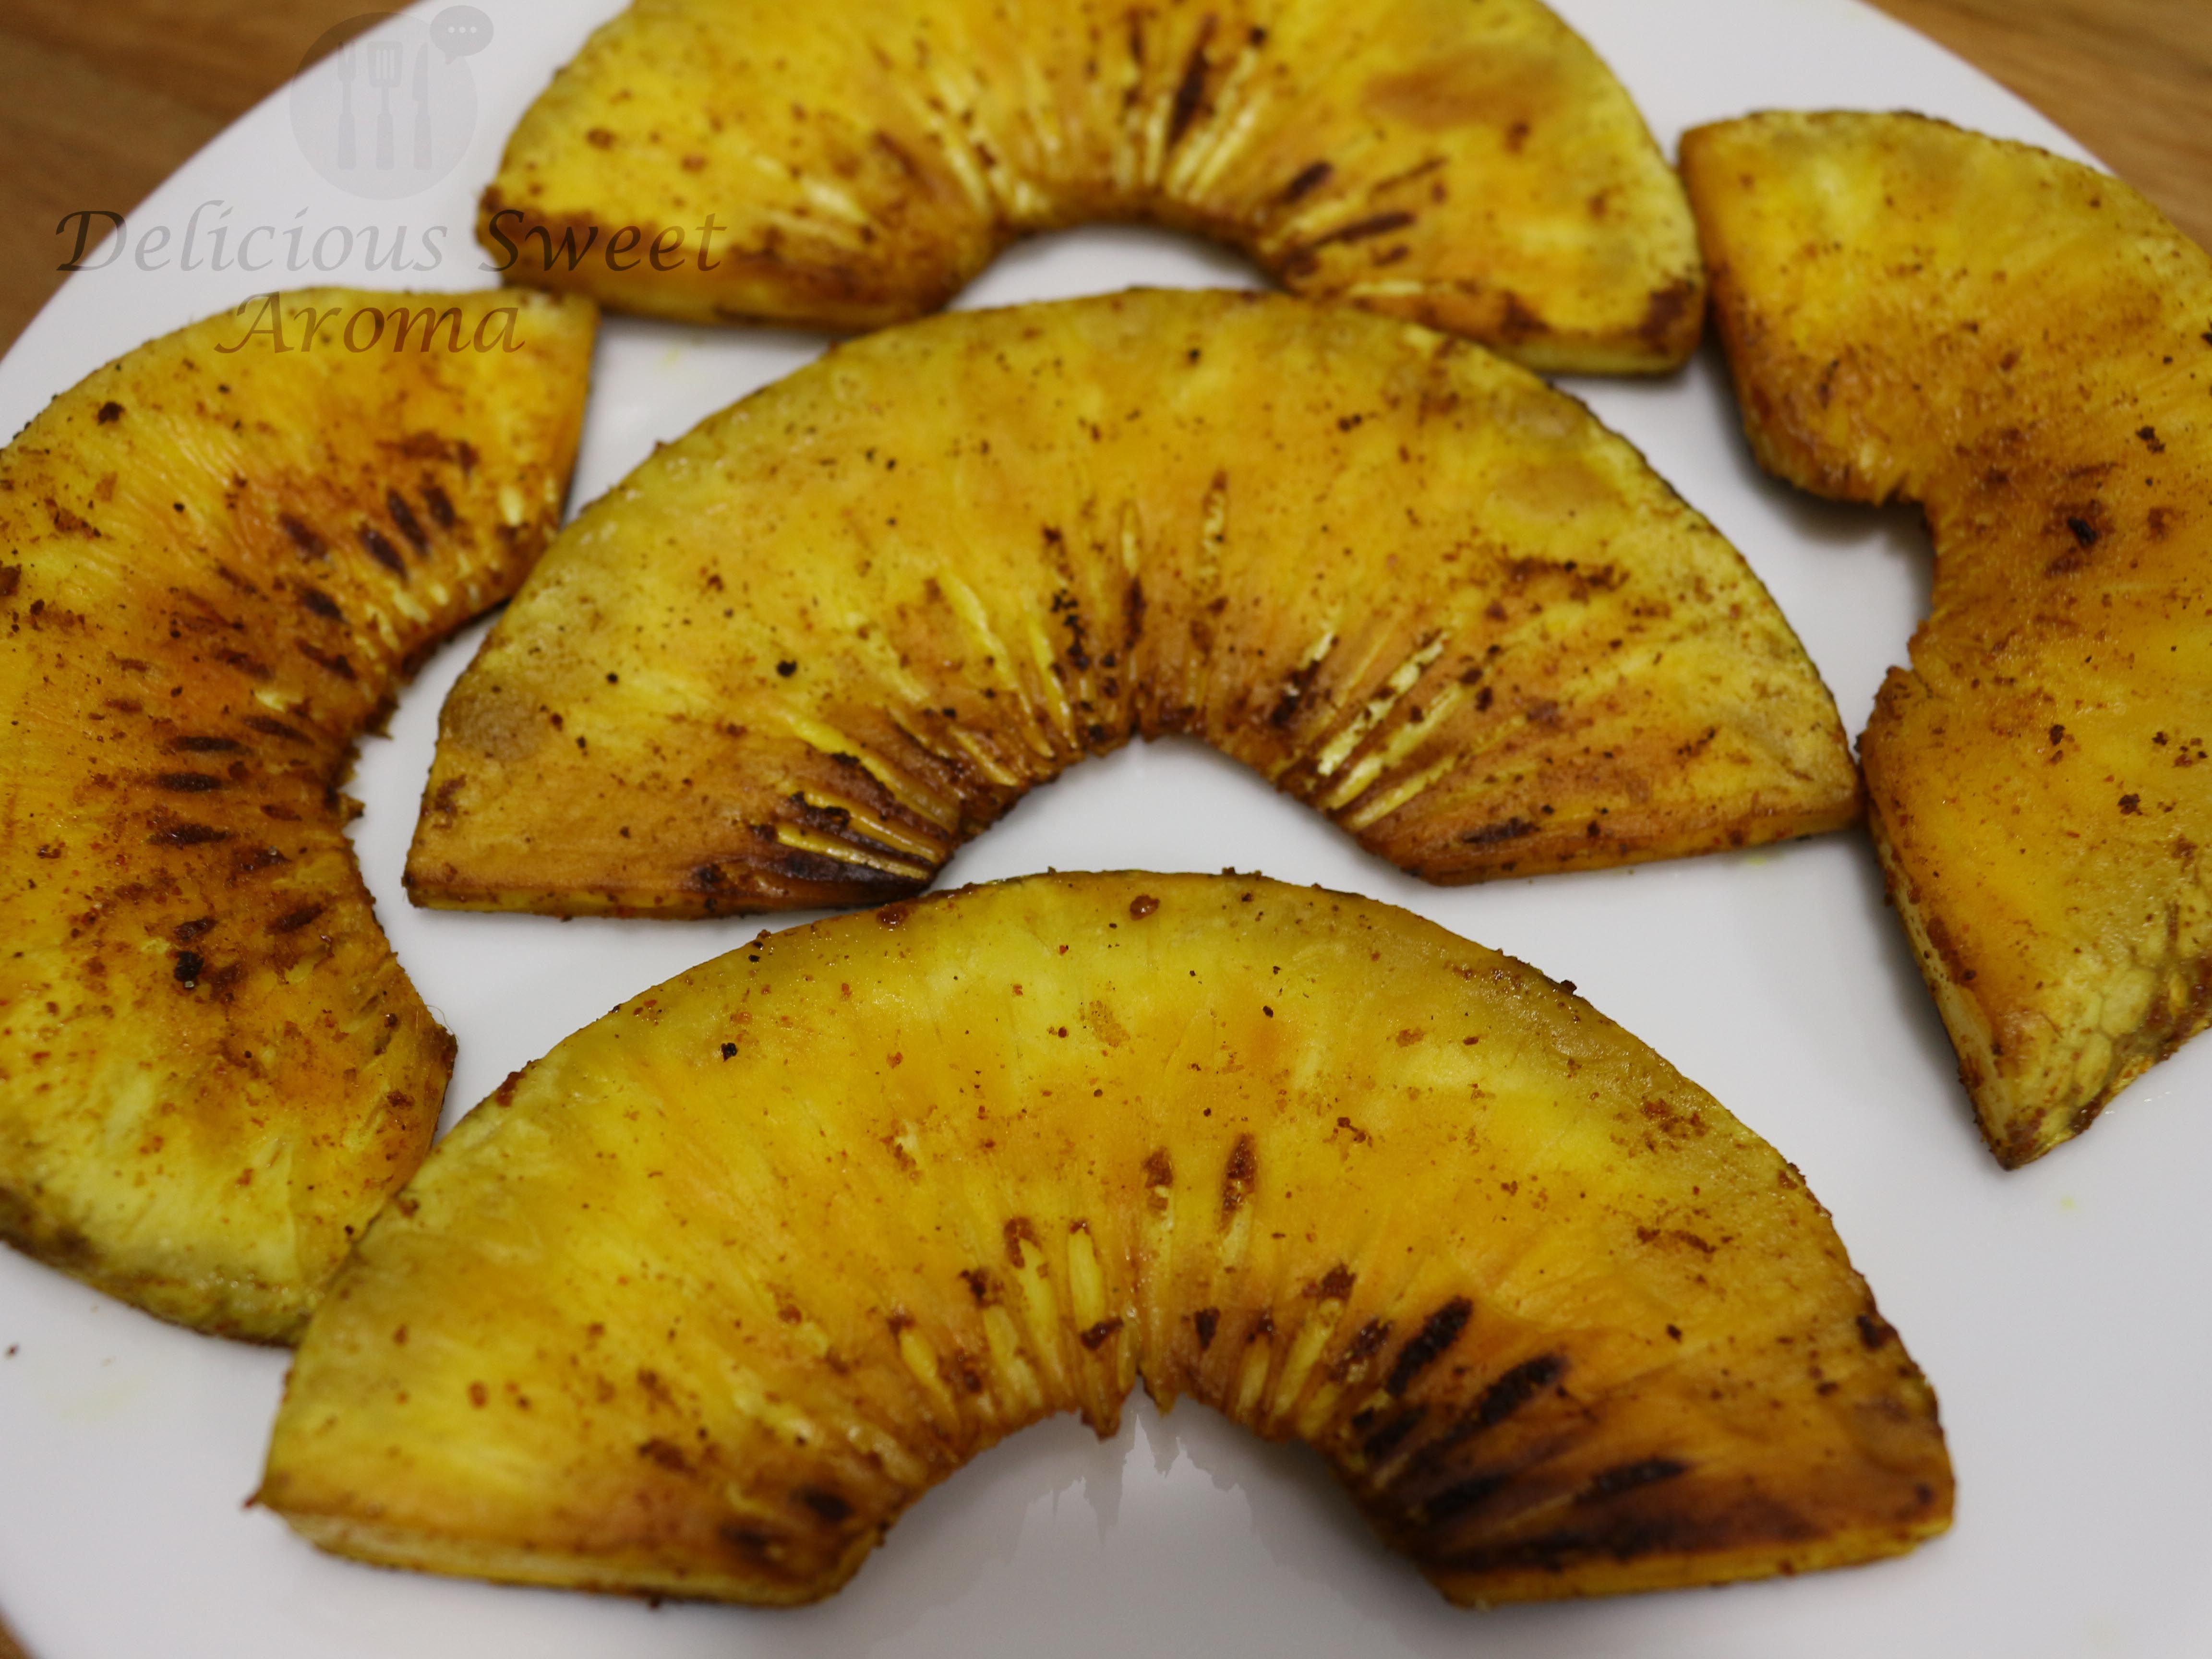
3. With 2 tbsp of oil, heat a pan. Pan fry each side on medium heat for 4-5 mins or until golden brown.

Pan fried Breadfruit | Delicious Sweet Aroma

Breadfruit chili fry | Vegetarian

Breadfruit chili fry | Delicious Sweet Aroma | Indian


If you find a breadfruit at your location, especially in the western countries, please share in comments below for everyone who has not seen or tasted it gets assistance in finding it. ✍🙂


P.S: I haven’t found a Breadfruit in Singapore yet. I will definitely update it when I do.


Notes:

*Apply some salt to the rest of the slices of breadfruit and store it in airtight container in the fridge. When ready to use, apply chili paste and fry.


Stay Healthy!

Read More

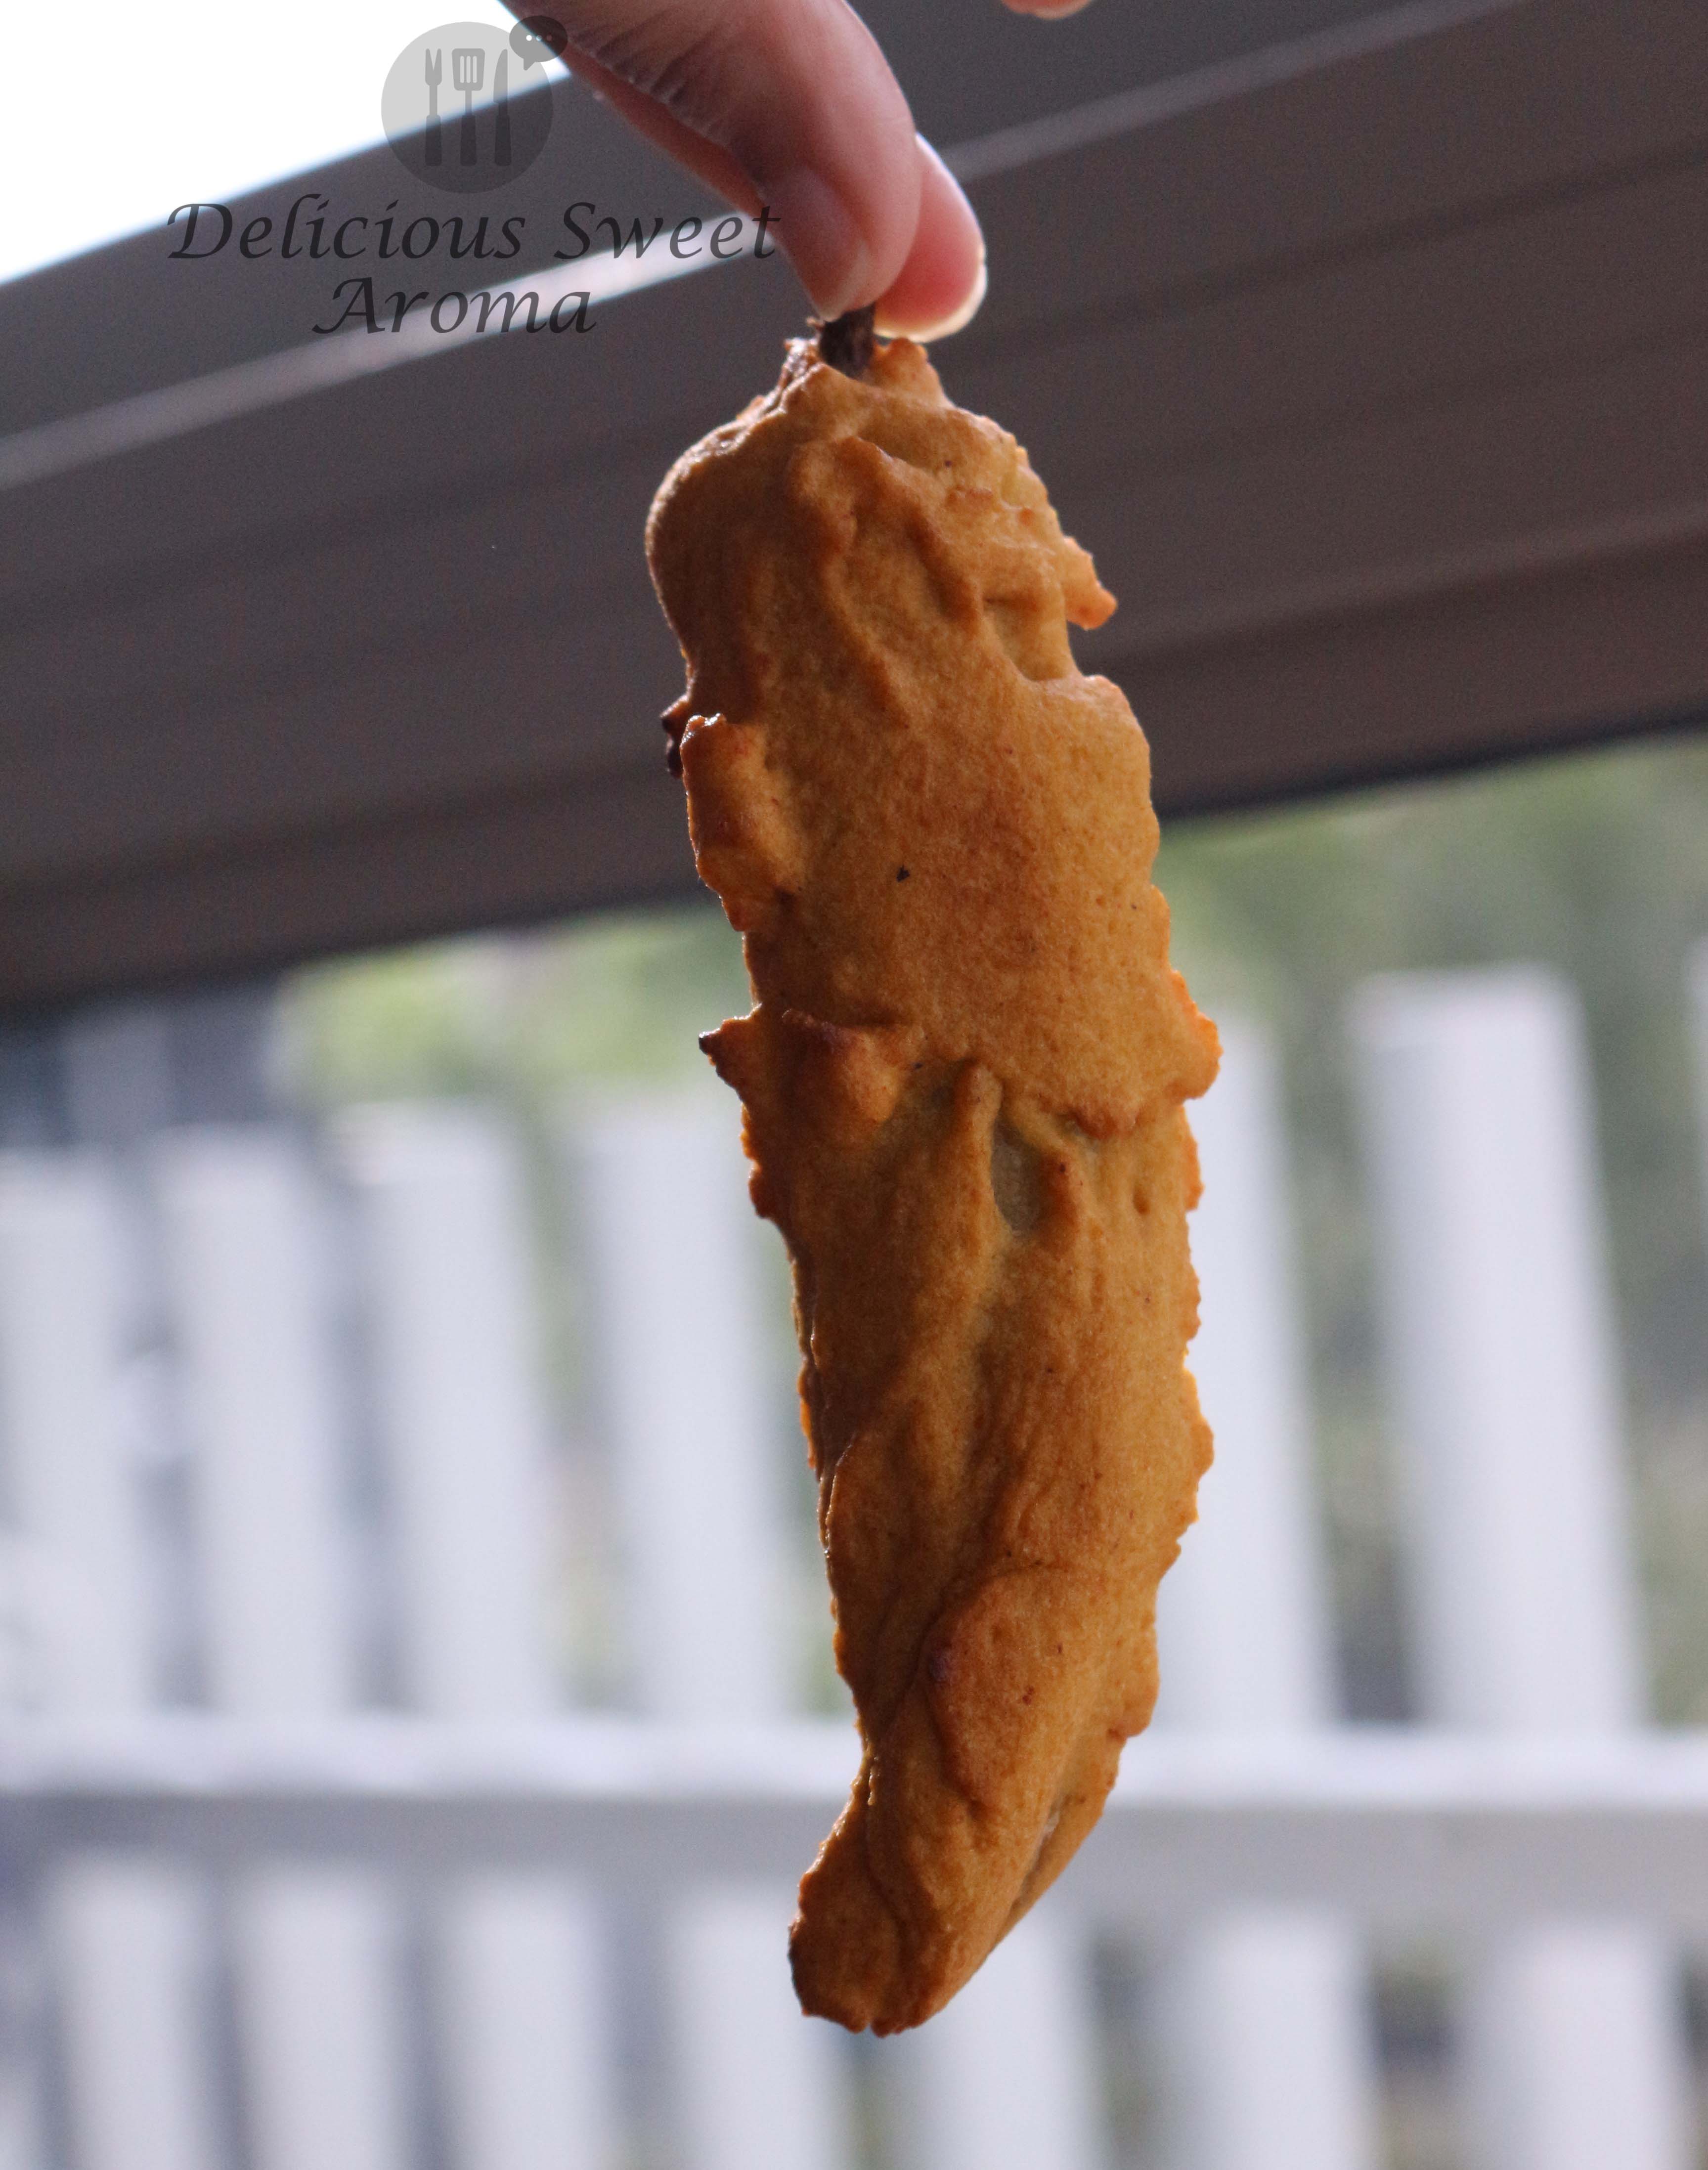
Spicy Banana Pepper Fritters

These Hot Chili Peppers which are commonly known as ‘Banana Peppers’ is named because it resembles the shape of a banana. It is 6-inch-long pepper, mild hot because of its seeds.

These banana pepper fritters are easy to make in less than 30 minutes. My husband wanted it spicy so I haven’t removed the seeds in my recipe. If you cannot take the spice, I recommend slicing the pepper vertically through the center and removing the seeds before coating with the chickpea flour.

Preparation time: 5 minutes

Cooking time: 20 minutes


Ingredients

Vegetable oil for deep frying

Banana peppers – 7 (spicy)

Chickpea / Gram flour (Besan) – 1 1/2 cup

Kashmiri Red chili powder – 1 tbsp

Salt – 3/4 tsp

Turmeric powder – 1/4 tsp

Water – 3/4 cup


Directions

1. Prepare a paste by adding all the ingredients: flour, chili powder, salt, turmeric. Add 3/4 cup water and mix to form a thick paste. Add more water if necessary, the batter must be thick.

chili powder & besan/chickpea flour for banana

saltturmeric for hot pepper fritter


2. Coat the peppers with the above chickpea mixture. Place it separately on a plate.

chili pepper fritter coating

3. Heat a deep-wide-bottomed container with 2 inch vegetable oil set at medium for deep frying.

Once its hot enough. Carefully place the peppers in hot oil. I fried 2 at a time in batches.

deep frying banana pepper

4. Fry on each side for 2 mins until they turn brown. Transfer and drain into paper towels.

5. Serve with coriander chutney, ketchup or can just be enjoyed plain with an evening cup of tea.

pepper fritter, hot pepper fritter

inside of Banana pepper


Notes:

*If you want to have a dip of coriander chutney, refer my previous post of goli baje recipe for instructions.


Hope you have a lovely Monday! Stay healthy!


Read More

Potato Cutlets with Egg

Vegetarian food has never appealed to me, until now, that I realized how much important it is to have greens and veggies in a diet. I cannot go without meat and I’m trying to add some vegetarian food from now on. Hopefully!!

Starting from here I wanted to learn some vegetarian recipes so I intended on going with potatoes. Potato cutlets are my first try at home apart from making a non-veg cutlet, this turned out surprisingly delicious.” Yumm!” was what my husband exclaimed as he took a bite of it.

It could also be great to have for breakfast or a quick snack or on the menu of kid’s classics.


Preparation time: 10 minutes

Cooking time: 30 – 45 minutes

Makes: 12

Ingredients

Potatoes – 350 g / 4 small size or  boiled & peeled potatoes

Spring onion – 6, finely chopped

Eggs – 2

Garlic cloves – 2, finely chopped

Salt – 1/2 tsp

Vegetable oil / olive oil for shallow frying


How to cook potatoes?

+Add potatoes (with skin) into a heavy-bottomed pan of cold, salted water and bring it to a boil. Cover and cook for 15 – 20 minutes until tender. To do this insert a skewer, it must get through easily.

+ If it is still firm, let it simmer for a couple of minutes. Then, leave it to stand in hot water for 10 minutes.

+ Drain them thoroughly. Peel the potato skin.


Directions

1. Mash the cooked potatoes with your fingers (or any other way most preferred) until no large lumps of potatoes remain.

2. To the mashed potatoes, add spring onions, garlic, eggs, salt. Using your fingers combine evenly.

vegetarian snacks

mashed potatoe

3. Heat a non-stick frying pan over medium-high heat. Drizzle oil, tilt to spread the base. Pour a tablespoon spoonful of the mixture in the pan of 5-7 cm (2 – 2.8 inch). Fry for 3-4 minutes on each side.

cutlet


4.Transfer to a plate. Repeat with the remaining oil and mixture of potato and egg.

Potato cutlet with Eggs

Serve with tomato ketchup or as side with pulav.

potato cutlet, vegetarian


Hope to serve you more with vegetarian recipes. Stay healthy!


Read More

Goli Baje Recipe

Hubby loves Goli baje’s, sounds funny, haha..Well, I came to know more of his tastes after getting married to him. And I love making them occasionally.

Goli baje (in Tulu, Indian cuisine) is a deep-fried tea-time snack popular in Mangalore-Udupi region. It is also known as Mangalore bajji or Mangalore bonda. Yes, my posts are often from Mangalore, being a Mangalorean myself they are served locally in restaurants for breakfast or evening tea along with a dip called chutney made of Coconut, coriander or others. Goli Baje’s have a unique taste with a smooth exterior and a spongy interior that suits well during the monsoon season. After few trials and errors I learnt the precise measurements to obtain a good texture. The texture also depends on the fermentation time and thickness of batter before frying. I have provided the precise quantity of all ingredients. The coconut-coriander chutney was just a perfect dip to enjoy it.

Preparation time: 10 minutes, plus 2 hrs fermenting time

Cooking time : 20 minutes

Makes: 25 – 30


Ingredients

Vegetable oil for deep-frying

Plain Flour / Maida – 1 cup / 150 g

Gram flour/Chickpea flour/Besan – 4 tbsp / 25 g

Yogurt – 1/2 cup / 160 g (thick)

Water -1/2 cup

After fermentation:

Ginger paste / fresh ginger – 1 tsp, chopped

Cumin seeds – 1/2 tsp

Green chili – 1 tsp / 1 small, chopped

Grated coconut – 2 tbsp

Caster sugar – 1 tbsp

Salt – 1/4 tsp

Baking soda – 1/2 tsp

Coriander (optional) – 1 tbsp, chopped

Warm water – 4 tbsp


For Coriander Chutney / Coriander Sauce (A dip that goes well with Goli Baje)

Fresh coriander/ Cilantro/ Chinese parsley- 25 g to 40 g, washed and roots removed (depending on quantity required)

Fresh grated coconut – 1/2 cup or as required (also, depending on quantity)

Salt – 1/4 tsp

Fresh ginger – 1 inch thick, small

Green chili – 3 small

Seasoning:

Vegetable oil – 2 tbsp

Red dried chili – 1 (if available)

Mustard seeds – 1 tsp

Curry leaves – 1 medium strip, washed & dried using towel (can use frozen)

Water as required for thickness


Directions

1. In a large bowl, to the the sifted plain flour, add chickpea flour, yogurt. Mix. Then add 1/2 cup water until well combined with no lumps in the batter.

chickpea flour, gram flour, besan added to maida, plain flour

curd added to Goli baje


2. Cover and set aside the batter in a warm place at room temperature for minimum 1 1/2 – 2  hours (I kept it for precisely  2 hrs). Even if it’s a little longer the better.

Goli baje batter of gram flour, plain flour, yogurt & little water


3. After 2 hrs: Add ginger, cumin, green chili, coconut, sugar, salt, baking soda (you can add coriander now if your using). Mix and add water to form a thick batter until there are no lumps (not too runny). Set aside for 5 minutes.

cumin seeds, grated coconut, ginger paste, salt, green chili, sugar, baking soda

4. Heat a container with oil on medium-high. Drop a pinch of batter, if oil is hot enough it will form bubbles around the batter and sizzle.

browning on one side of Goli baje

5. Take tablespoon of the batter, scoop it in your fingers and drop it in small amount into the hot oil. Do not overcrowd. In a few seconds flip to brown on the other side. Fry in batches.

Goli baje, Mangalorean bonda, Indian

Once they have turned brown, drain them on paper towels using a stainless steel slotted spoon (reduce heat to low while removing to prevent over browning). Serve hot with fresh coriander chutney.

goli baje with coriander chutney


Coriander chutney: Preparation time – 7 mins to 10 mins

1. In a blender add coriander leaves, coconut, ginger, salt, green chili and a little water. Blend until smooth paste.

2. Heat oil in a small deep bottomed, stainless steel container on medium. Add mustard seeds, it’ll start splitting. 

Coriander chutney, mustard seeds sputter

3. As the mustard seeds sputter add red-dried-chili and curry leaves. Reduce heat and toss for 5 seconds. Make sure not to burn.

mustard seeds, red dried chili, curry leaves

4. Now, add the coriander paste from the blender. Mix and let it boil over low heat. Add water depending on your choice of consistency for thickness.

Coriander chutney for Goli baje

Goli Baje with coconut-coriander chutney

Storage of Chutney:

+Store in an airtight container in the fridge or can also be frozen. Must be used within 2-3 days if stored in the fridge.


Note:

*I haven’t used coriander in the Goli Baje batter.

*If you do not have coriander for the chutney, substitute it with additional coconut to prepare a coconut chutney.

*While removing the goli baje from oil after it has turned brown, reduce heat to prevent burning.

*If the batter is too water you can add more plain flour/maida.


I would love to know how it turns out for you. Thank you for visiting 🙂


Stay healthy!

Read More

Diamond cuts (Tukdi)

I’m quiet surprised that I’m making another snack for Christmas. After my Sweet curls recipe this is my second recipe on Christmas goodies. I prepared this yesterday and I loved the way they turned out.

Diamond cuts or Tukdi (we call it in konkani at home) is a traditional snack. It’s still a favorite snack to munch on while at home. They are crunchy, fluffy and hollow. It is made in different varieties, sweet or biscuit flavored. I made a small batch of it and the recipe is very easy.

Have a joyous Christmas 🎄🎅

Preparation time: 1 hour

Cooking time: 30 mins

Utensil : Pizza cutter/biscuit cutter

Roller pin


Ingredients

Vegetable oil for deep frying

Unbleached All-purpose flour/Maida + extra for dusting – 250 g

Unsalted butter (soft)- 2 tbsp

Chickpea flour – 25 g

Salt – 1/3 tsp

Water – 1/2 cup or as required for the dough ( *EDIT), room temp


Directions

1. In a medium bowl, add all-purpose flour,  chickpea flour, salt, butter. Mix together with your hand. Add water in parts and knead until you get a soft elastic dough. It’ll tend to be sticky at the beginning, keep kneading until it becomes smooth.

ingred_IMG_5908

Step1_IMG_5912

2. Prepare a rolling surface, dust the surface with flour. Take a small portion of the dough and form a ball. Place it on rolling surface and sprinkle some flour again. This will help prevent sticking.

Step22_IMG_5941

Now, using a rolling pin, roll the dough thin (not too thin or thick).


3. Using a small biscuit roller/pizza cutter, cut the flour vertically with 1.5 cm spacing between each line. Then, cut them in horizontal direction that shape it into a diamond form.

vertical cut of doughhorizontal cuts

diamond cuts from dough

Carefully transfer them, by using a knife edge to slide them onto a flat plate without disrupting it’s shape.


4. After your done making diamond cuts. Heat a container with oil on medium-high heat (If your using induction, keep it on 7).

5. Drop a piece to check if the oil is hot. It’l start sizzling and bubbling. Slide the diamond cuts in oil in batches, not to over-crowd them. It will start puffing up. Stir them gently so they get separated. Let it fry for a minute or two, until golden brown.

tukdiyo, tukdi, diamond cuts


6. Strain them into paper towel. Pour the next batch until all are done deep-frying.

diamond cuts, snack


Mangaloran snack, christmas snack

Storage:

* Keep them in airtight container to retain the crispiness once they have completely cooled down.


For updates on posts and recipes to come please follow the Fb page >> Delicious Sweet Aroma


Note:

*While kneading the dough, if it tends to be sticky add some flour.

*Dust generous amount of all-purpose flour before running the biscuit roller otherwise they stick to the plate which will tend to loose its shape while sliding into hot oil.


More on Christmas Recipes:

Sweet Curls /Kidyo or Kulkuls

Rose Cookies – Mangalorean Kokisan (NEW)

Traditional Christmas Cake – Fruit Cake (NEW)


Stay healthy!


Read More

Easy Beetroot Rice

When I say Beetroot rice, what is the first thing you notice? Oh yes! The color, of course. It’s gorgeous purple/red color is so deep and vibrant, that when combined with rice, just makes a wonderful one pot easy recipe.

If you have tried this, then drop a feedback of your recipe.


Preparation time: 10 minutes

Cooking time: 20 minutes

Serves: 3-4

Ingredients

Olive oil/Ghee – 2 tbsp

Grated Beetroot – 1 big size

Basmathi rice/ Ponni rice – 1 cup

Onions (optional) – 1 medium, cut into thin long strips

Green chilies – 1

Cinnamon – 1 bark

Cardamom – 2

Fennel seeds – 1/4 tsp

Salt – 3/4 tsp

Water – 2 cups

 Beetrootbeetroot, onions


Directions

1. In a pressure cooker or deep sauce pan (see notes if your using electric rice cooker) add 2 tbsp olive oil/ghee. Fry the cinnamon, cardamom and fennel for a minute on medium.

cinnamon, cardamom, fennel seeds

2. Add onions, green chilies, grated beetroot and salt. Stir well and fry for 4 minutes until its slightly less raw.

onions, green chilies

beetroot, onions

3. Now, add rice with 2 cups of water( twice the quantity of rice taken). Mix and taste for salt. Add more if necessary. 

rice, beetroot

beetroot

4. Close and cook (for pressure cookers one whistle, if using electric rice cooker check in 15 mins if the rice is cooked and make sure not to over mix)


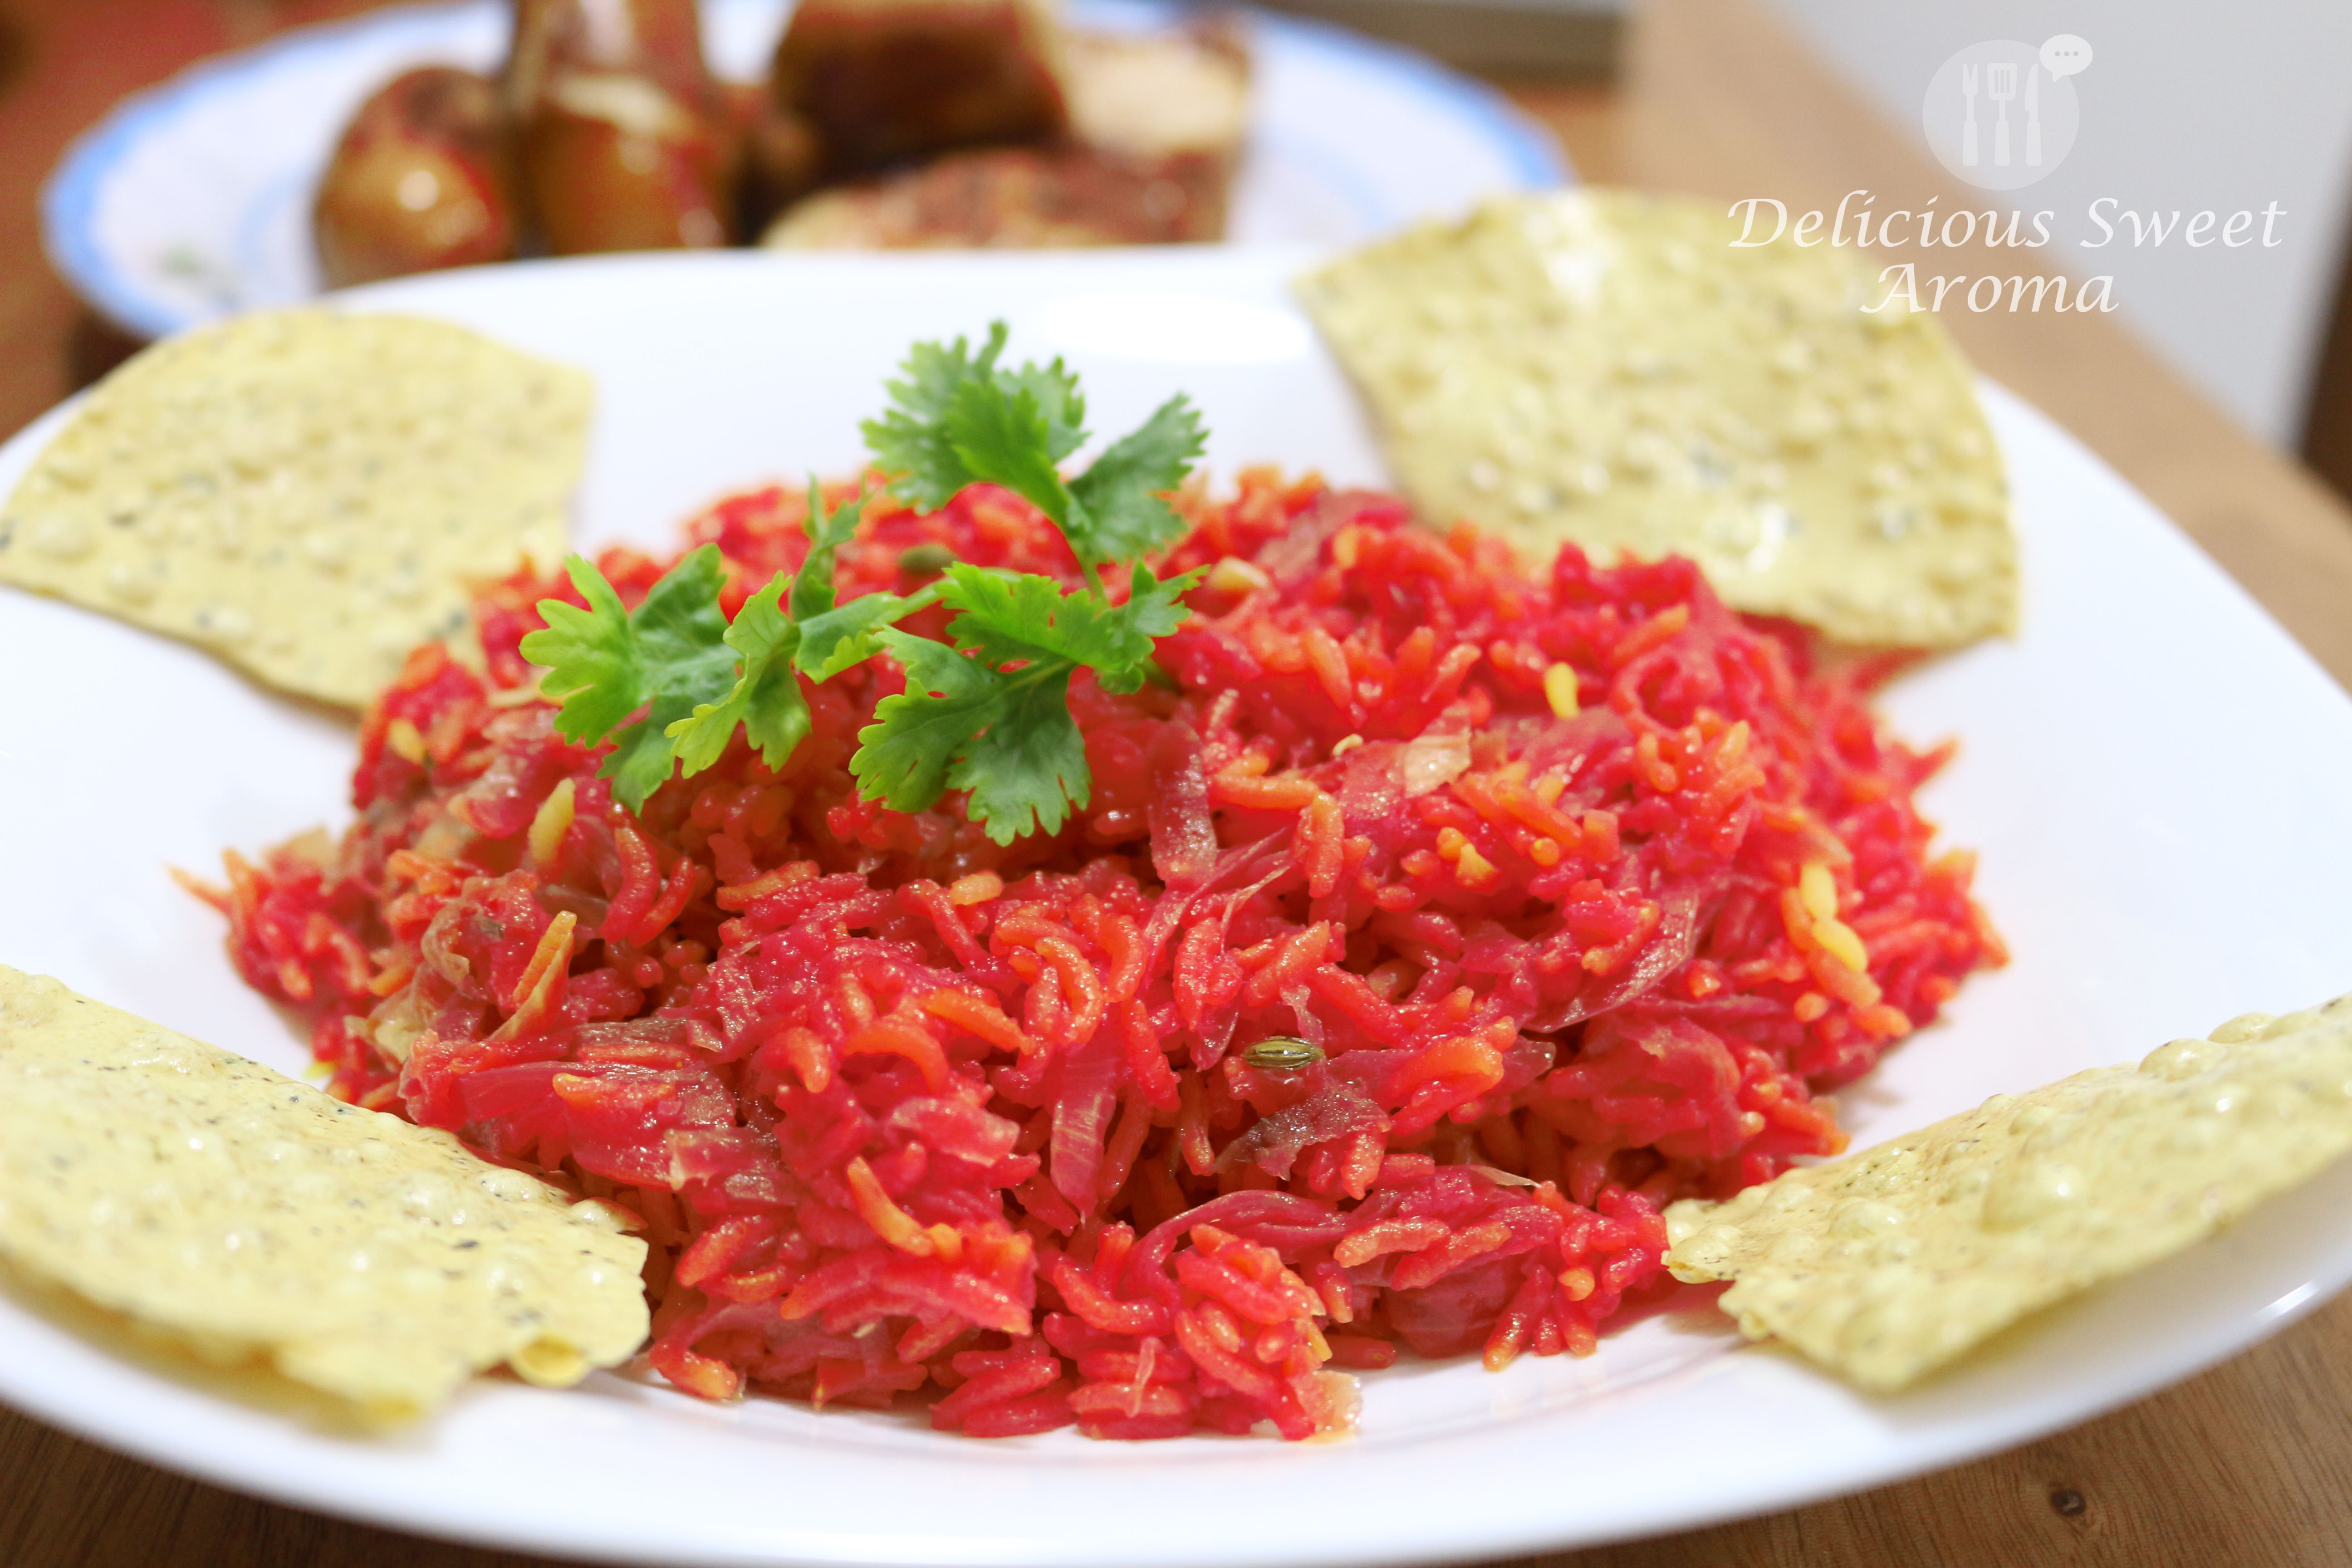
My Beetroot Rice is ready with Papad (it’s tortilla like) and some cheesy pork sausages. Yummm!!

Easy Beetroot Rice


Notes

*If your using an electric rice cooker. First, fry all the ingredients till step 2, add rice, water and check for salt. Transfer the contents to the cooker and cook.


Stay Healthy!


Read More