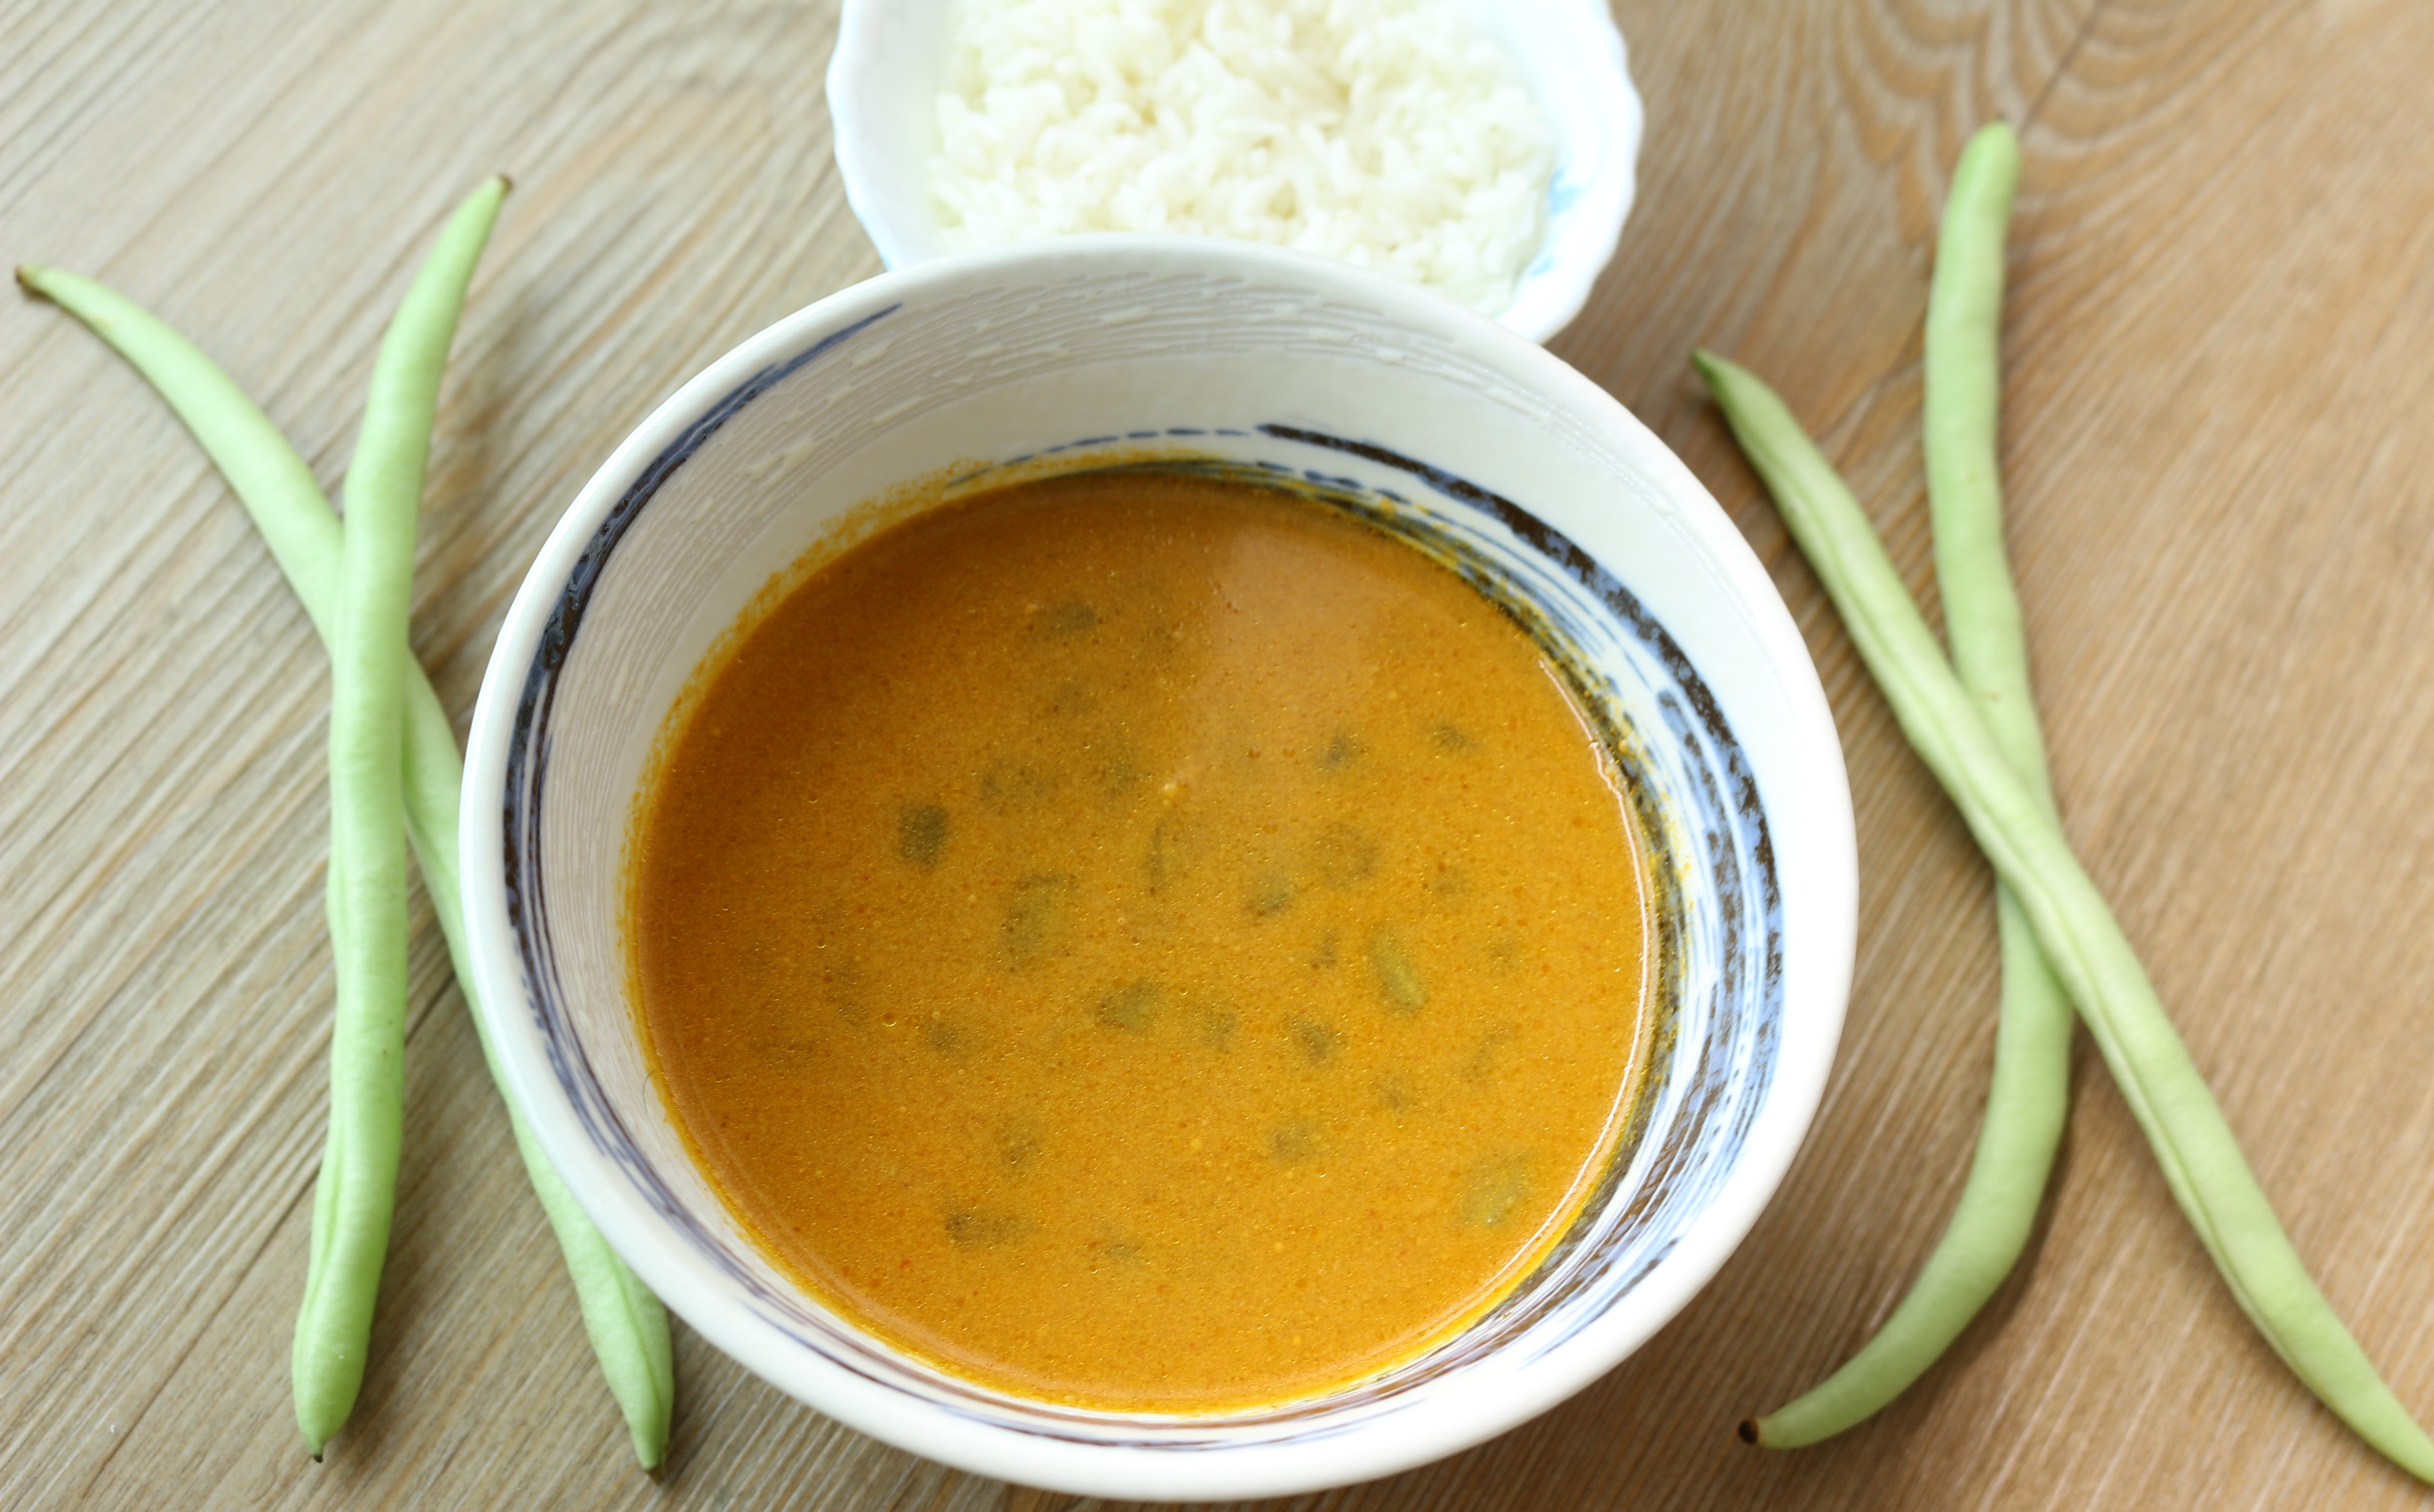
When you need to feed a group of people, this vegetarian curry recipe is easy to make. It is also quite suitable for a crowd.
It’s tempting to use store-bought ready-made spices. But, nothing compares to the taste of homemade veg-spice-paste with fresh and pure ingredients. Even if you prepare an extra batch you can store it and use it on your other vegetables.
Preparation time: 10 minutes
Cooking time : 15 to 20 minutes
Serves: 4
Ingredients
Green bean – 120 g, chopped into 1 cm thickness
Olive oil / Veg oil – 2 tbsp
Water
For the veg curry masala paste:
Grated coconut – 1 cup, depending on the quantity required
Onion – 1 small, roughly chopped
Garlic cloves – 2
Coriander seeds – 1 tbsp
Cumin seeds / Jeera – 1/2 tsp
Fenugreek / Methi seeds – 1/4 tsp
Mustard seeds – 1/4 tsp
Dry red kashmiri red chili – 3 to 4
Turmeric – 1/4 tsp
Water
Directions
1. Prepared the ingredients and the curry masala.
Put the above masala ingredients into a mixer or blender. Add 1/2 cup water and grind into a smooth paste. Set it aside.
2. Warm oil in a large saucepan over medium heat. Add the paste and fry for 2 – 3 minutes until it starts leaving the sides of the container.
3. Add 2 cups of water or more based on the consistency of curry thickness you need. Thicker the more flavor. Add 1/2 tsp salt and bring it to a boil.
4. Now, add the chopped green beans. Mix, you can some more water now if the curry is very thick. Cover and bring it to boil again.
Check for salt. Add more if required. Most suitably it can be served with bread and rice. Serve warm or hot.
Cook’s tip: This post with dry red chili has a slightly extra heat. I recommend using kashmiri chili for less intense heat if you do not like it hot.
To help you with more vegetarian recipes, here are a list of few that I tried
After all that I have eaten while I was back home, I’m excited to bring back a few recipes. These recipes will satisfy the cravings for a delicious, spicy seafood fry.
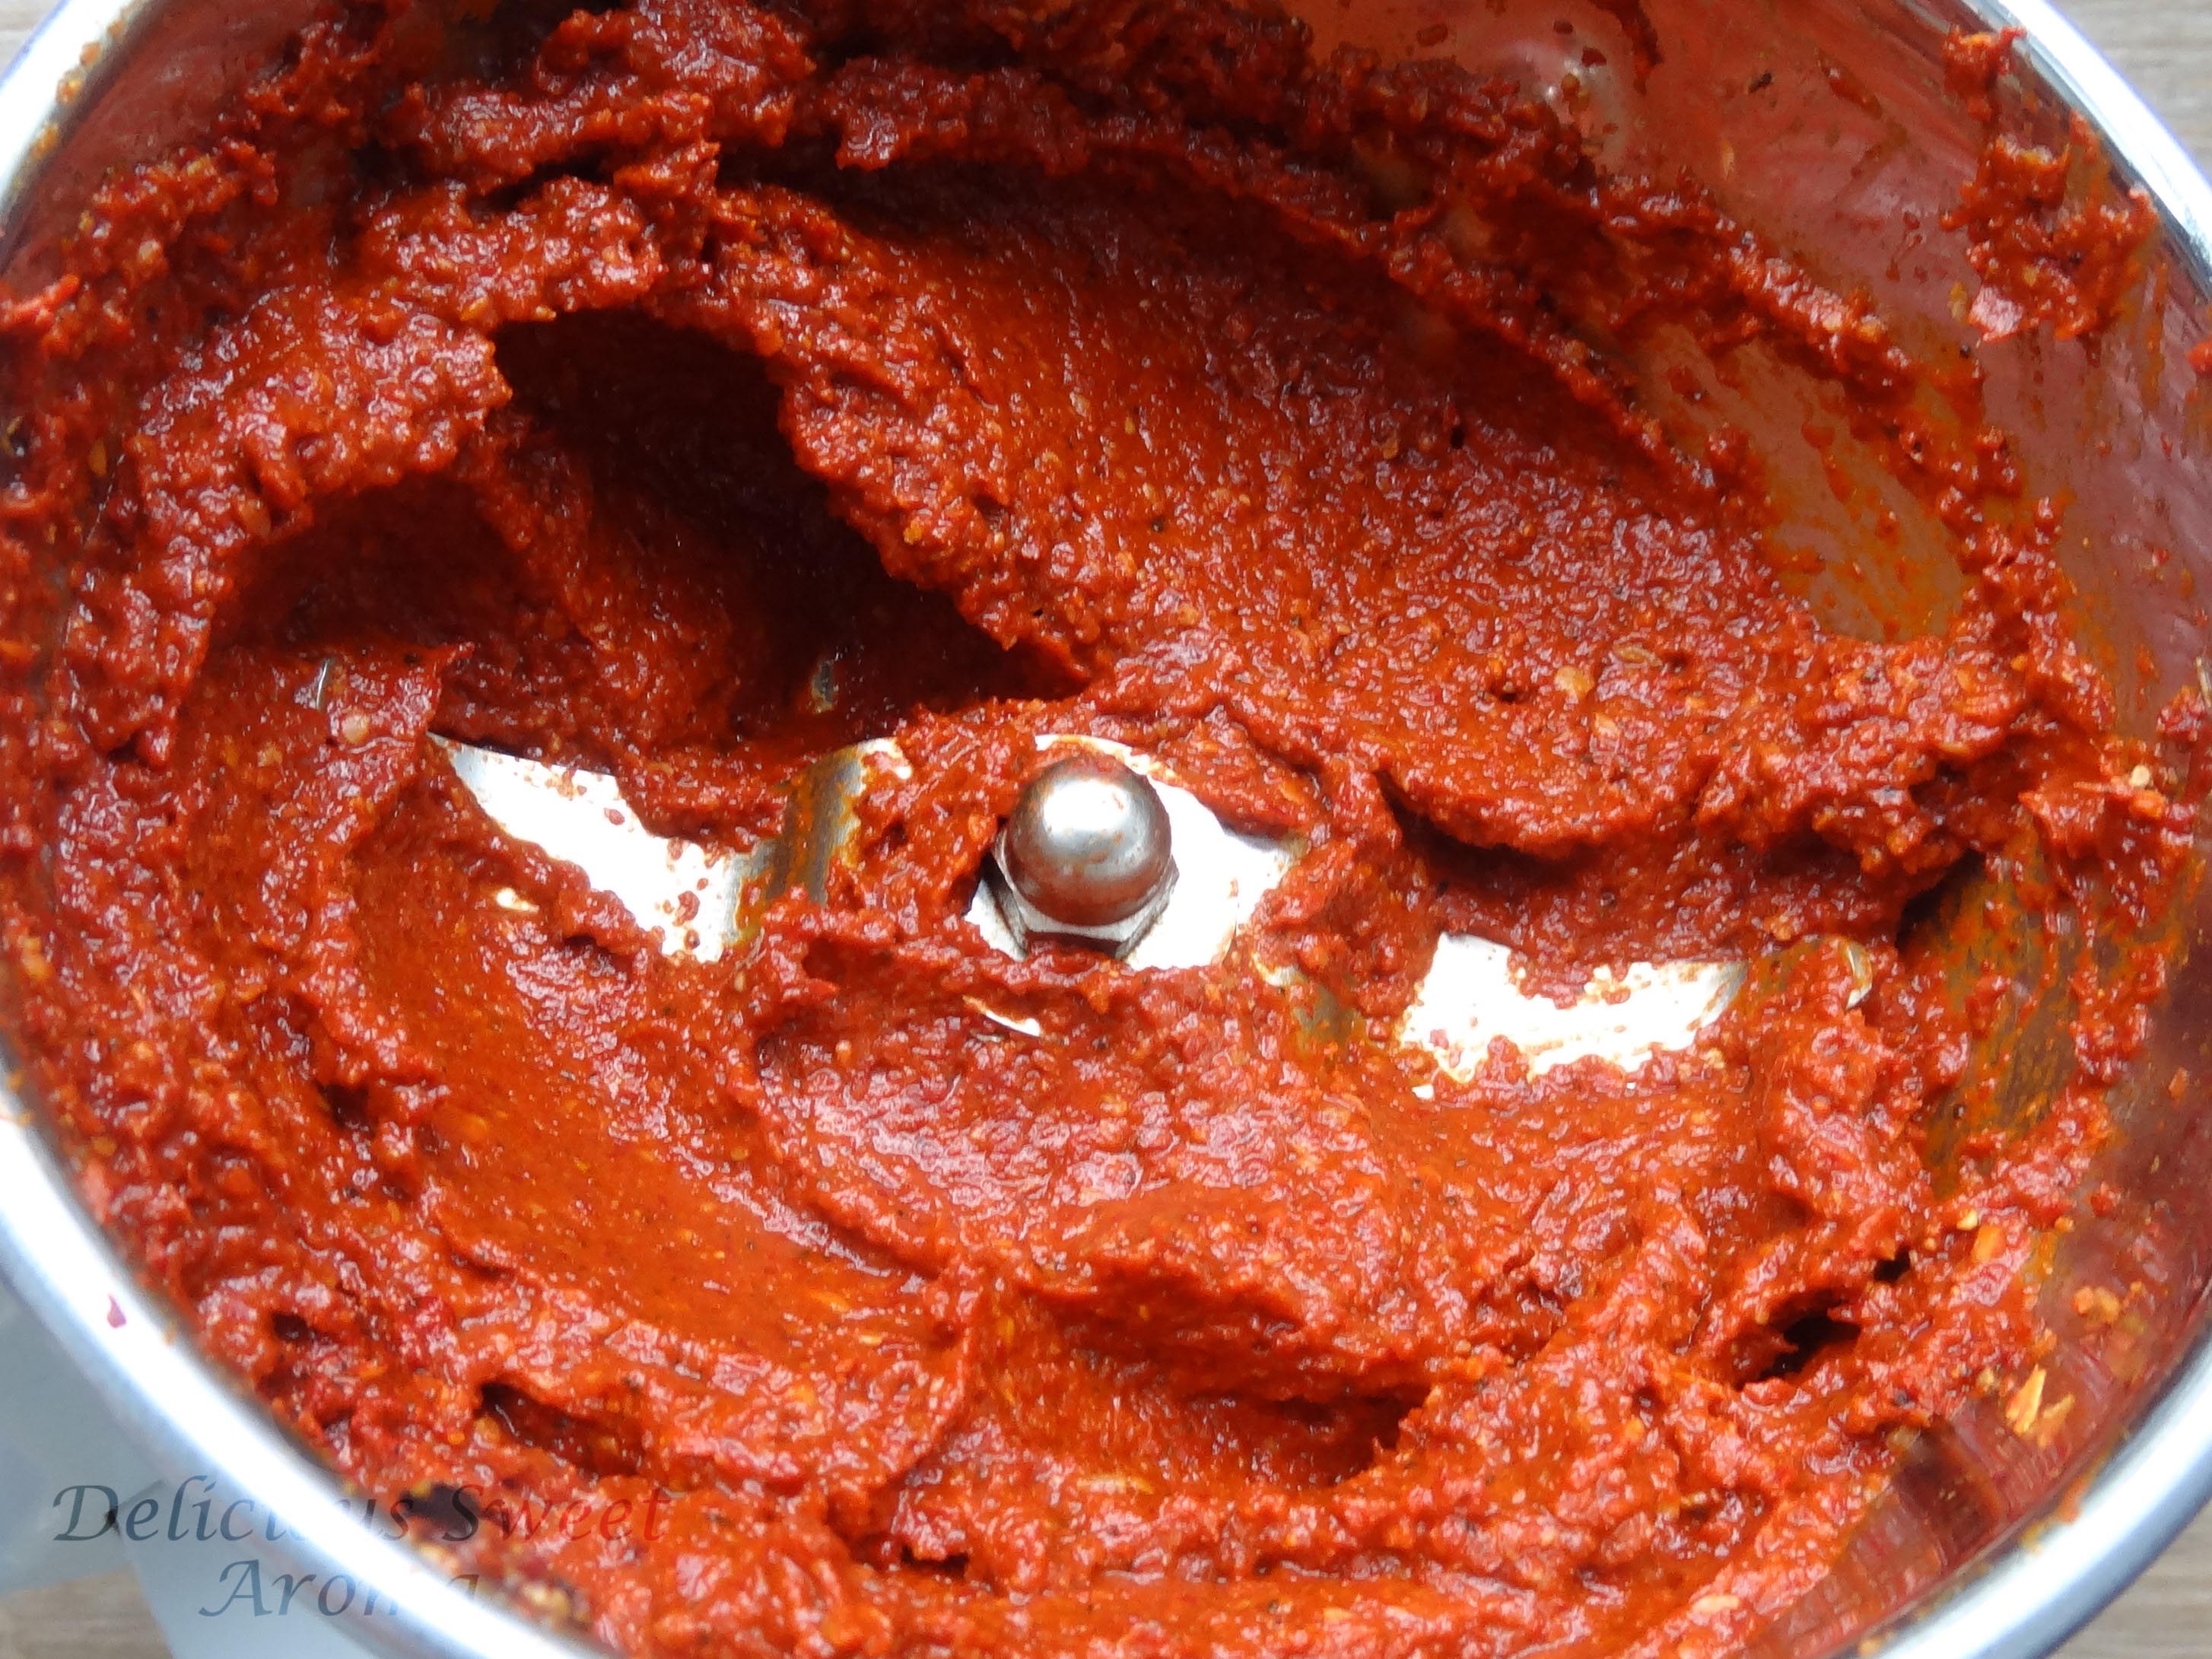
Fish chili paste is made out of the most common spices that are available in almost every local Indian supermarket. It is popular in the coastal regions of South-India prepared differently in different regions. Chili paste is exactly what it sounds like: the spicy tangy flavor. This recipe is always used in my mom’s kitchen and comes in handy for every fish I want to fry.
I used to start by coating my fish with a paste of chili powder, a pinch of turmeric, and salt. This paste had a less intense flavor. It got me thinking there was something missing. I then made up my mind. I prepared this paste which I should have tried long before. Now, every time I fry my fish with this paste, it takes me back home. The aroma of the spices fills the air. It spreads the spicy blend to the olfactory system. The liquid moves across your palate. It’s mouth-watering!
Preparation time: 5 minutes
Appliance required: Blender
Ingredients
Red Kashmiri dry chilies – 32 g / fist full
Black pepper seeds – 1 tsp
Cumin seeds / Jeera seeds – 1/2 tsp
Salt – 1 tsp
Vinegar – 2 tbsp
Turmeric – 1/4 tsp
Directions
1. Prepare the ingredients. Combine all the ingredients in a blender, preferably in a small sized container so as to grind it into a fine paste. Add very little water if its very dry.
2. Grind into a thick fine paste. Transfer it into 200 ml or 200 g glass jar. Store it in the fridge.
3. Marinate 1 tbsp of chili paste on fish, either whole fish or pieces. You can adjust the amount of paste based on your spice level. Sprinkle just a pinch of salt over fish since the paste already contains some amount of salt.
4. Let it sit for a couple of minutes, longer the better. Shallow fry the fish in a pan.
You can fry any lean fish which are available in wide varieties. Fish that are commonly fried with this paste:
Mackerel (Bangude)
Sardine (Tarle, Boothay)
Ladyfish (Kane)
Pompfret (Maanji)
King Fish / Seer ( Surmai, Anjal) : Pic below (EDIT)
Coat each fish piece with the chili pasteSprinkle some semolina on either sides so they dont stick to the pan when frying
Coorgi pork is a traditional dish from Coorg with a complete twist unlike my previous post of black pepper pork recipe.
Coorg also known as Kodagu, is a district in South-Indian state of Karnataka. It’s a hill station with a stunning landscape and because of its breathtaking view, history, nature, cool climate it is equated to Scotland known as “Scotland of India”. It has a lot to offer to tourists with acres of tea and coffee plantations with vast stretches of the pristine grasslands.
Coorg Pork Masala – 3 tbsp ( or you can prepare this powder with the ingredients given below under coorgi pork masala powder)
For the paste: Grind these into a paste
Coriander – 10 stems
Green chilies – 3
Garlic cloves – 10 large
Onions – 3 big size, roughly chopped
Ginger – 1/2 inch
Coorgi pork masala powder: In a small saucepan roast the following ingredients except turmeric for 2 minutes on high heat and make a fine dry powder using a small blender (see notes*).
Coriander – 1 tbsp
Cumin seeds / Jeera – 2 tsp
Mustard seeds – 1/2 tsp
Peppercorns – 2 tsp
Turmeric powder – 1/4 tsp
Directions
1. Cut the pork into medium-sized pieces and sprinkle 2 tsp salt. Set aside for 30 minutes.
2. Using a sauce pan fry the pork without oil on medium heat until excess fat separates. Discard this fat and transfer the pork into a plate.
3. Heat 1 tbsp oil in a heavy-bottom pan, add curry leaves. Add the paste, 1/4 tsp salt and fry for a couple of minutes.
4. Add some water, pork meat. Mix and cook for 15 minutes on medium heat.
5. Now, add the coorgi masala powder, vinegar. Mix , cover and cook for another 15 minutes or until well cooked. Check salt, add if required.
Note:
*Remaining Coorgi masala powder can be stored in an air-tight container or zip-lock bag in the fridge for later use.
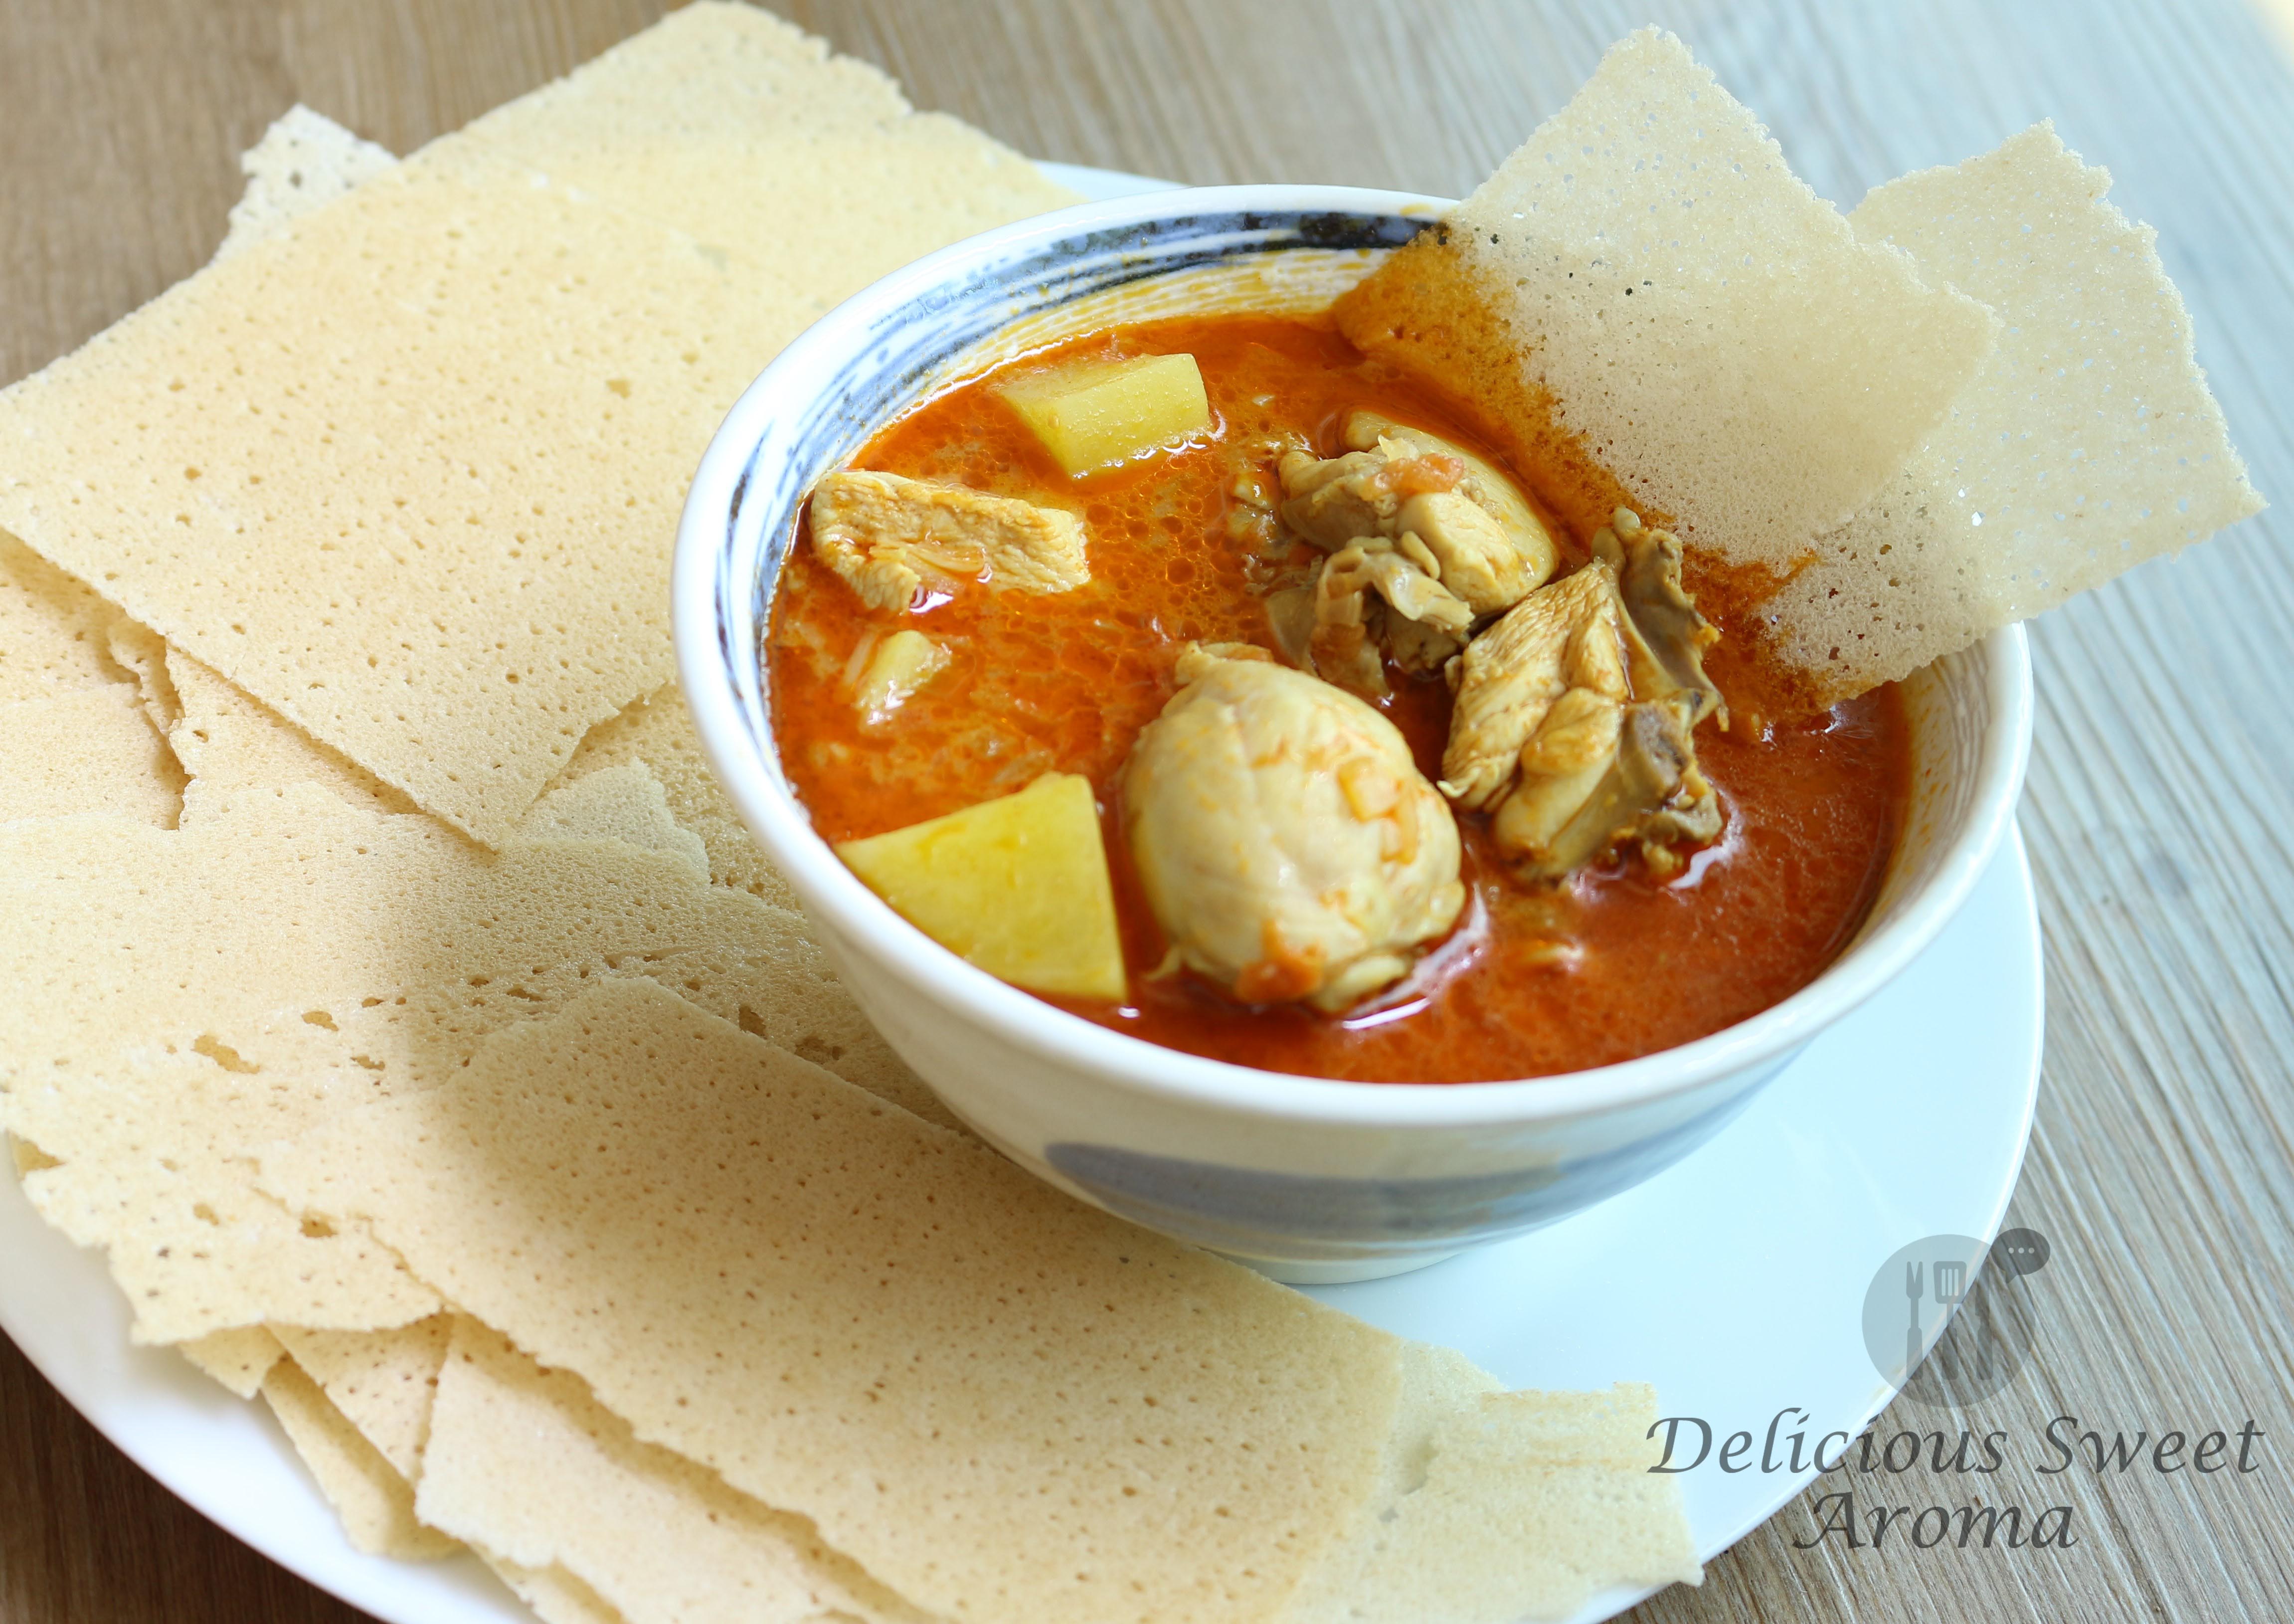
Curry is the pinnacle dish of South Asian meals goes-with-everything and a great accompaniment with bread, rice pancakes or rice. This Chicken Curry recipe is a basic recipe that is made easy where even a newbie can try and can never go wrong.
In Mangalorean cuisine we call this dish as Kori Rotti, Kori – Chicken and Rotti meaning rice wafers made from boiled rice. The Rotti is a bread where the rice paste is flattened and then sun dried to get thin sheets. Typically Kori Rotti is made from freshly ground spices but I have used my version of basic recipe with generous amount of curry and gravy to compliment the dish.
Chicken curry is a family-friendly dish in my home most commonly prepared during weekends or festive occasions. Since this recipe is very basic prepared with ready-made spice powders it doesn’t require a blender to make a curry paste these powders are usually available in Asian supermarkets. The addition of yogurt is another key ingredient to get a thick creamy texture.
Directions
1. Sprinkle 3/4 tsp salt evenly over the chicken and set aside.
2. Heat 4 tbsp ghee or oil in a deep-skillet, Fry chopped onions till slightly brown on high heat. Add tomatoes, cook and stir occasionally until softened, about 5 minutes.
Add salt, garam masala, bafat powder or chicken powder, turmeric and give it a final mix.
3. Add potatoes, garlic and ginger-garlic paste. Fry for 2 minutes. Add little less than 1/4 cup water, lightly whipped yogurt and finally the chicken. Give a good mix to coat the chicken.
4. Pour 11/2- 2 cups of water enough to cover the chicken pieces. Add some salt if necessary. Cover and cook on low heat for 25-30 minutes. Cook the potatoes till tender when pierced with a fork or knife.
Here’s a simpler version of the serving suggestion for Kori Rotti:
Place the pieces of Rotti on a plate by breaking them.

Top it with hot curry and mix with your hand so the crispy wafers become soft. Relish!!! :)
Enjoy the delicious combination of spicy chicken curry and crispy Kori Rotti!
Chicken Curry | Mangalorean | South Indian
Sherryl Andria
Traditional Chicken Curry served with crispy Kori Rotti, a Mangalorean delicacy combining tender chicken and crunchy, thin bread.
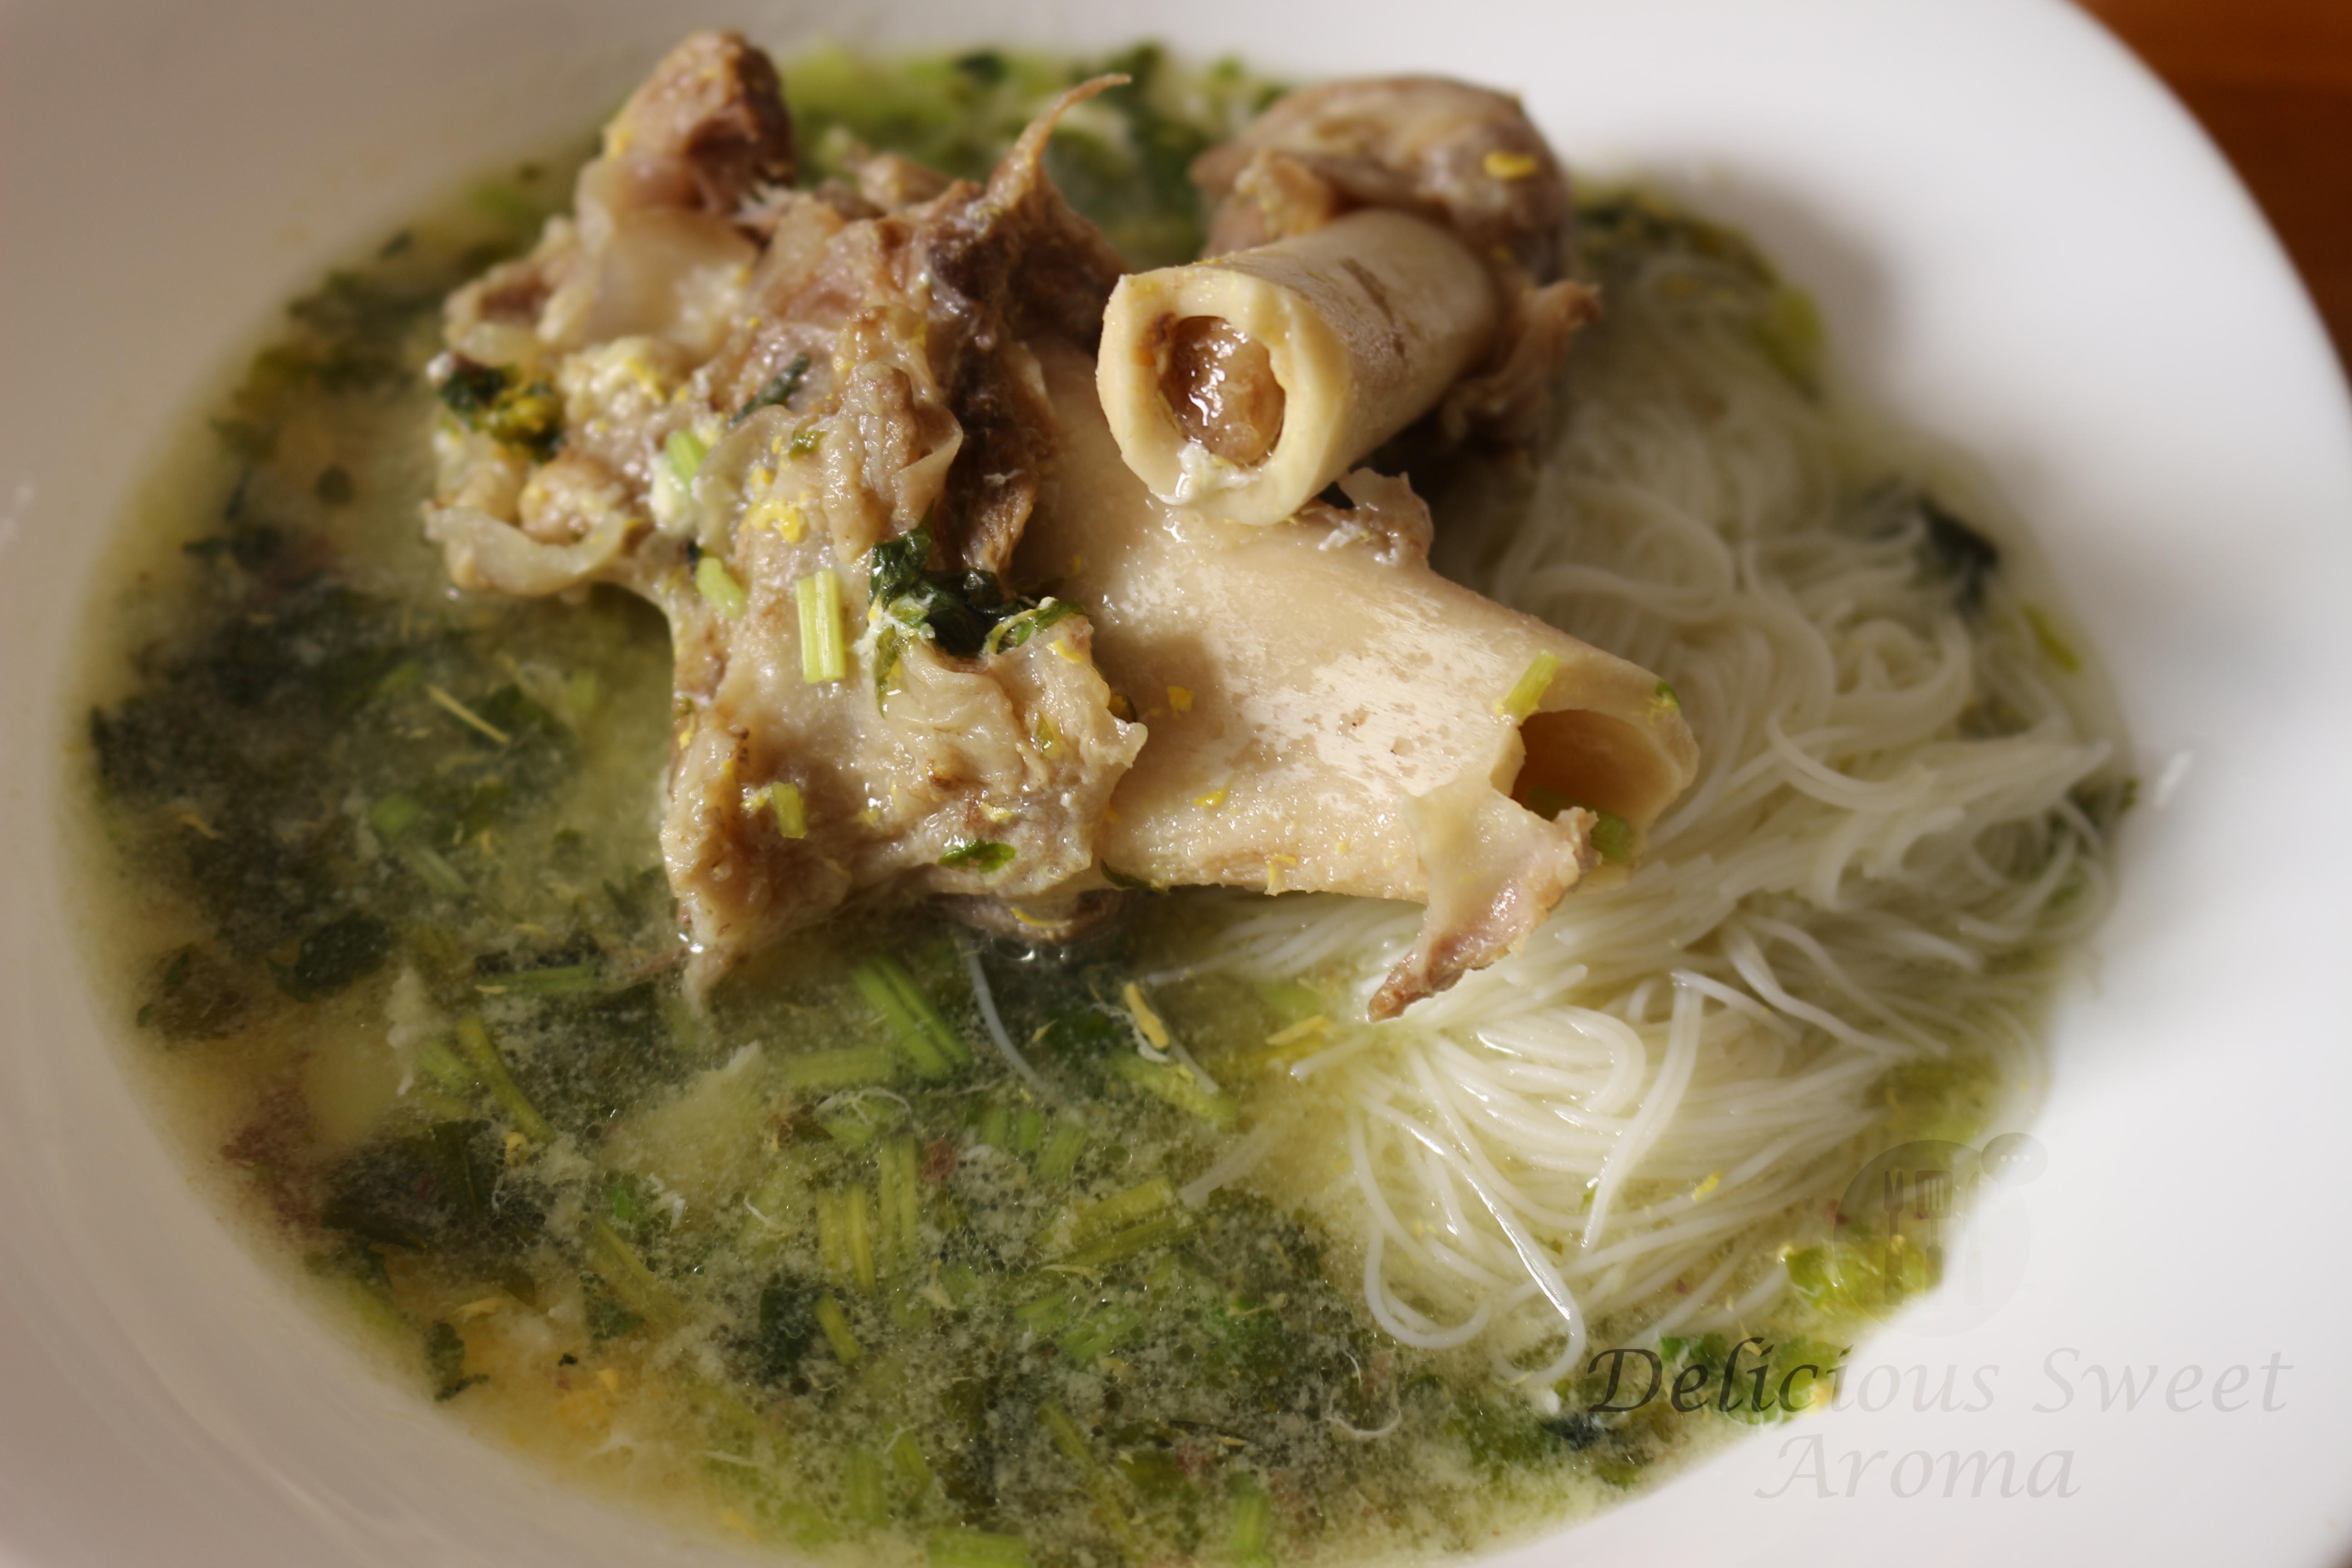
Bone-Marrow is considered a delicacy in many countries with India being one of them.
We in Mangalore prepare variety of mutton dishes with bone marrow in them. Not everyone accepts the taste of the bone marrow flesh but, I suggest you taste it once. Eating with hands is the best way to enjoy the bone marrow. Taste it and drop by again until my next post. Would loved to hear back if you’re still reading. Ciao!!
Preparation time: 5 minutes
Cooking time: 45 minutes
Serves: 2
Required appliance: Pressure cooker (Mine is a Prestige hard-anodized which comes with a insertable pressure regulator on the lid.
Ingredients
Bone marrow (frozen or fresh) – 5 or more chopped, with flesh
Celery leaves or 2 stalks – 1/2 cup, chopped
Egg – 1
Corn flour (optional) – 1 tbsp
Salt as required
Water – 3 cups
Rice vermicelli noodles/Egg noodles – for 2 servings
Directions
1. Into a large pressure cooker, place the mutton bones along with 2.5 cups of water. Add 1/4 tsp salt. Close the lid and Insert the pressure regulator (Check instructions on how to use a pressure cooker for the type you own). Set the heat high.
Since mine comes with an insertable pressure regulator. Take 6 – 7 whistles. This must take approximately 25 – 30 minutes. Turn off heat and let the steam escape on it own.
2. Remove lid, placing it on heat add celery. If you’re using corn flour take some of the liquid from the soup into a glass with some cold water, add flour, mix. Add this to the soup (adding corn flour directly into very hot liquid will form lumps).
3. After a boil. Lightly whisk the egg with a fork and immediately stir until it gets mixed into the soup. Add salt and pepper powder. Turn off heat.
Cook the rice noodles as per instructions on the package in a separate container. Strain and serve it over the soup.
Done! And, it’s that easy 🙂
Enjoy the flavored bone flesh with hot soup.
EDIT 1:
When I prepare with Celery stalks.
If you have any questions please feel free by commenting below 👋 🌹
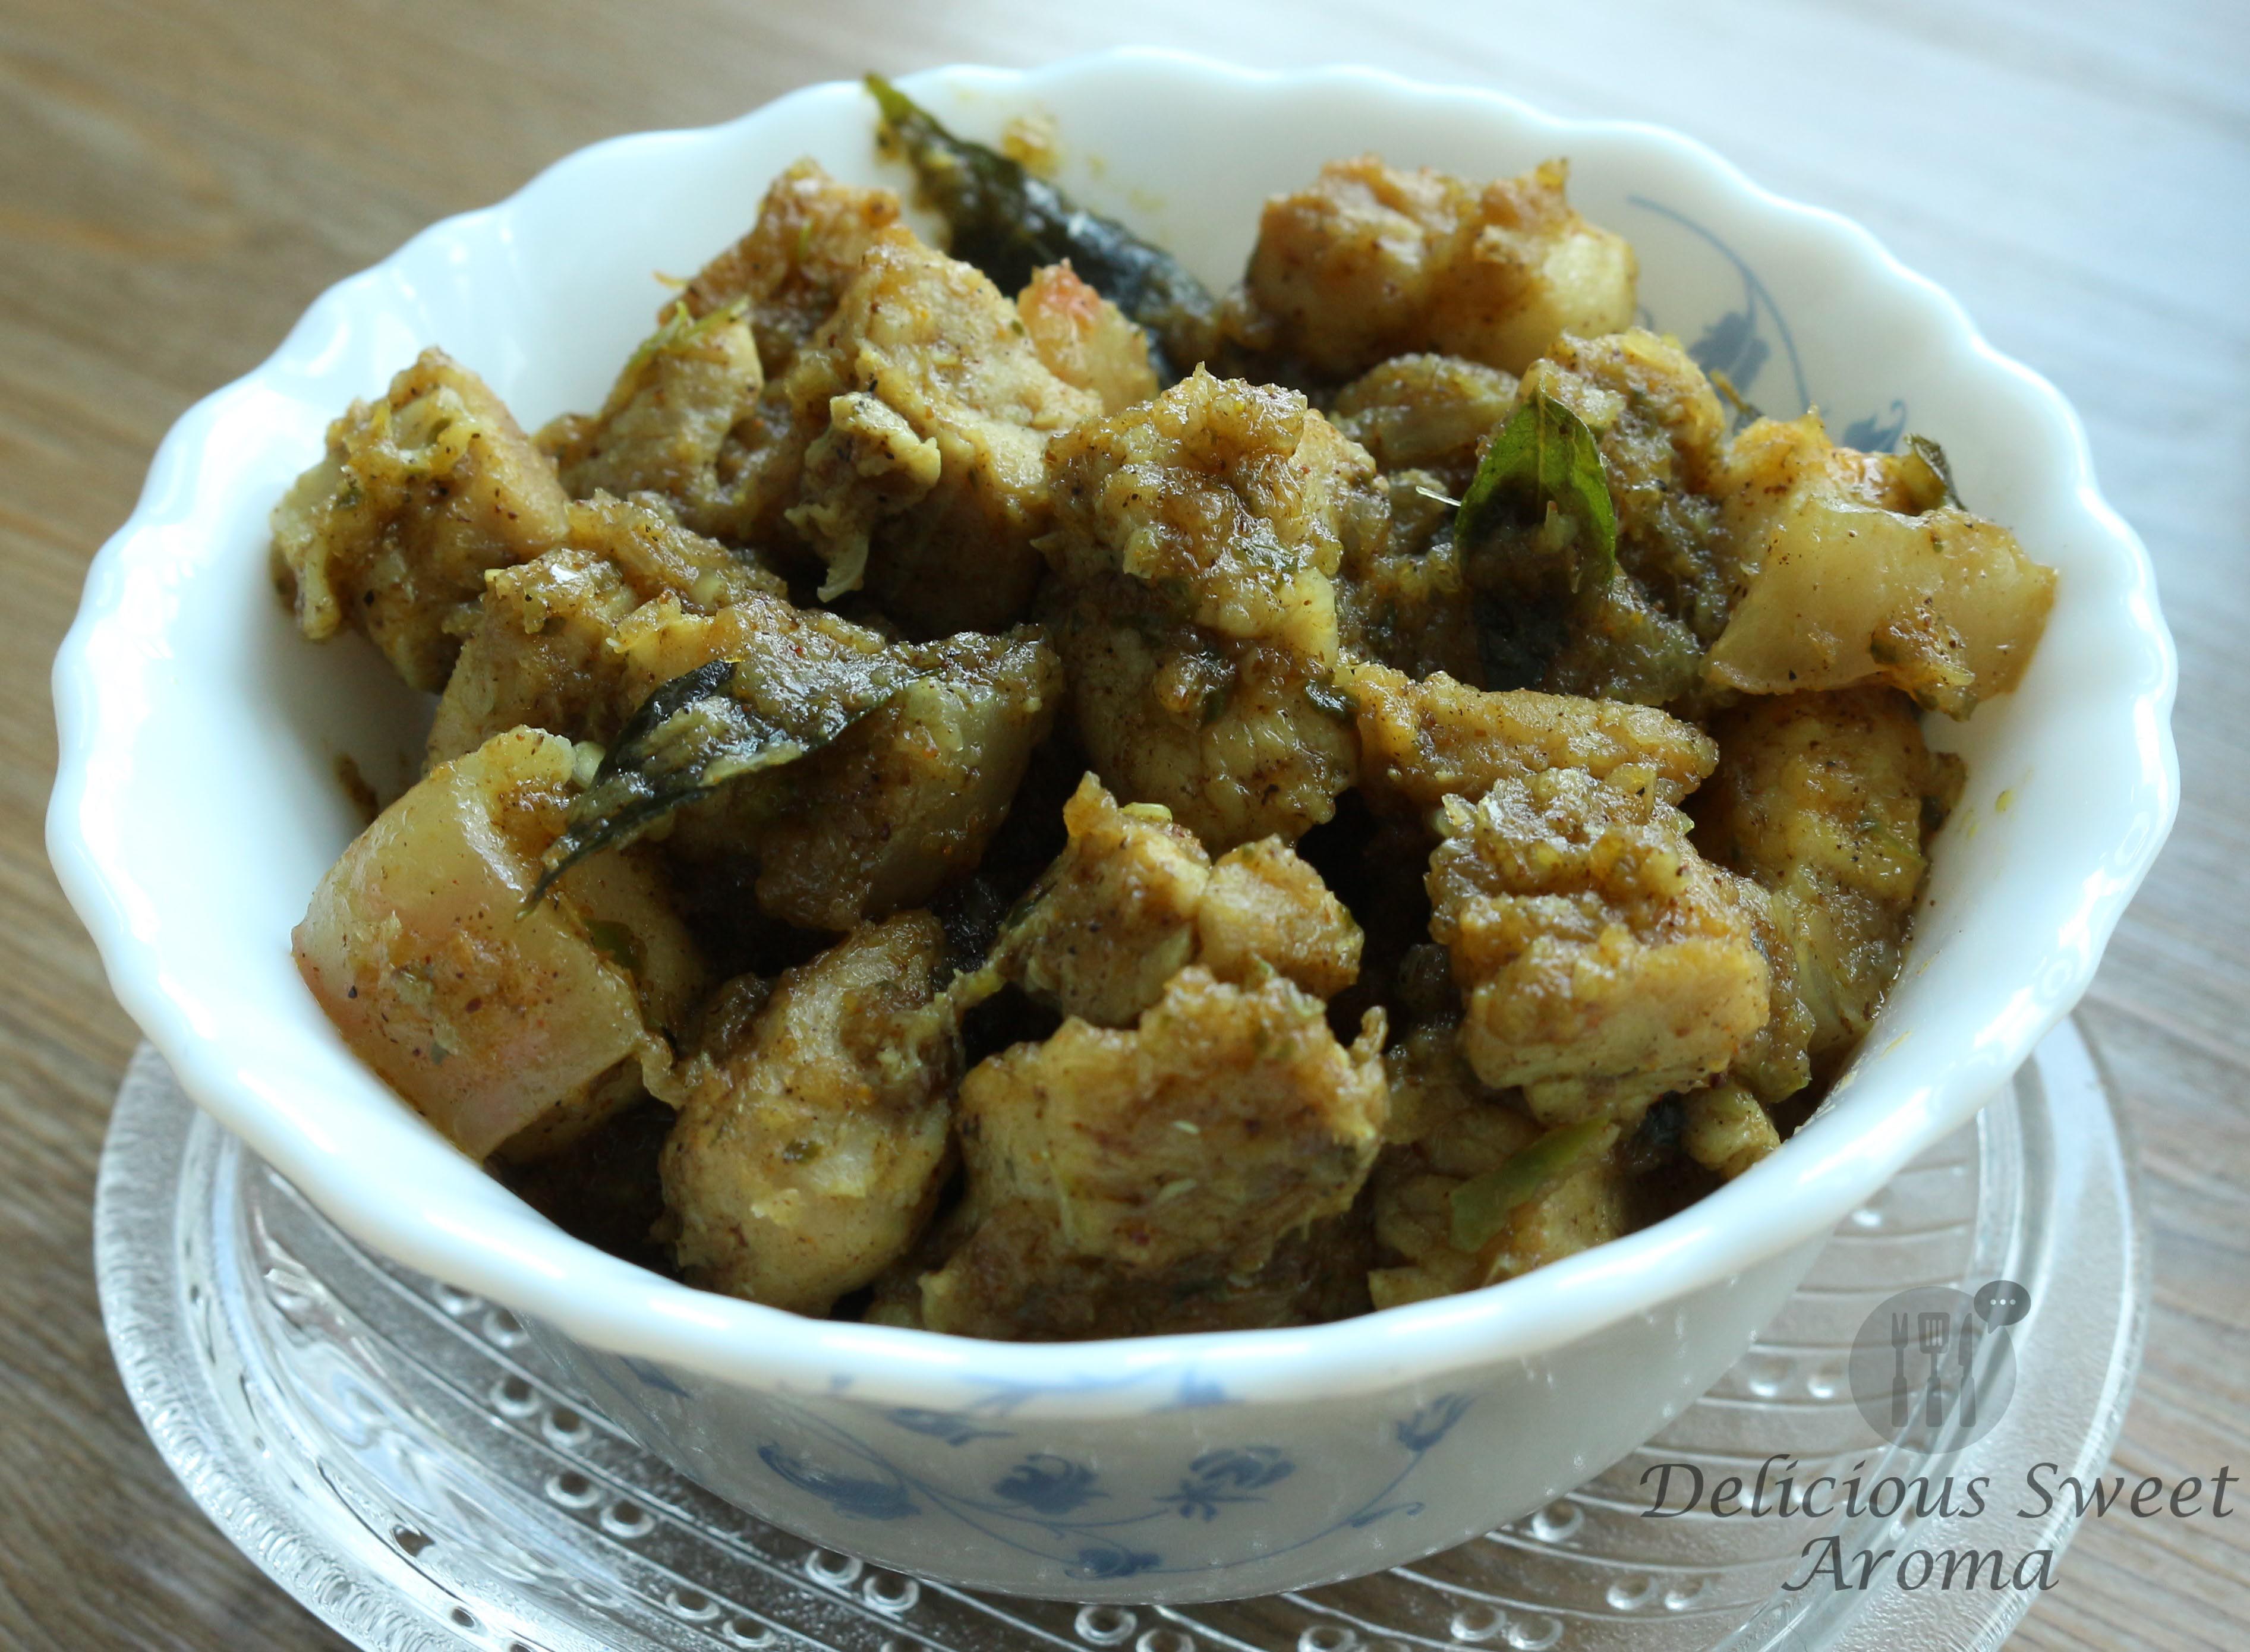
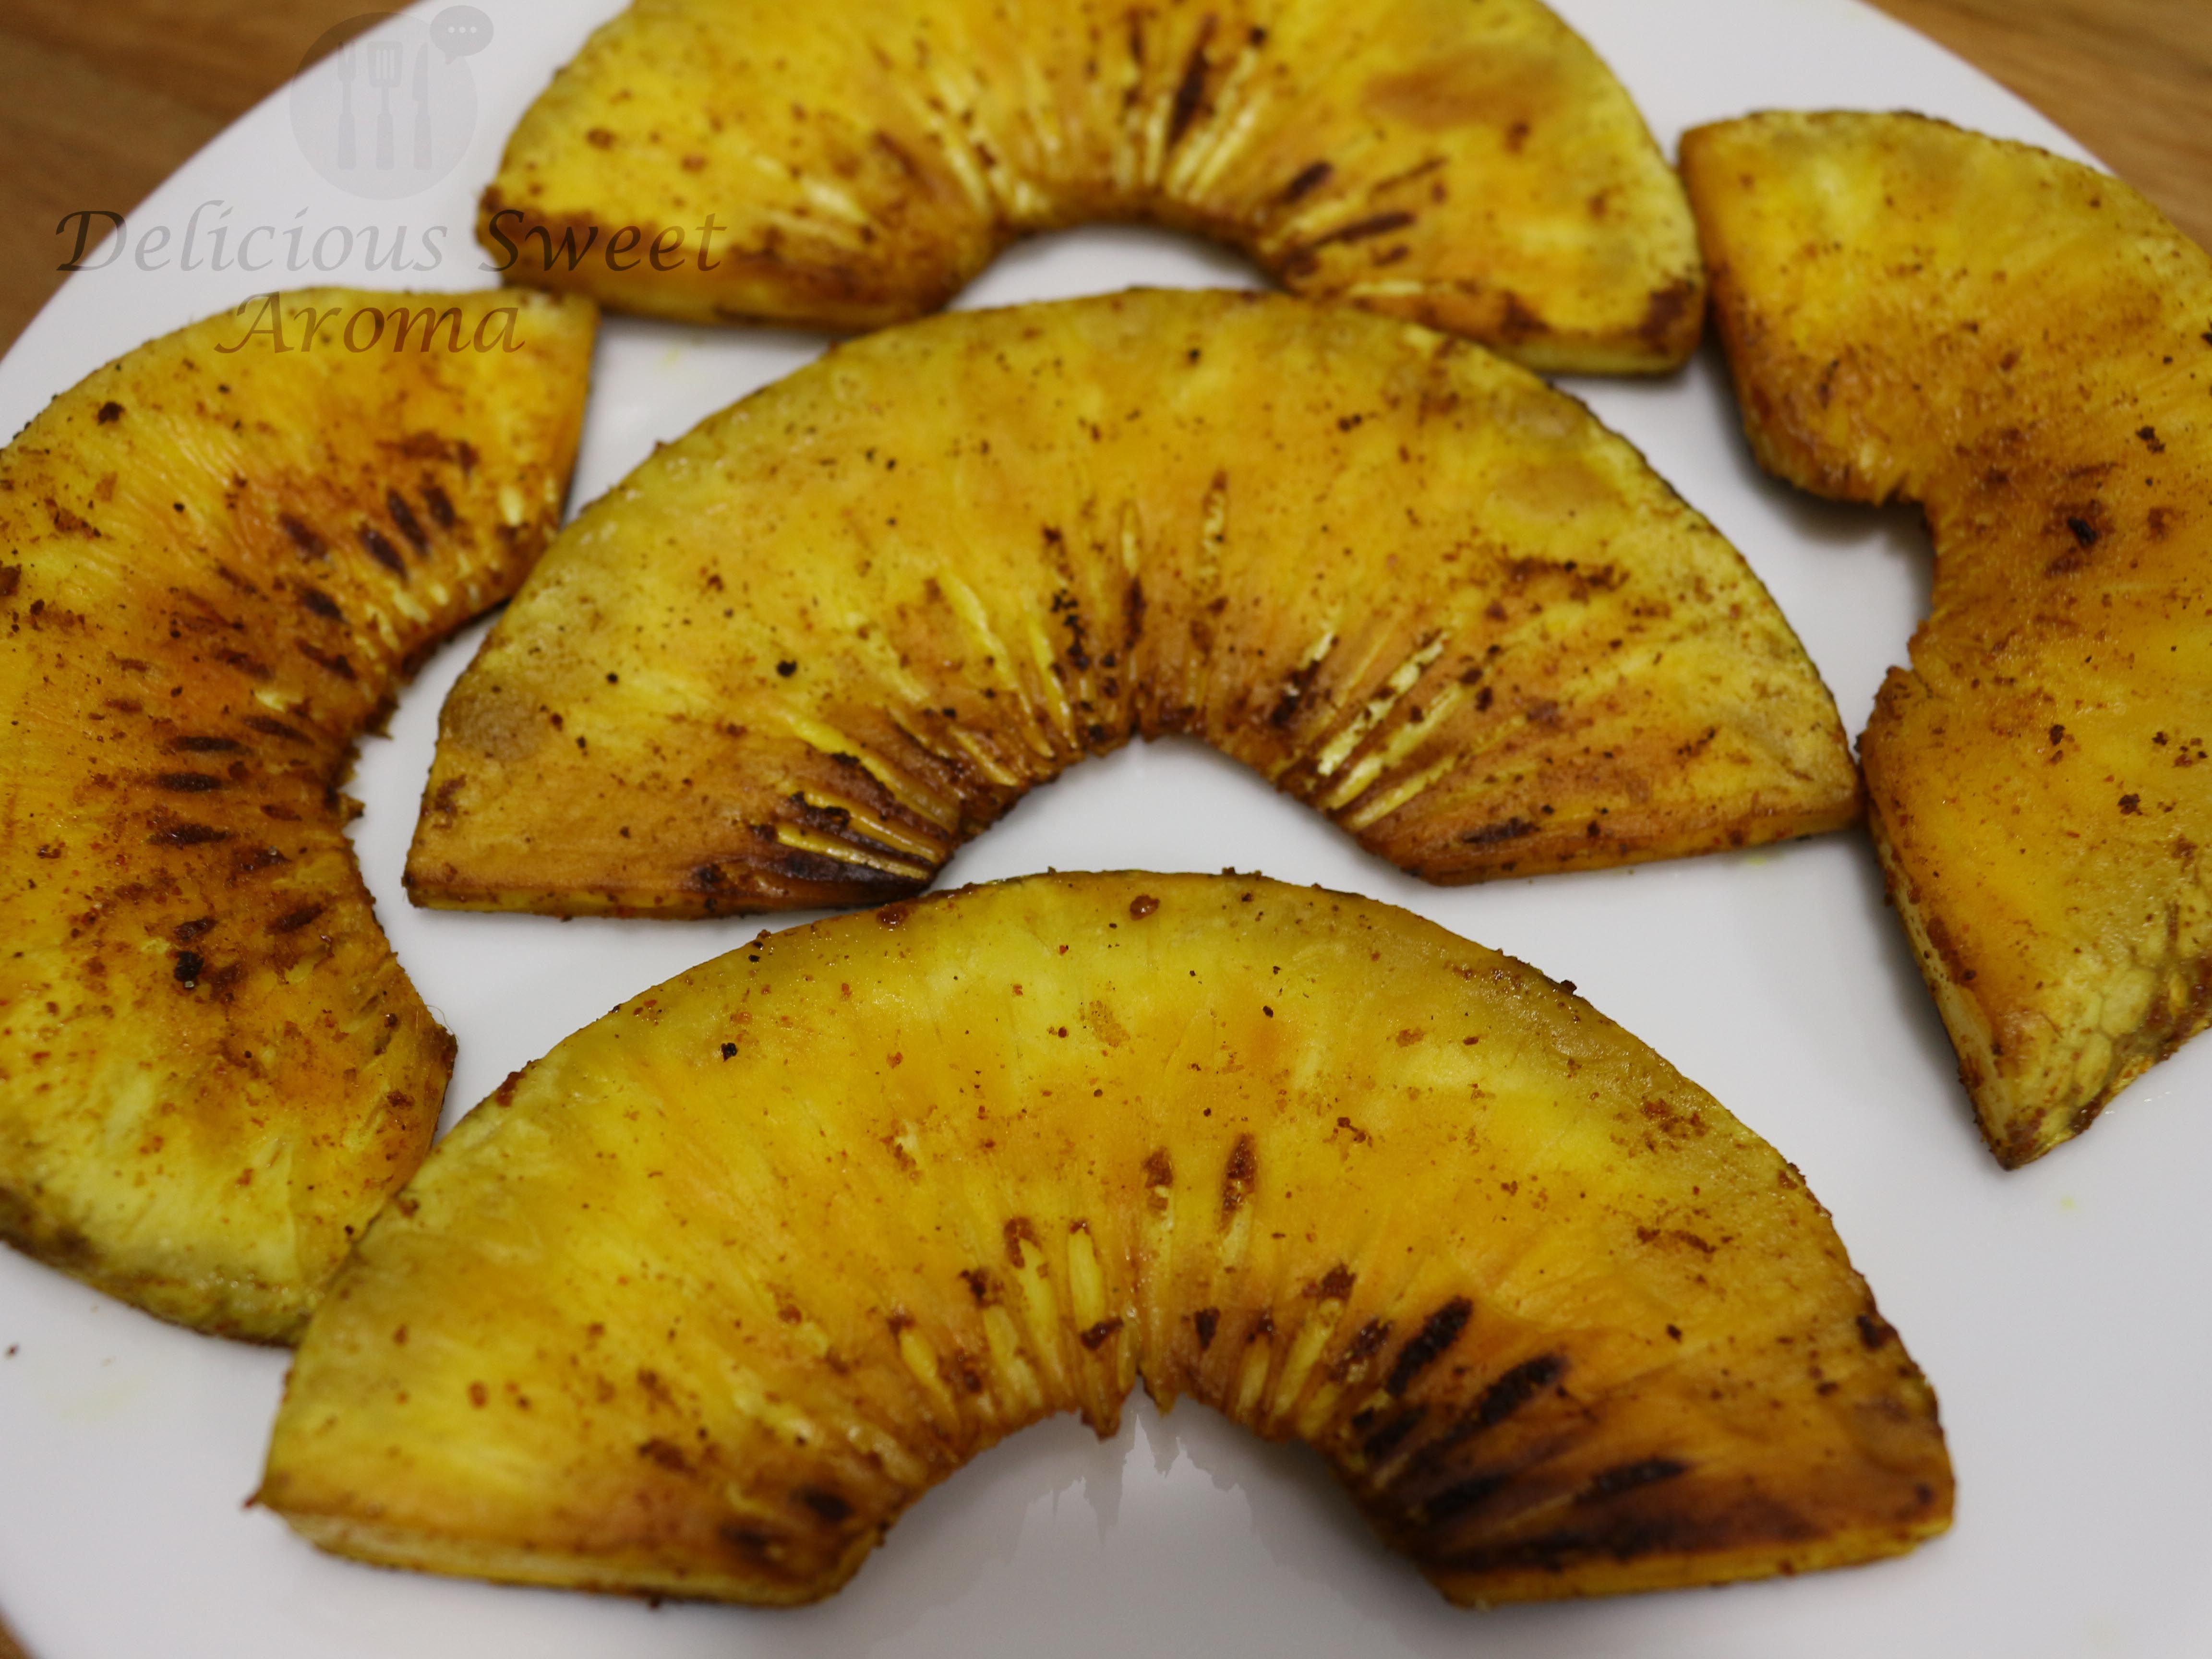
While Breadfruit is still unknown to many, they are commonly found in tropical areas where good amount of sunlight and rain is required.
We have a tree in our backyard in my hometown and quiet often my family used to prepare this recipe to accompany with anything as a side dish. During my last visit home in March – when it’s the season for breadfruits, the tree stopped fruiting a lot with few breadfruits falling off before even they turn ripe. So, before leaving, I bought a ripe one at the open market and when I got back to Singapore, stored it in the fridge for a few days.
Breadfruit is considered to alleviate hunger and feed the world. It is large, green with a prickly skin when unripe. When buying look for a mature one with a greenish-yellow skin, a smooth surface which is not prickly, a brownish cracking between the surface segments. Avoid buying immature “Green” Breadfruit. In order to delay ripening, store it in the fridge for few days and then freeze it for later use. It tastes more like a roasted potato when ripe. Sweet with an aromatic fragrance.
Pan-Fried Breadfruit Recipe is easy to be made once you learn how to cut it. Do share your views on this recipe. Following are a few names of Breadfruit :
Deeviso gujo / Jeev Kadgi / Dee Gujje (Konkani), Ber / Beru (Kannada), Neer Phanas (Marathi), Brot Frucht (German), Panas (Puerto Rico)
Preparation time : 10 minutes
Cooking time: 7 -10 minutes
Ingredients
Breadfruit – 500 g
Red chili powder – 1 tbsp
Turmeric powder – 1/4 tsp
Paprika powder – 1 tsp
Vinegar – 1/2 tsp
Salt – 3/4 tsp
Directions
1. How to cut breadfruit >>
Cut into halves. Peel it as it were a potato.
Cut them into thin slices of less than 0.5 cm thickness, remove and dispose the core. Season with salt and let it rest for 15 minutes (refer notes for storing extra quantity).
2. Apply some salt and set it aside for 15 mins. After a while you will notice some water settling at the bottom. Discard the water and apply the chili paste (or homemade paste) with your hands.
3. With 2 tbsp of oil, heat a pan. Pan fry each side on medium heat for 4-5 mins or until golden brown.
If you find a breadfruit at your location, especially in the western countries, please share in comments below for everyone who has not seen or tasted it gets assistance in finding it. ✍🙂
P.S: I haven’t found a Breadfruit in Singapore yet. I will definitely update it when I do.
Notes:
*Apply some salt to the rest of the slices of breadfruit and store it in airtight container in the fridge. When ready to use, apply chili paste and fry.
On the occasion of Easter weekend, I baked Egg Puffs wondering if something similar like these that are made in bakeries can be re-created at home.
Egg Puff
I never thought Egg puffs were this easy to be made at home, especially when you feel confounded by making a dough and your not too sure if the pastry would turn out puffy with crispy golden flaky crust after baking. To make it more easier I used the ready-to-use puff pastry which you must definitely try unless you’re good at it.
Tips of Puff Pastry
Using store-bought puff pastry is a convenient way to create delicious pastries without the effort of making it from scratch. Here’s how you can use ready-made puff pastry without hassle
Thaw the Pastry:
If your puff pastry is frozen, allow it to thaw in the refrigerator for 1 hour or follow the package instructions for quick thawing.
You want the pastry to be pliable but still cold.
Roll It Out:
Lightly flour your work surface and roll out the thawed puff pastry to your desired thickness.
You can make it thinner for delicate pastries or keep it slightly thicker for more substantial treats.
Cut and Shape:
Use a sharp knife or pastry cutter to create shapes. Common shapes include rectangles, squares, or circles.
For turnovers, cut the pastry into squares or rectangles.
Add Fillings:
Place your desired spiced fillings on one half of the pastry shape.
Fold and Seal:
Fold the pastry over the filling to create a pocket.
Press the edges together to seal the pastry. You can use a fork to crimp the edges.
Egg Wash:
Brush the top of the pastry with beaten egg for a shiny finish.
Bake:
Preheat your oven according to the puff pastry package instructions (usually around 400°F or 200°C).
Place the prepared pastries on a baking sheet lined with parchment paper.
Bake until golden brown and puffed up (usually 15-20 minutes).
Cool and Enjoy:
Let the pastries cool slightly before serving.
Directions
1. In a saucepan, fry onions till slightly brown. Add garam masala, chicken powder, coriander powder (if your using) ,green chilies, chili powder. Mix. Add turmeric and pepper powder. Fry for a 1-2 mins. Transfer to a small container to cool.
2. Peel the eggs and cut them lengthwise with a very sharp knife. Lightly wet the knife for cleanest cut. Season with pepper powder, salt and chaat masala.
3. Thaw the puff pastry as per instructions given in the package.
Using half of this puff pastry. Flatten it into desired thickness into a square. Cut out the uneven sides and use this left-over in the end. Divide the pastry into required square size to make different shapes.
cutting into squares based on the size of the egg
Preheat oven to 200 degrees Celsius or 400 deg F (convection with fan) until it reaches the desired temperature.
Fill in 1 tsp of the filling and top with egg halves facing down and to the corners lengthwise. Brush with egg wash, stretch the 2 corners towards the center. If required use a fork to seal them (Mine didn’t seal too well, but it looked delicious I believe ;)). For video
4. Line the puffs in a baking sheet and bake at 200 degrees Celsius for approximately 15 minutes or until the pastry top becomes golden brown and crisp.
Serve them with ketchup or enjoy them on its own. I would recommend without ketchup to to enjoy the spice filling.
You can also look at more recipes with Egg and a printable version below :
Unravel the secrets behind crafting the ultimate Egg puff – a symphony of golden layers, savory fillings, and an irresistible aroma that elevates comfort food to an art form.
Take a pan, fry 1 chopped onion till slightly brown.
Add 1/4 tsp garam masala, 1/4 tsp turmeric, 1/2 tsp pepper , 1/2 tsp red chili powder, 1/2 tsp cumin and 1/2 tsp coriander, 3/4 tsp chicken masala powder along with 1 tsp ginger-garlic paste and green chilli.
Season with salt, mix together and fry for a 1-2 mins.
Transfer to a medium sized bowl.
Puff Pastry
Preheat oven to 200 degrees Celsius (400 deg F) convection with fan for 10 minutes.
If the pastry is thick, flatten it into desired thickness into a square.Cut out the uneven sides and use this left-over in the end. Divide the pastry into required square size to make different shapes.
Fill in 1 tsp of the spice filling and top with egg halves facing down and to the corners lengthwise.
Brush with egg wash, stretch the 2 corners towards the center. If required use a fork to seal them.
Line the puffs in a baking sheet and bake at 200 degrees Celsius for approximately 15 minutes or until the pastry top becomes golden brown and crisp.
Serve them with ketchup or enjoy them on its own.
Keyword Easy Puff Pastry Appetizers, Egg Puffs, Indian egg puffs, puff pastry recipes, Puff Pastry snacks, Quick puff pastry, South Indian Egg puff
Clay-pot recipes are one my families ancient ways of cooking. My granies backyard has a separate open fireplace to cook food in clay-pots. My mom still cooks food in clay pots in granies kitchen. The food prepared in them are one of the tastiest than when prepared using other utensils.
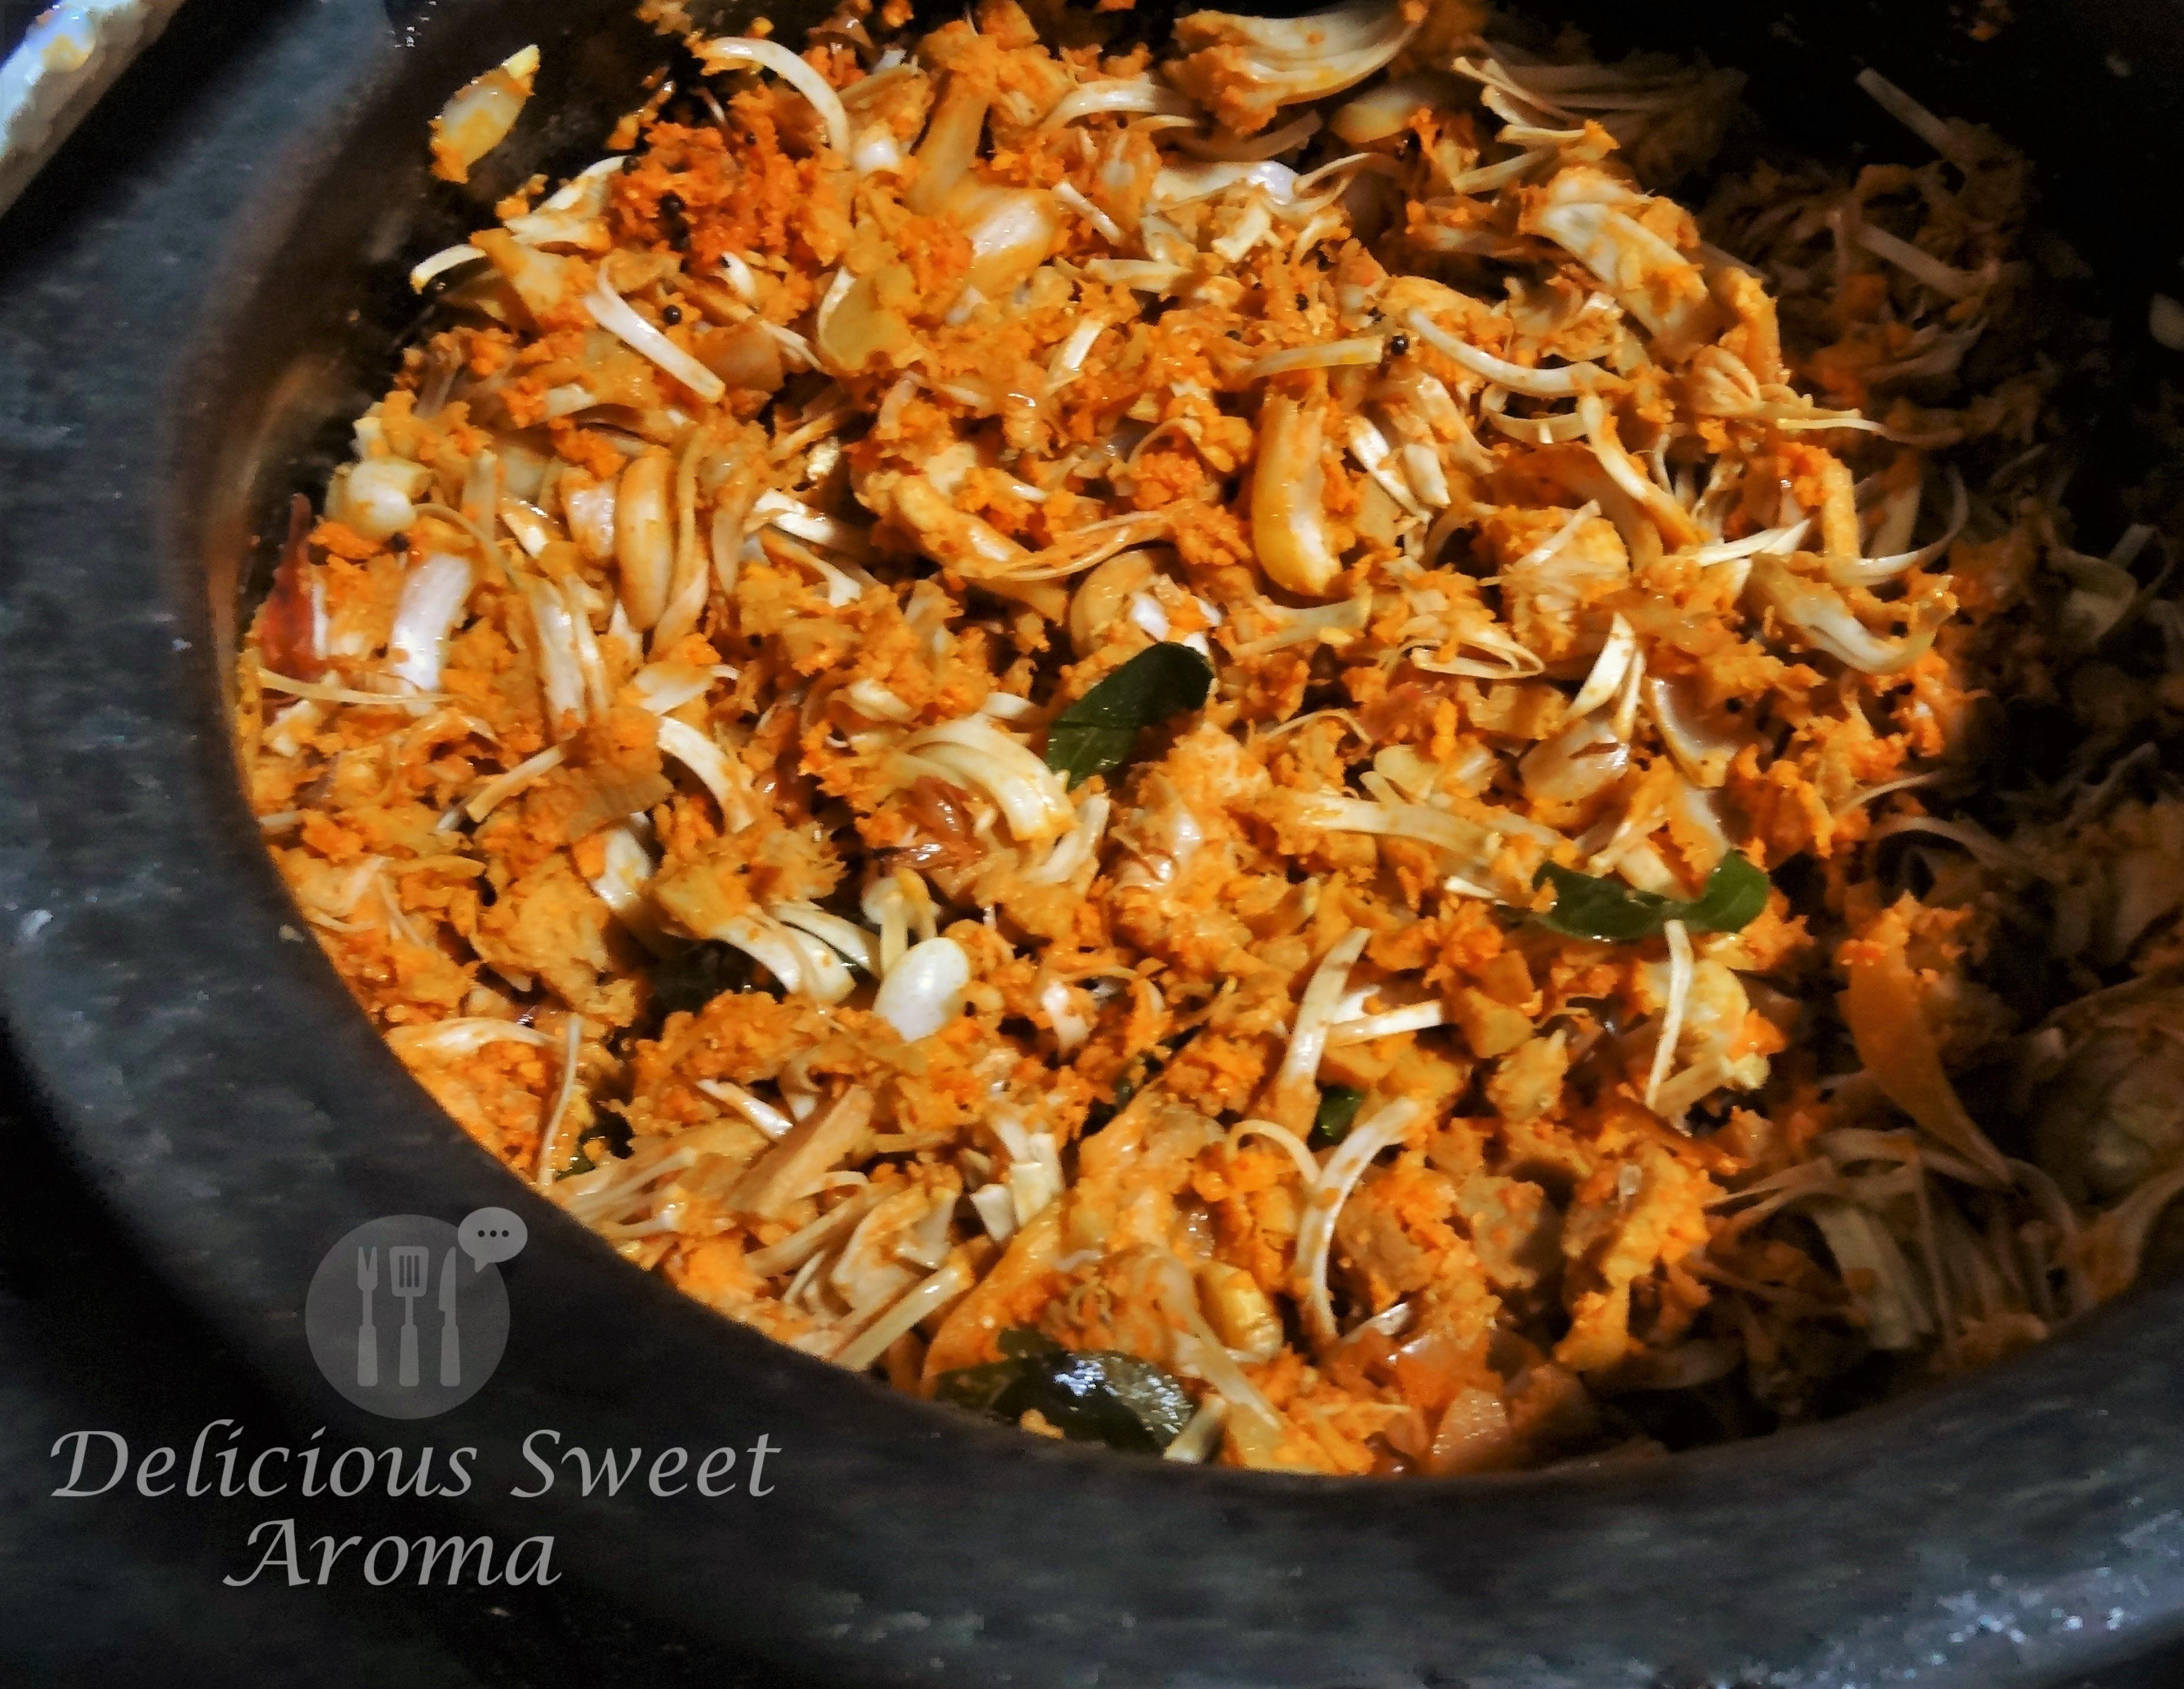
Having lived abroad some foods can never replace home food. During my recent visit to Mangalore, I had enjoyed having cooked raw jackfruit prepared in clay pot (as we always do!). After I got to know that, this fruit is one of the fruits unknown to most people, I made sure I took a picture of it this time.
It varies in size. Since this fruit is very sticky, once cracked open, its a good idea to oil your hands and knife before cutting. It’s an excellent vegetarian substitute for meat because of the fleshy inside. The skin of unripe jackfruit must be peeled first, the rest is chopped and then used to prepare savory dish with spicy chili paste. Young jackfruits also used to prepare curries, pickles and other dishes.
The size of Jackfruit used for preparing this recipe
Preparation time: 45 mins
Cooking time: 1 hour
Serves: 4 – 6 as sides
Ingredients
Raw Jackfruit – 1 small sized
Salt – 1 tsp
For tempering:
Vegetable/Sunflower oil – 2 tbsp
Mustard seeds – 3/4 tsp
Fresh/Frozen grated coconut – 1.5 cups (depending on the quantity)
Curry leaves – 2 stems
Garlic cloves – 2 large, smashed
Tamarind – 3 seeds, mixed in some water, seeds discarded
Onion – 1 medium, thinly sliced
Water – 1 cup or as required
Salt if necessary
Veg Red chili paste (click here) – 3 tbsp (mild), depending on spice level
Directions
How to >> Cut Raw Jackfruit
+ Prepare the working surface by covering with a large plastic. Add water into a large bowl and keep it aside.
Remove the latex from the fruit if a lot oozes out.
+Remove the skin. Cut them into chunks and dip them into the bowl of water. Set it aside until your ready to cook in the next steps.
Once your done. Apply few drops of veg oil on hands to remove the latex. Wash with soap.
1.Cooking the jackfruit:
Strain the liquid from the jackfruit that was previously soaked in water. Add them into a claypot and enough water to soak. Add 1 tsp salt. Cook this until it becomes soft for 30 mins – 45 mins.
Once the jackfruit is cooked. Strain it in a colander. Crush the jackfruit gently.
Crushed cooked jackfruit
2.Tempering: Prepare the ingredients as given under tempering.
Heat a clay-pot. Add oil. When the oil is very hot, add mustard seeds. After they sputter, add curry leaves and garlic. Stir for few seconds.
Add onions. Stir fry until they turn translucent.
3. Add red chili paste and fry for few seconds. Then, add grated coconut, tamarind water and some salt. Mix well and toss for a few mins.
Add some water.
4. Add the cooked jackfruit and mix well to coat the spice paste. Cook for 5- 10 minutes.
You can enjoy having it plain or by using it as a side-dish.
Sorry for a few blurry pics, I tried my best for good shots with time constraint. I hope you still enjoy making this. You can also try the recipe on how to make snacks using ripe jackfruit.
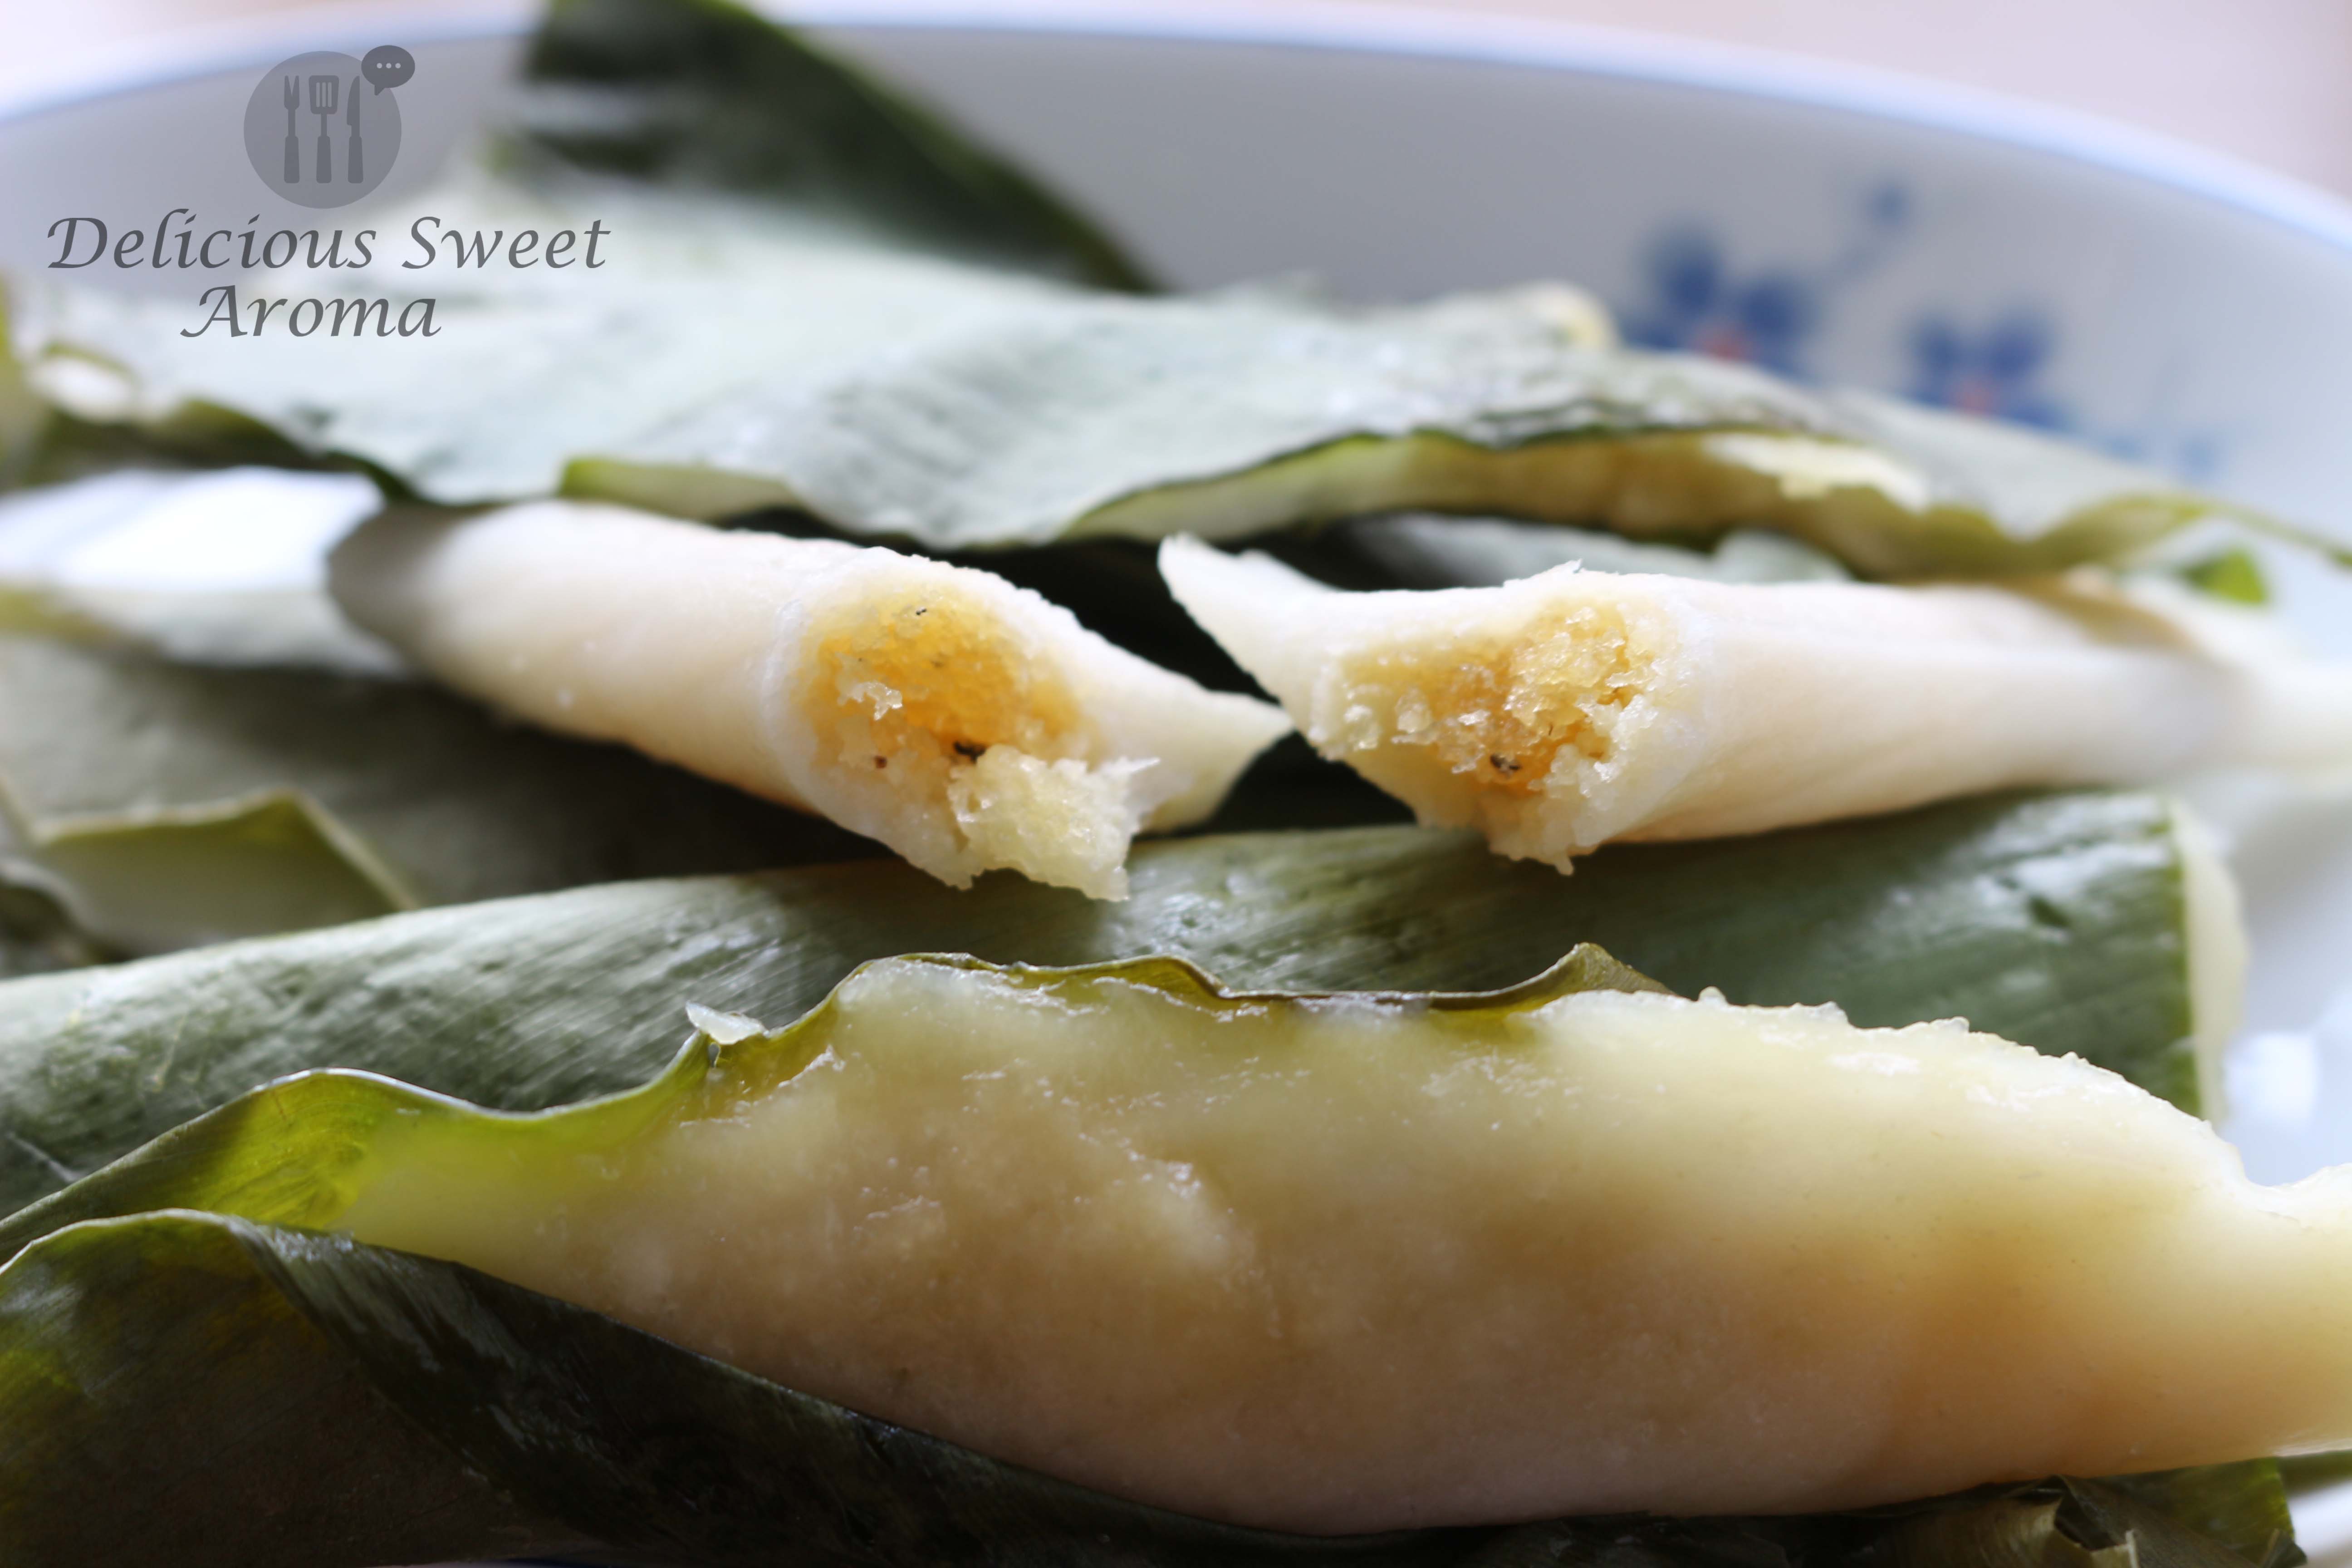
They say:”The key to everything is patience”. That defines my recipe today. I prepared it last weekend. Sweet Rice Dumplings are a typical Mangalorean sweet dish. Sweet Rice Dumplings with turmeric leaves have another name. They are commonly known as Haldikolyache Patholi in Konkani language (mother-tongue in South-West coast of India). Its made with rice filled with Jaggery-coconut mixture, wrapped in turmeric leaves which makes it a special dish.
Patholi, as we call it, was traditionally made at home. It was especially common when turmeric leaves were in abundance in my grandmother’s backyard during the monsoon season. While in Singapore, I discovered turmeric leaves at the supermarket and felt a strong craving for them. These leaves are used because of their unique flavor and delightful aroma. So, if you happen to have turmeric leaves in the local supermarket, I can assure you. This recipe won’t disappoint you.
Let me tell you a little about this popular “superfood sweetener” commonly used in India. Our elders always prepared sweet dishes with a sweetener called ‘Jaggery‘, Gur in hindi, Bella in Kannada. Jaggery varies in colors. It ranges from golden brown to brown and dark brown. Jaggery is known to have the ability to cleanse your body. Jaggery and sugar both are obtained from the same source of sugarcane juice. However, jaggery is unrefined sugar. The sugarcane juice undergoes a boiling process. The syrup is boiled continuously until it forms a thick paste. This paste is then poured into molds to form solid blocks.
Why is jaggery a “healthy” replacement for sugar? Unlike sugar, which is absorbed by the body quickly with a sudden burst of energy, jaggery is absorbed slowly. It releases energy over an extended period of time. Now, this is just one form of jaggery. The others are jaggery from palm sugar and so on..which I haven’t used in my recipes yet.
Soaking time: 2.5 hrs
Preparation time: 30- 45 minutes
Cooking time: 12 minutes
Ingredients
Raw rice / Boiled Rice / Surai or Ponni rice – 3/4 cup or 180 g (preferably boiled rice ) (*EDIT)
White small grain / Idli rice – 3/4 cup or 180 g (‘mutambo’ rice in Konkani)
Salt
Medium size turmeric leaves / Haldi leaves – 15 to 17, stemmed, rinsed and wiped dry (*see notes)
For the filling:
Pounded jaggery – 150 g or 3/4 cup (as per sweetness)
Grated fresh coconut – 120 g (*see notes)
Cardamom – 4 pods, seeds powdered
Directions
To save time, prepare the first two steps of the rice dumplings batter a day in advance.
1. First step soaking the rice : Mix and wash the boiled/ponni rice with water in a bowl. Do the same with the white small grain rice. Wash each type of rice once.
2. Next is making a smooth batter: Using a blender, add the rice and 1/2 tsp of salt. With very less amount of water as possible make a thick smooth paste. I divided the rice into 2 batches. This made it easier to grind. It resulted in a nice smooth paste and less grainy texture for the rice dumplings
Making of rice dumpling batter
3.Preparing the filling: In a small bowl add powdered jaggery, coconut and cardamom powder. Stir thoroughly until the mixture is smooth and free of lumps.
4.Prepare the turmeric leaves (*see notes). Place a tablespoon of batter or just scoop it with your fingers. Spread the batter evenly over the shiny part of the turmeric leaf. Make sure it is not too thick or too thin. Leave a 1-inch gap along the edges.
5. Using a teaspoon, add the jaggery-coconut mixture along the center-line of the leaf.
Fold the leaf in half starting from one end, gently pressing the edges along its length. Repeat the process of step 4 with the remaining leaves and place them on a plate.
6. Using a steamer or a wok. Pour 1 1/2 cup of water. Place a small plate over the steamer plate with holes. Make sure it is at least an inch or two above the water level. Bring the water to a boil.
Arrange the leaves on the steamer plate at different angles, layering them as needed. Cover with the lid and cook on high (induction 8) for 12 minutes.
7. The rice dumplings are ready when a toothpick inserted into it comes clean. Remove the leaves from the steamer using tongs and place it on a plate.
Peel the leaves from one end and discard. It tastes best when its piping hot. Hope you like it. Happy cooking.
Note:
*If your using fresh coconut that has been in the freezer. Place it out on the kitchen counter an hour in advance to thaw and soften.
*If the turmeric leaves are too long you can cut them into half first and then place the batter.
* Since I made this recipe for 2 servings, I used just half the batter and made 8 leaves one day and the rest I used it another day. The coconut-jaggery filling can be stored in the fridge for a day or two to reuse later. Do not keep the filling stored too long as it will go bad.
EDITs:
In case you’re wondering how to pound jaggery, put the jaggery cubes in a ziplock bag. Use any object to pound them. Do the same with cardamom if you do not use a mortar and pestle.
For any updates on this page or website please follow my Facebook page>>Delicious Sweet Aroma<< . If you have trouble viewing certain pages, comment below.
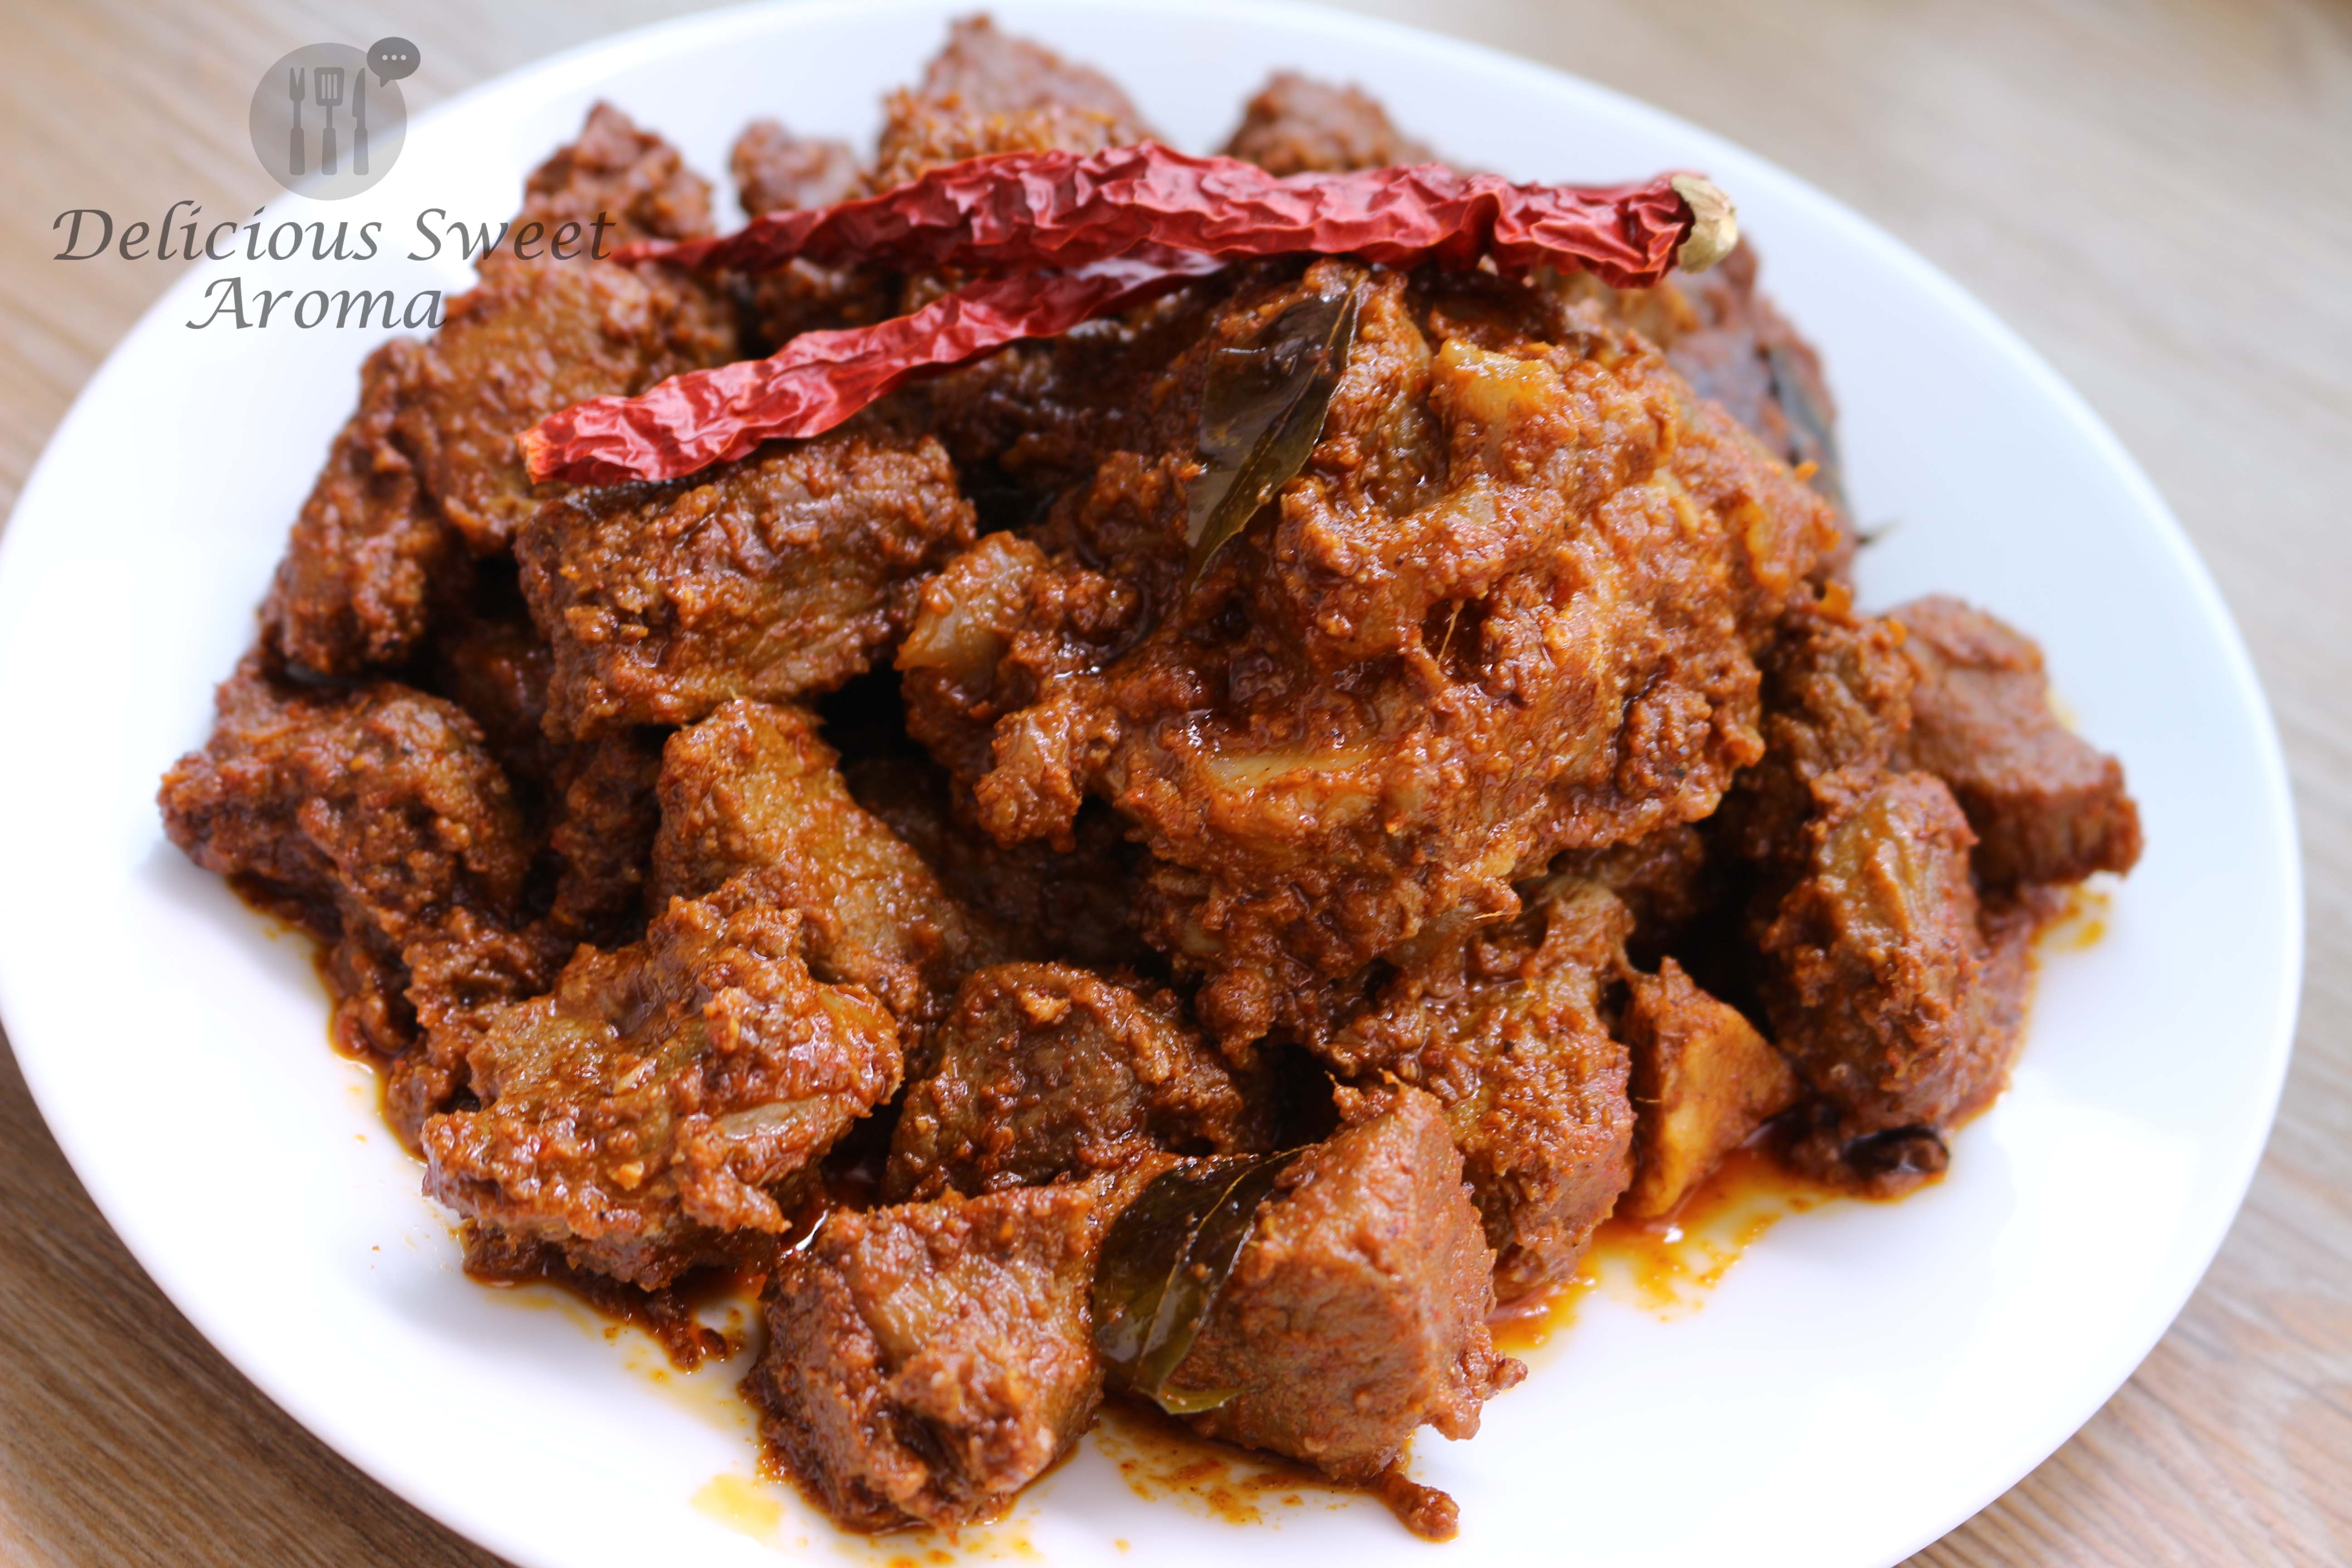
I have always had sides of mutton recipes in Indian restaurants and it never occurred to me how easy it was to cook at home. Its not so often that I prepare mutton at home because its not available everywhere, especially in supermarkets where pork, chicken or beef is easily available.
Mutton Ghee Roast is another recipe from Mangalore where the spicy freshly ground chili paste is roasted in ghee and then tossed with cooked mutton which imparts a rich delicious flavor of the spices to the meat. You can also prepare this with chicken where I have posted a recipe of Chicken Ghee Roast. This recipe has a mild spice, so do not be afraid to use the chili’s as much as I used.
Before you prepare this, make sure to check the ingredients needed for this recipe. These spices are always available in Indian supermarkets.
Kashmiri dry red chili – 10 (for red color, although it has a bit of heat)
Red chili powder – 2 tsp (depending on the spice level, you can skip this or add later in step-5)
Black peppercons – 1 tsp
Coriander seeds -1 tbsp
Star anise – 1
Cloves – 5
Cinnamon stick – 3 to 4 inch long
Cumin seeds -1 tsp
Fennel seeds – 1 tsp
Cardamom pods – 3
Garlic cloves – 5
Tamarind pulp, half the size of table tennis ball mixed in little water
Directions
1.To the cut meat, add turmeric, ginger-garlic paste salt. Mix together to coat the pieces and set aside for 10 -15 minutes.
2. Meantime while the mutton is retained, prepare the masala paste.
Heat a small pan on high heat. Add the spices of dry red chili, peppercorns, coriander seeds, star anise, cloves, cinnamon, cumin,fennel seeds, cardamom (except for garlic & tamarind). Lightly toast them for 2 to 3 minutes.
Then, remove the pan from heat.
3. Transfer the toasted spices into a small blender or mixer. Now, add garlic cloves, tamarind water and red chili powder. Grind into a fine paste. If necessary add some water and make a smooth paste.
4. Cooking mutton:
Heat a pressure cooker on high with 2 tbsp of ghee. Add the mutton pieces and fry them for 1-2 minutes.
Add 1/2 cup of water, not too much. Cover with the lid and the whistle. Take 6 whistles and turn off heat. Wait until the pressure is all gone before opening.
Taste the mutton to check for salt to add later.
5. Heat 3 tbsp of ghee in a wok or pan, add the masala paste, salt, and fry on high heat for 30 seconds (if you haven’t added chili powder earlier you can taste the spice level and add now).
Add the mutton pieces (if there is water, you can use it to make soup) without the water or fat content, and stir-fry the mutton to coat the meat pieces. Sprinkle curry leaves and stir-fry for 2-3 minutes until the gravy turns thick and roasted.
The longer you toss, its color changes and becomes more like a dry gravy. Serve piping hot with any rice recipe. It can also be served as a main course with bread.
Thank you for visiting!
If you are unable to comment or subscribe to my posts drop me a message at delsweetaroma@gmail.com
Hover over the recipe and click for more related posts:
As a hobby I blog on recipes that fascinates me to learn the art of cooking inspired from people to places I've been. In my recipes you will find step-by-step pictures with instructions for easy cooking. Hope to hear your views, share pics and have fun.
Happy cooking!